I like the EinScan-SE & SP Desktop 3D scanners. When I reviewed them, it became clear to me that Shining3D has produced two compelling scanners. For $1299, the SE is a great scanner for anyone that wants to start 3D scanning small objects in with high quality geometry. And for $2499, the SP adds professional features like increased accuracy, faster scanning, tracking marker detection and a turntable with coded targets.
What I liked most about these two scanners, is that they take the hassle out of 3D scanning. They can be connected to a PC (and now also Mac in beta form) with just a single USB cable. This is a stark contrast with other desktop structured light scanners that often require connecting 3 USB cables (2 cameras, 1 turntable) and an HDMI cable for the projector, result in a bunch of cables that can be quite daunting for inexperienced users.
One of the downsides of almost any desktop 3D scanner, including the SP and SE, is color capture. This is because they come with monochrome cameras and capture color by projecting red, green and blue frames onto the subject. This works and is good enough as a reference but often doesn’t result in photo-realistic textures required for use cases other than engineering, such as video game or VR/AR asset creation, cultural heritage and archaeology.
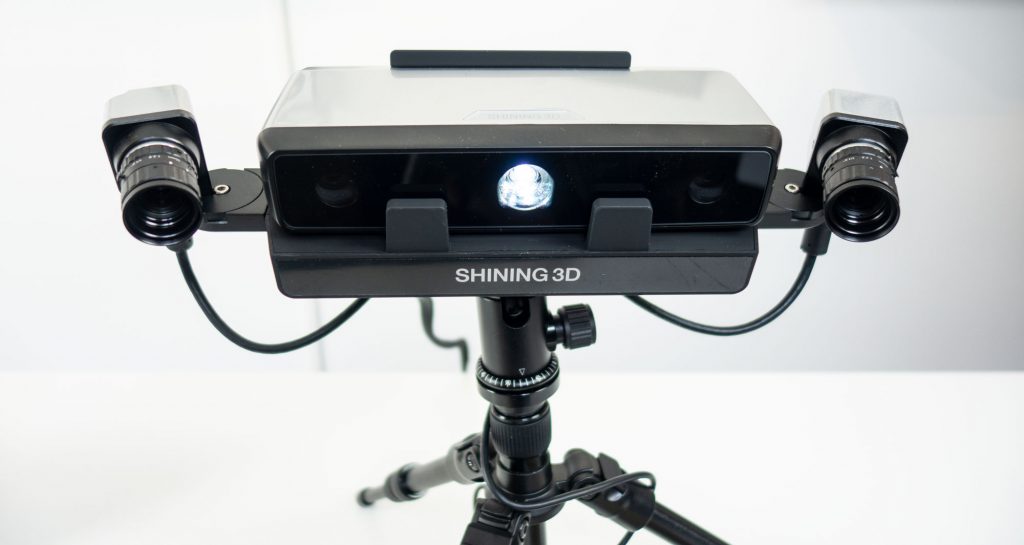
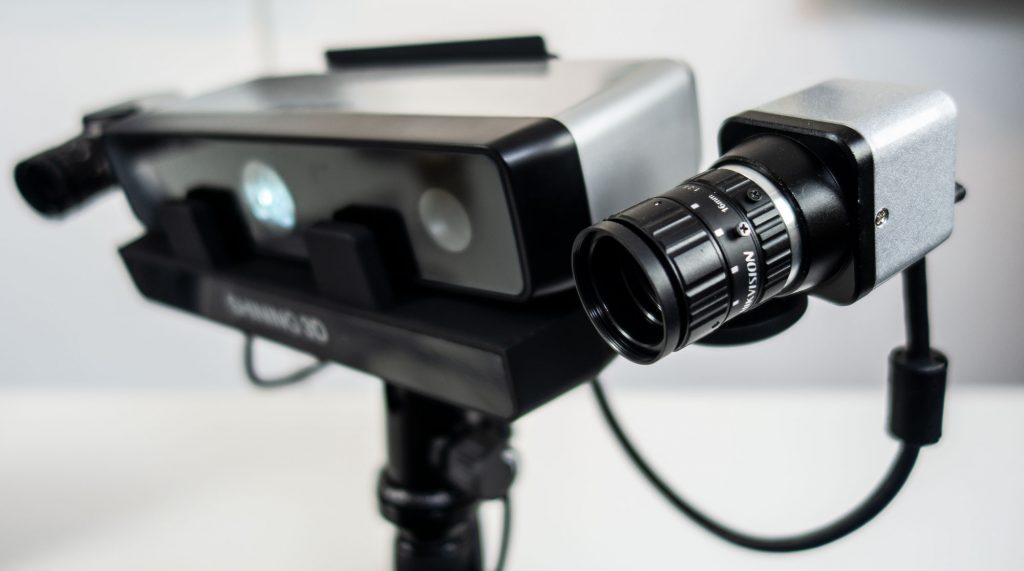
Shining3D realizes many people care about color so they’ve introduced the $1399 Discovery Pack for the SP and SE. Similar to the Color Pack for the EinScan-Pro+ handheld scanner, this add-on adds native RGB color capture to the existing scanner. And with the Discovery Pack, you get not one but two industrial-grade, 12 megapixel color cameras — a big step upwards from the 1.3 megapixel monochrome cameras present in the SP/SE scan head.
Shining 3D not only promises vibrant color capture, but also an increase in 3D data resolution. Because I believe that color capture is essential for the future of what I call “3D scanning beyond engineering” I was excited to finally test and review this upgrade.
I tested it with the EinScan-SP, which makes the most sense because with the SE the price of the Discovery Pack add-on would be higher than the price of the base scanner. On the other hand, the two new cameras completely replace the built-in ones off the scan head, so if you don’t need the SP’s extra features and do want the benefits of the Discovery Pack, you can just as well combine those.
With the Discovery Pack attached, the SP looks a lot more like other desktop scanners with rail-mounted cameras. But Shining3D has put a lot of time in making sure the scanner is still user-friendly.
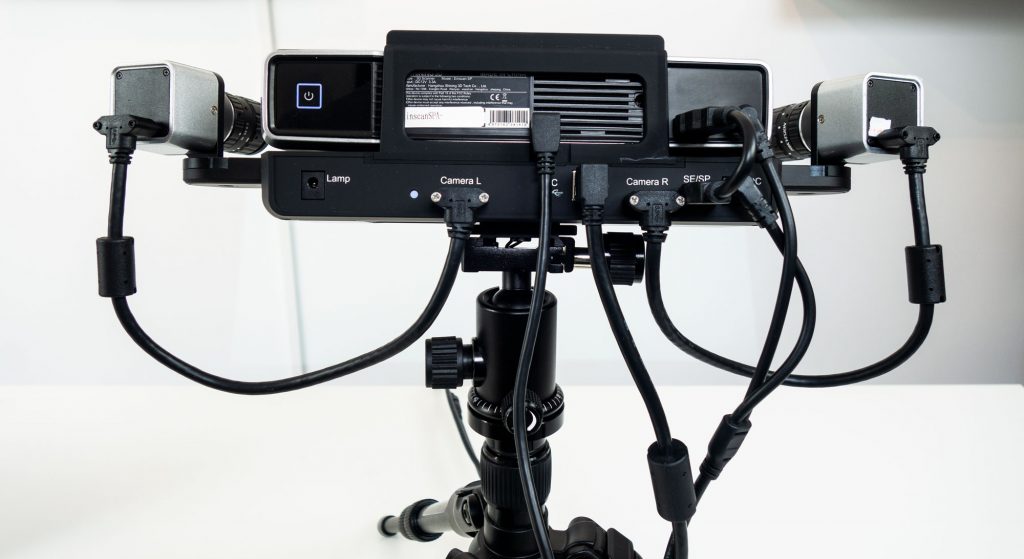
While you might see a lot of cables compared to just the SP, all data and even the power supply is neatly combined into a single power cable and a single USB cable. This is great news for laptop users that often have just one or two USB ports. It must be noted, though, that USB 3.0 is now required to handle all data.
It’s also good to know that while the two industrial cameras look complex, their focus and aperture has been fixed by the manufacturer. The screws have literally been glued in. This can be undone if really required, but it’s not necessary. The same is true for changing the angle of the cameras, although doing this is quite easy with the supplied Allen key.
Setup
Installing the hardware is very simple. The SP/SE scan head fits securely onto the Discovery Pack base and all ports on the back are clearly labeled. After that it’s simply plugging in the USB cable and get scanning… or is it?
In reality I encountered two major issues when setting up the Discovery Pack. The first is that the EinScan software scans your computer for all available cameras and gets confused when it find more than the two on the Discovery Pack. This means I had to disable the webcam on my Surface Book (great laptop for 3D scanning by the way) in the Windows Device Manager before I could get the software to work. As I result, I can’t log into windows with facial recognition and have to enable my webcam I want to do consulting calls over Skype.
The second issue is that as soon as I plug in the USB cable of the Discovery Pack, my WiFi connection loses internet connection. This made it impossible to do the required online activation. And since I have no Ethernet dongle, I had to share my phones internet connection over USB to activate the scanner. Maybe it’s a Surface Book-specific problem, but it was cumbersome.
It must be noted that the camera issue is noted in the manual, but I had to request that since it wasn’t supplied in the box and can’t be found on the website.
Luckily, after resolving these issues I had no further problems with setting up the Discovery Pack.
Scanning
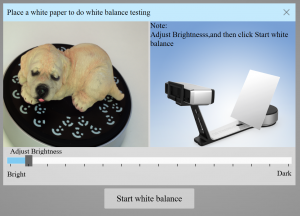
Scanning with the Discovery Pack isn’t different than with just the SP or SE, but in practice you need to be a lot more careful with lighting conditions. Since the SP/SE uses light projection for color capture, it can essentially capture color in complete darkness. The color cameras on the Disovery Pack rely on ambient light for capturing colors so you’ll need to create a evenly lit environment for the scanner. A studio light will help, but too much light will interfere with both the with balancing feature and the geometry capture.
To solve this, the Discovery Pack has a “Lamp” port on the back that can be used to power a Light Tent. This power will switch off when the scanner is projecting its structured light patterns and on when capturing color. Unfortunately I haven’t received the light tent and the lights I have don’t have the right connector. So for this review I’ve used a single soft box light behind the scanner, but only partially on to prevent over-exposure. Either way, it’s essential to get the right lighting and set the right exposure in the software when performing the white balance test.
After that, you’ll have to set the brightness for the geometry capture. But unfortunately, the camera feed of the Discovery Pack doesn’t show overexposed areas in red like the default SP/SE scanning mode does.
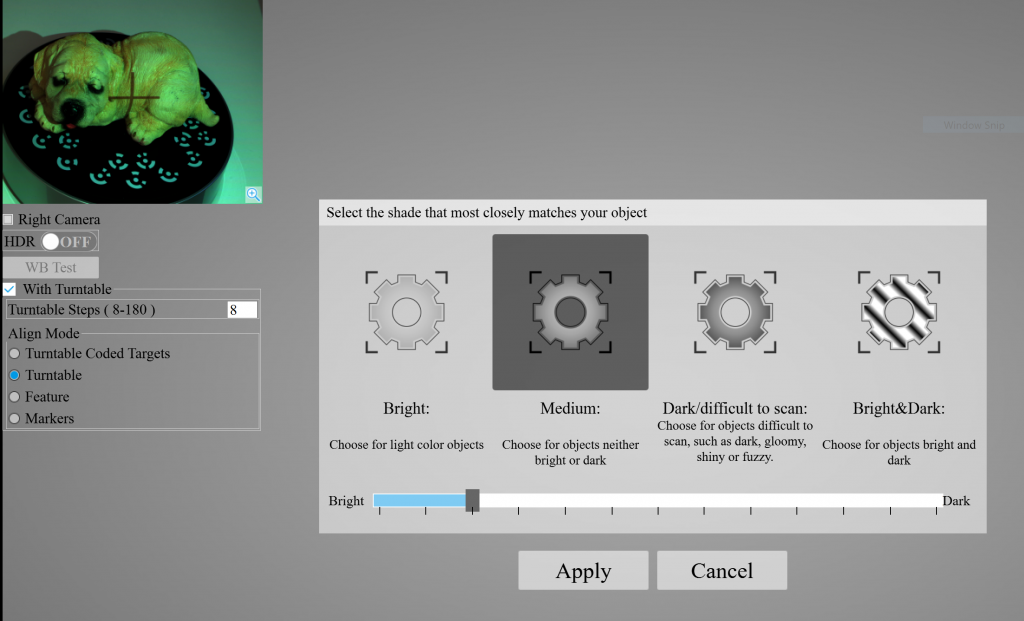
It’s also noteworthy that to use the coded targets on the SP’s turntable, the scanner has to be fairly close to the turntable (around 350mm). The SP’s default scan mode is less picky about the distance, enabling me to scan larger objects on the turntable. Of course, you can always fall back to using feature-based alignment but that doesn’t always work well on symmetrical objects.
Overall, scanning times seem to be a tad faster with the Discovery Pack when scanning with color capture enabled, since it doesn’t have to project the RGB sequence. But the color capture follows the geometry capture so fast that I had a few occasions where the projector wasn’t yet switched off when the color capture started, resulting in greenish areas in small parts of the texture.
Processing
For all processing settings, please read my original EinScan SE/SP review.
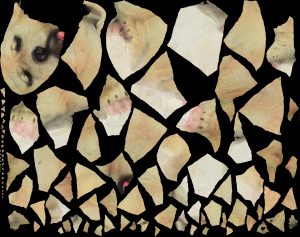
One interesting feature that was added to the software after my original review is Texture Layout Optimization. You can tick this option after choosing Watertight meshing.
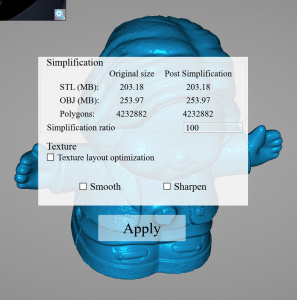
With it enabled, the software will generate a UV texture map divided into islands so it contains just the information you need in a more efficient way. Without this, the texture will consists parts of the photos taken with each scan. Below you can see the result of the dog figurine without (first) and with (second) Texture Layout Optimization enabled. Click to view them at their original resolution.
The optimized texture is indeed more efficient. Although I must note that it took between 30 and 60 minutes longer to process models with this option enabled on my Surface Book with Intel i7 processor. Also, I would have liked it if the image resolution was constrained to the standardized 4K resolution (4096 x 4096 pixels) that many real time 3D engines prefer for optimized memory allocation. It’s now dynamic and the example above is 5007 x 3958 pixels. To preserve quality, I’d also like the ability to export textures as PNG instead of only compressed JPGs.
Finally, the islands have hard edges. As you will see in the results below, this can lead to the seams being visible in many real time 3D engines. Blurring the edges is generally a good idea to prevent this. If you want to do this manually, you can open the JPG file in Photoshop and read the final section of my texture optimization tutorial.
Results
All results below are processed at medium quality to keep their file sizes realistic for online sharing through Sketchfab. I also chose the Watertight processing on all models, which fills all holes automatically and generates a 3D model with separate texture file. I’ve exported them as OBJs and uploaded them to Sketchfab manually. The EinScan software also has a direct Sketchfab export feature, but I like to have my models on disk as well.
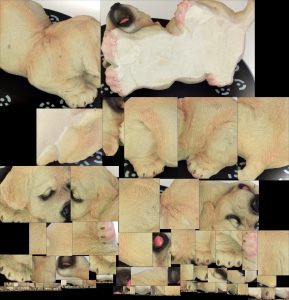
Let’s start with two scans of the dog figurine, scanned right after each other with the SP’s scan mode (first) and with the Discovery Pack and Texture Optimization on (second) and off (third)
https://sketchfab.com/models/29848f586ed84de3920f310709fb3736
https://sketchfab.com/models/12b904df81614324bdb00921585a3e80
https://sketchfab.com/models/1a012251b6cf4498954e86c3761e8a23
Starting with the texture quality, you can see right away that the Discovery Pack offers a big improvement. The texture is more realistic in color representation and a lot sharper as well. For comparison, the SP’s texture map is slightly over 1K in resolution while the Discovery Pack’s texture map is slightly over 4K — more than 12 times the amount of pixels.
Depending on the device you use to view the embeds above in real time, you might see black lines over the surface of the model in the second embed. This is because the hard edges of the islands in the optimized texture I wrote about in the previous section. The third embed, without texture layout optimization, doesn’t have this issue.
If you press 3 on your keyboard while viewing the embeds, you can turn off the texture to view only the geometry. You can see that the Discovery Pack offers a bit more details in the fur and other parts of the model. And these are both processed the same way at medium quality. Processing at high quality could result in even more detailed models, but medium already produces models with more than a million polygons so you must be really serious about that extra step and have a decent computer to handle the output.
Another comparison. Here’s the same toddler sneaker scan from my original review (first), compared to a new scan made with the Discovery Pack (second):
https://sketchfab.com/models/48cae121b62a41e2b6ae86ffd291a2b0
While the texture quality of the original scan isn’t bad at all, it’s quite grainy. It’s also not mapped correctly at the back of the sneaker. The Discovery Pack scan shows what more diffuse lighting can do compared to hard lighting with a projector. If you zoom in, you can see the Superstar text on the side is also a lot sharper.
Geometry-wise, the Discovery Pack might have slightly more details but it also has a bit more surface noise. This might be the result of capturing depth with color instead of monochrome cameras, since the latter are generally more optimized for noise reduction. It could also be that the lower resolution of the SP’s built-in cameras filter the noise. Regardless, the amount of noise isn’t distracting and the EinScan software does offer a noise reduction feature when processing. I didn’t use the smoothing or sharpening features for this review.
Here’s another model that shows that both color and depth are nicely captured. It also shows how easy it is to create full 360-degrees models with the EinScan software, since it can combine multiple poses of an object. Here I scanned the toy standing upright and laying flat on her back. It’s impressive that this can’t be seen in the texture.
https://sketchfab.com/models/3ba8a8bca67845f3b46e8485c78881a5
Of course, you can also scan more technical models with the Discovery Pack for use-cases such as (backwards) engineering. Here’s a scan of the Intel RealSense D315 depth sensor (Review) which is only 95mm wide.
I was impressed by how well the scanner could capture the metal surface of this device. Of course it couldn’t capture the glossy black glass on the front. The hole-filling algorithm chose to create a bulge while I’d rather have seen a flat fill there but I realize that’s always hard to estimate.
I’m not sure if the Discovery Pack’s slight increase in 3D detail capture is worth the add-on price for engineering purposes. But that’s partially because the SP’s default scan mode is already very good in that area.
That said, if you have a use-case where it is beneficial that small texture details like texts on the object can be read on the digital model, the leap in texture resolution will be of great help. To test text readability, I’ve scanned a pack of chocolate sprinkles. As you can see you can read all the ingredients (if you can read Dutch).
https://sketchfab.com/models/515d372f37d2448186e966e949d2d3d4
Verdict
For $1399 the Discovery Pack is a fairly expensive upgrade for a series of desktop scanners that differentiate themselves partially with an aggressive price point. For that price, I kind of expected a simple foldable light tent to be included, since the device has a dedicated power port for that. Luckily, it also works fine without the tent.
That said, if you want to capture small objects at high resolution through structured light scanning and also need good color representation for your use case, the difference in texture quality is huge. It brings the textures from a 3D scanner a whole lot closer to those created through photogrammetry, with the added benefit being able to capture objects with smooth or flat surfaces with great accuracy. That is, if your objects fit within the scan range of the scanner.
While the increase in cables might look daunting for beginners, Shining3D has done a great job of actually making sure the add-on doesn’t require extra USB ports or an extra power source. However, plugging-in the USB cable somehow disables my Surface Book’s WiFi signal and the software also forces me to disable my webcam to work properly. Both issues are very inconvenient.
It’s nice that texture maps can now be optimized in the software but this feature could benefit from a speed bump, power-of-two resolution output and island edge bleeding. These problems are more apparent with the higher resolution maps from the Discovery Pack that can easily contain 12 times more pixels than the default SP or SE’s texture output.
In my testing, I did notice an increase of 3D resolution as well but it’s nowhere near as big of a leap as the increase in texture quality. The SP itself is already very good at capturing small details and the monochrome cameras built into the SP’s scan head seem to be more resilient to variations in scanning distance, lighting conditions and camera noise than the Discovery Pack’s color cameras.
The combination of the EinScan-SP and the Discovery Pack is attractive for professionals that want to use 3D scanning beyond engineering and apply it to use cases such as creating assets for games, VR/AR and 3D animation productions, as well as cultural heritage and archaeology.
For a combined price of $3898 it’s not really something you buy on impulse but that price is still competitive to alternatives like HP’s Pro S3 (Review) and Scan in a Box (Review) — both of which only include monochrome cameras.


The article is great. I only wish that you had included in your tests the scanning of a coin or any small object like that (a wedding ring, or a cameo, something that is intricate and max 25 mm wide), among the 5 objects that you tested. Many commercial scanners claim a certain “fantastic” resolution in their specs but then when you try to scan a coin another reality shows up.
One more thing that I would love to see analyzed in this article: this discovery pack has 2x 12 megapixels camera. It makes me happy to read that industrial grade 12 megapixel cameras are becoming less expensive. However there must be a relationship between the resolution of the projector (HD= 2.1 megapixels), and the resolution of the cameras (with the minimun focus distance -both for the projector and the cameras – being another factor). So even if the cameras have 100 megapixels in the future, you will not capture more detail because the resolution of the projector limits the total result. That is: if the projector has a resolution X ,and given the minimum focus distance, then maybe cameras having a resolution higher than Y will not able able to provide more detail. I do not know the math, and it’d be interesting to see it discussed in this article.