Last year I reviewed HP’s original Sprout Pro. I concluded that while the idea of a super-all-in-one PC with integrated 3D scanning capabilities was a great concept, the software that came with the machine was too basic to get the most out of the hardware. Specifically the fully automatic software lacked any kind of control over combining multiple cycles of structured light scans.
Recently, HP has released the Sprout Pro G2 with a mission to fix these issues and provide a more usable product overall. Like last time, Dutch Sprout reseller De Rekenwinkel kindly supplied me with a review unit to play with for a few weeks. They also updated their dedicated Dutch HP Sprout website for the new model.
The big question of course is: Is this the Sprout everyone has been waiting for? I think it’s pretty close! In this review I’ll show and tell you why. Again, this is not a review about the Sprout G2 in general, but purely about the 3D scanning capabilities of the machine.
The Sprout Pro G2 in general
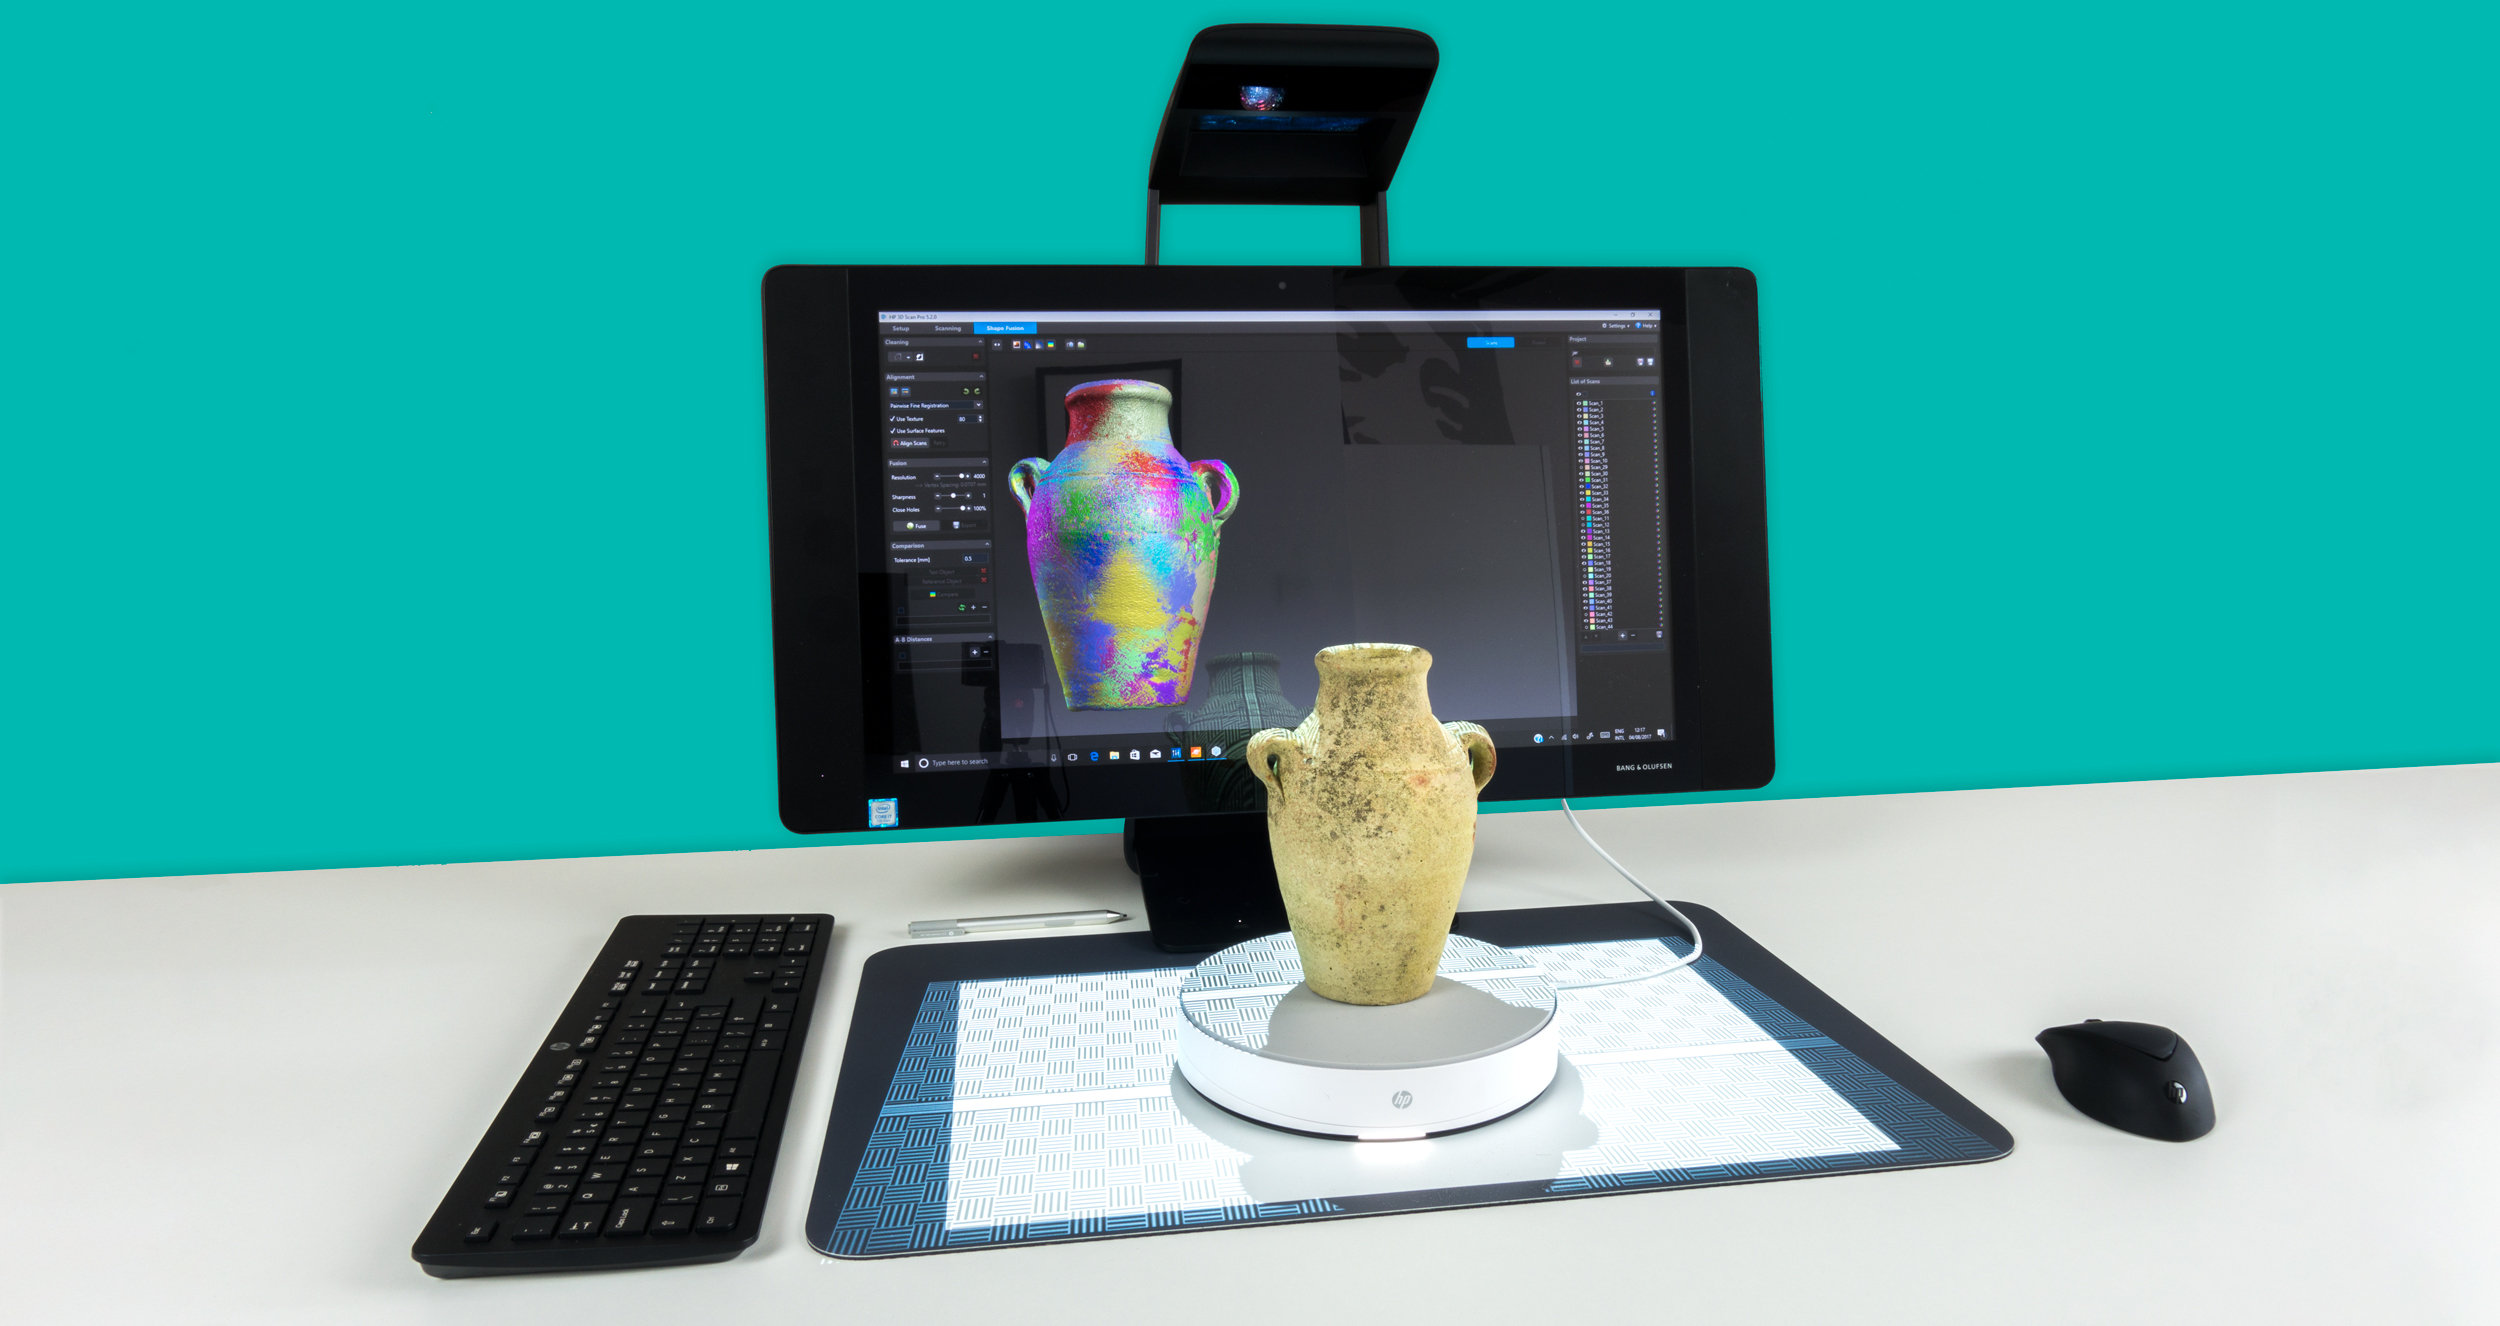
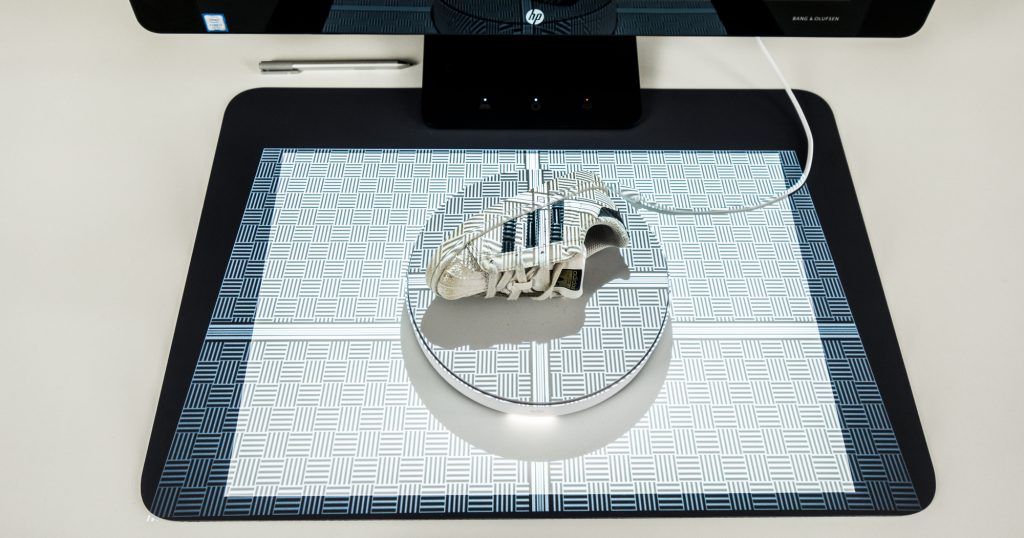
The overall concept is exactly the same: it’s an all-in-one Windows 10 PC with a touch screen and an overhead beamer that can project a second screen on a touch-sensitive placemat. But all parts have been upgraded with better specs.
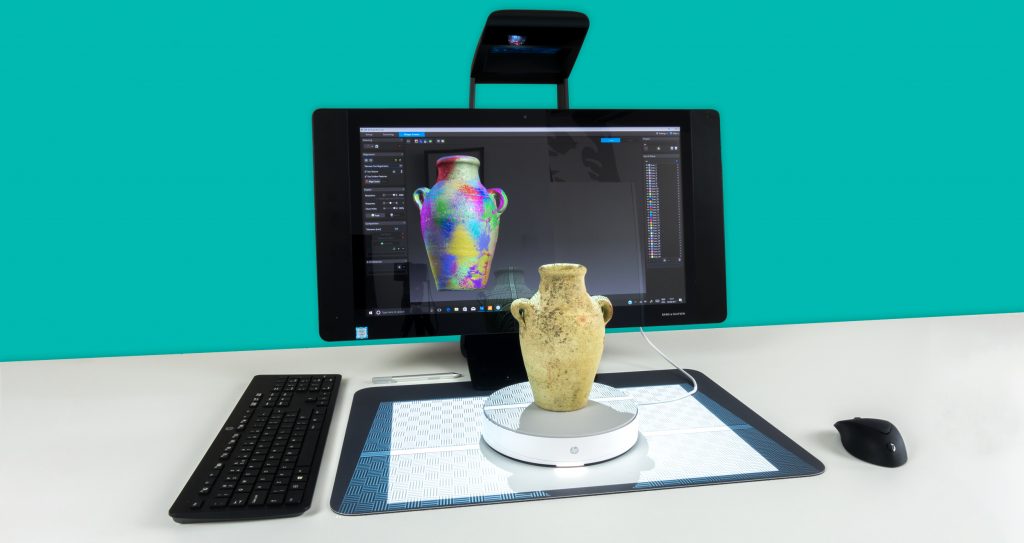
First of all, it now looks less like an iMac with its own totally black design. The screen is bigger (23 inch) and the speakers are now on the side. This makes the whole machine look mode wide screen and produces better stereo sound. The speakers are from Bang & Olufsen and they’re okay for a machine like this. Just don’t expect the sound you get from dedicated B&O equipment that costs more than this machine as a whole. And that price is €3883,47 plus VAT in Europe or $3559 in the US.
That’s $860 more than an 27-inch Apple iMac equipped with similar specs and a 5K screen. But that doesn’t have a touch screen, projector, touch mat, or anything else I’ll cover in this review. But an iMac is a very premium machine made of aluminum. The Sprout Pro G2 is heavy, but still made almost completely out of plastic.
That said, the G2 does come with a fast Intel Core i7-7700 processor, 16GB and a 512GB SSD. The GPU has been updated to an Nvidia GTX 960M, which is nice but still a previous-gen processor that’s not capable of driving a VR headset like a Rift of Vive — or even HP’s new $329 Mixed Reality Headset. In my opinion, that’s a missed opportunity for creating a truly multi-purpose 3D creation and presentation computer.
But who cares if it makes great scans, right? Let’s get started!
Two Ways to Scan
When I tested the 2016 Sprout Pro (which was an updated model from the original Sprout introduced in 2014) I discovered that the integrated and highly marketed Intel RealSense 3D camera wasn’t being used for 3D scanning at all. Instead, the 2016 model came with custom software to make 3D scans using structured light technology. For this, it combined the digital projector and the high resolution camera that are also integrated in the overhead unit.
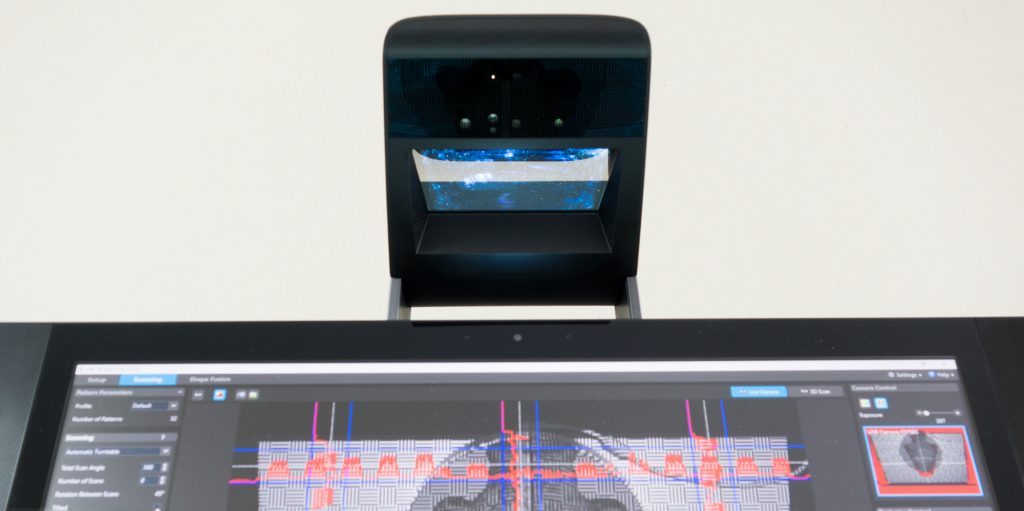
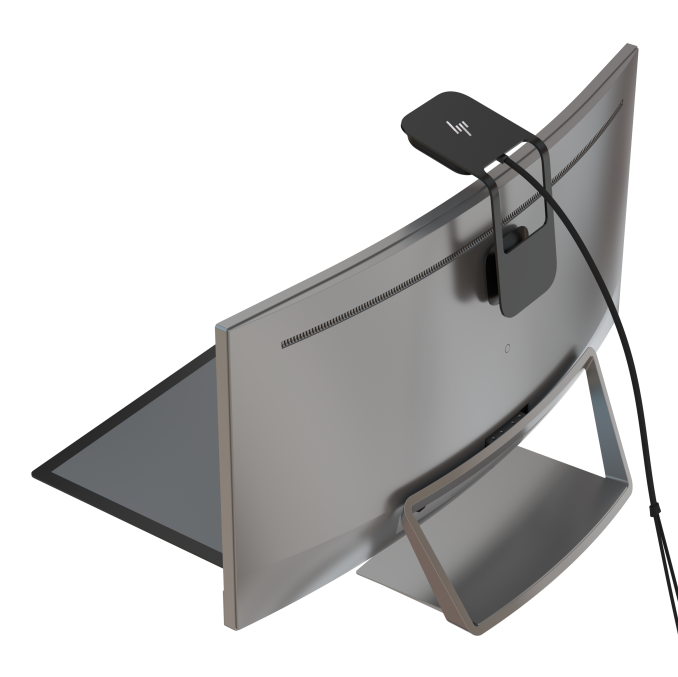
While the overhead unit itself looks the same as last model (albeit in black) it has no RealSense 3D Camera anymore. Instead, HP has integrated an Orbbec Astra S sensor (which is also available as a standalone device — I have one). So this time around, you can actually use the depth sensor for 3D scanning and HP has included a new application called Camera 3D for this.

This time around, you can actually use the depth sensor for 3D scanning.
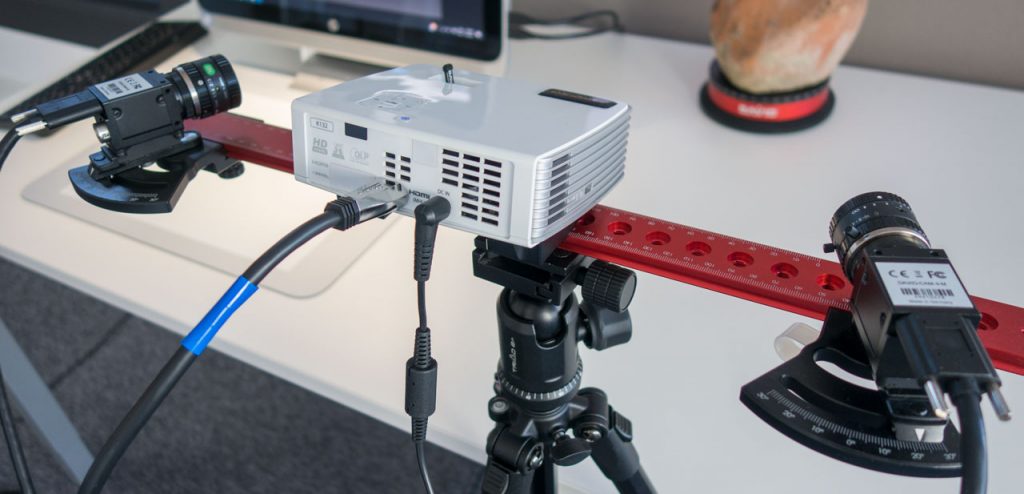
The digital projector has been upgraded from 1024 x 768 to 1920 x 1280 resolution which is both nice for the quality of the images on the touch mat as well as for 3D scanning with structured light. To automate this, you can (and should) still get the optional €296,69 (ex VAT) $263,99 3D Capture Stage, which hasn’t changed. While the changes in the structured light scanning hardware are small, the change in the included software is huge. HP aquired 3D Scanning manufacturer DAVID last year and includes the now-rebranded HP Pro Scan 5 software with the Sprout G2, which I recently tested for my my DAVID SLS-3 Review (which is now called HP Structured Light Scanner Pro S3) that sells as a complete kit with turntable for around $6950. That put’s the Sprout G2’s price into a better perspective.
I’ll start with the structured light scanning method, because it’s the best comparison to the previous Sprout and the SLS-3 Scanner.
Structured Light Scanning with the Sprout Pro G2
The Structured Light Scanning software 2016 Sprout Pro (Review) was clearly designed to make 3D scanning easy for everyone. Everything was operated through a step-by-step wizzard and the whole interface was touch-optimized. It even projected instructions onto the Touch Mat that made it fool proof to place the 3D Capture Stage correctly and perform an initial background scan to enable the software to remove it from the actual scan later.
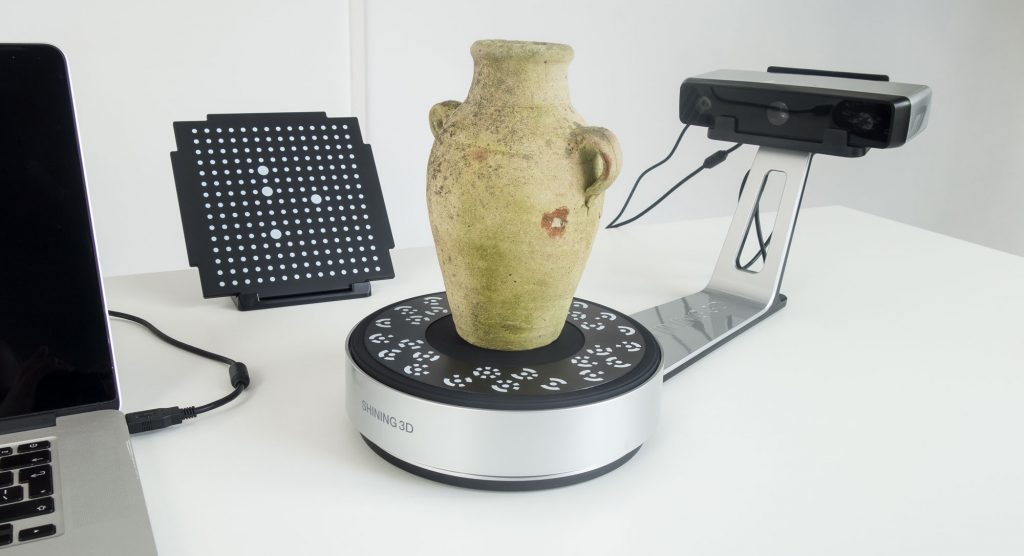
That user interface was genius but it didn’t work on most everyday objects. The main reason for this is the fact that most objects need to be scanned through multiple cycles to create a complete 360-degrees model. And because the Sprout’s top-down orientation of the projector and camera differs from other turntable-based desktop 3D scanners (like the SLS-3 and the $1199 EinScan-SE I reviewed recently) multiple cycles are even more of a necessity. The previous software often failed to automatically align different cycles and offered no manual mode to help the algorithms.
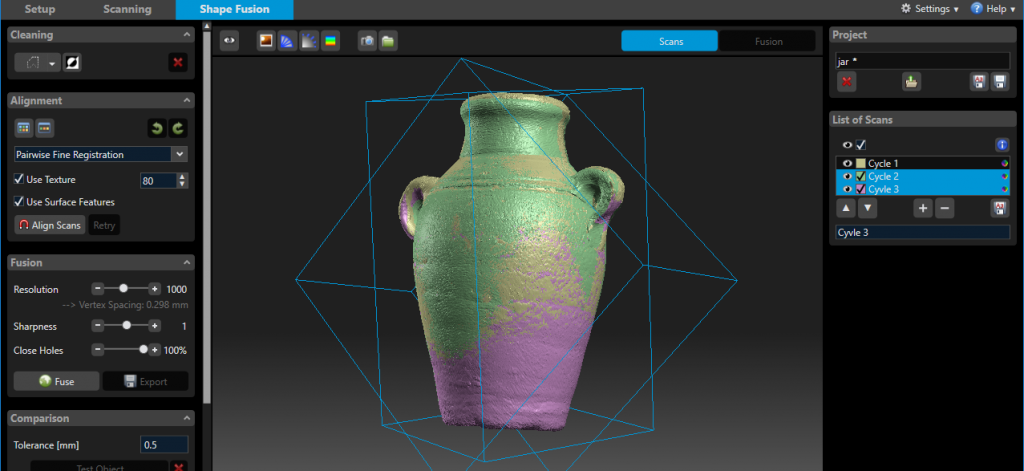
The screenshot below makes clear that the new (ex-DAVID) software sits at the complete other end of the spectrum.
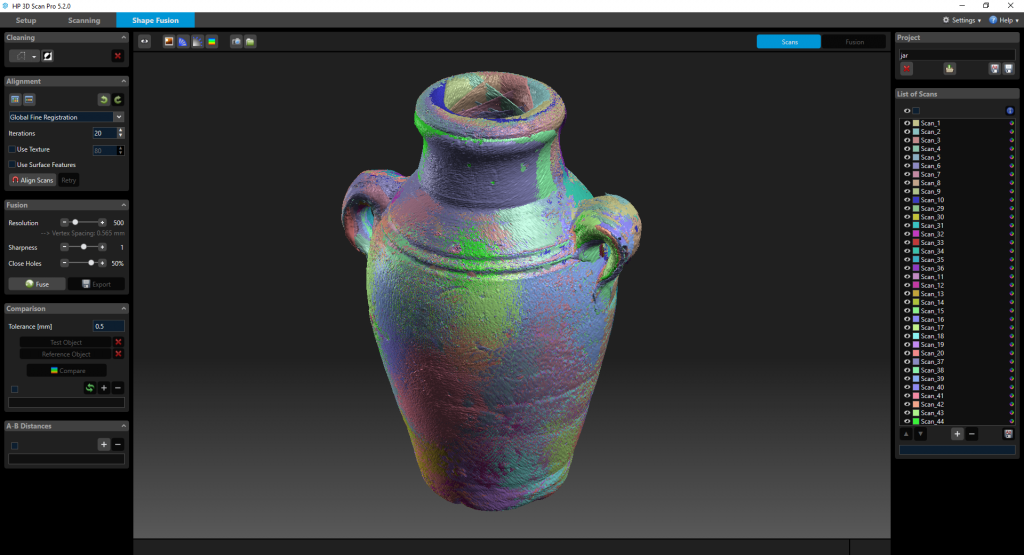
It’s a truly professional 3D scanning application but it comes with a learning curve that might be daunting for first-timers. As I wrote in my SLS-3 Review about the same software it takes a while to understand the workflow and it requires a lot of manual steps. But if you get the hang of it, you have complete control over the registration process. That approach makes the Sprout Pro G2 more Pro, but I’m not sure if this software will work in a classroom.
It’s a truly professional 3D scanning application but it comes with a learning curve
The new software also isn’t touch-optimized and relies heavily on using the keyboard and mouse. Luckily, the wireless set that comes with the Sprout G2 is a vast improvement over the set that came with the previous model. The keyboard now has space around the arrow keys instead of having all keys cramped together and the mouse is slightly angled. I actually really like working with it!
Setup
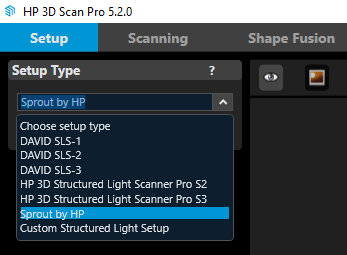 Setting up the software for the Sprout G2 is a lot simpler than for the SLS-3 or other supported desktop scanners. This is mainly because all you need to do is select the preset.
That’s it! There’s no need to do any time consuming calibration because the distance between the camera, projector and Touch Mat are fixed. But after that, you’re on your own. You either have to read the manual, watch some YouTube Tutorials — or read my reviews — to know what you have to do. So let’s walk through it.
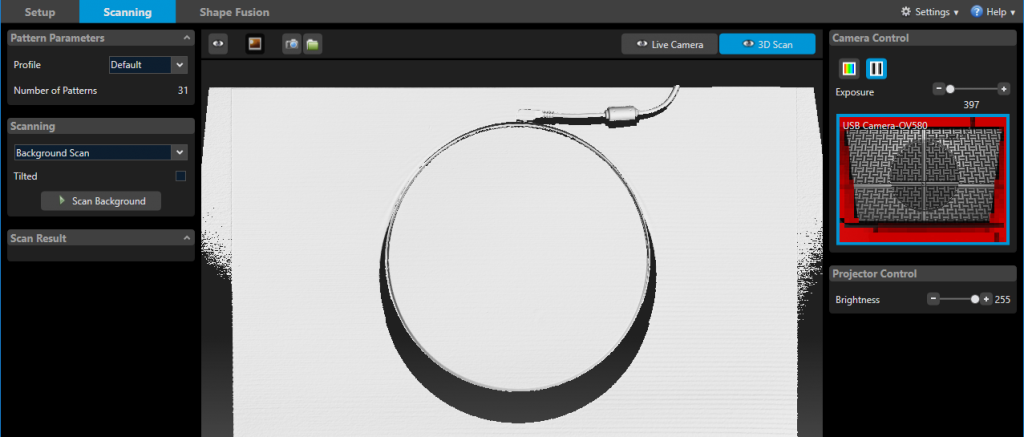
First of all, there’s no wizard anymore that will tell you that you really need to perform a background scan first, regardless of using the 3D Capture Stage. This can be done by simply selecting Background Scan in the Scanning menu. First you have to decide if you want to use the turntable in regular or Titled Mode. I still really like that feature and I recommend to always use the tilted mode if your object doesn’t fall off that way (double sided tape rules, by the way).
This GIF also illustrates how reflective the screen is…
Then it’s just a click of a button to scan the background. Remember that you have to do this every time you switch between Tilt modes or move the turntable. I also recommend re-scanning the background if you have changed the Exposure setting in the panel on the right. Increasing the exposure makes it possible to scan dark objects but you might loose details in white parts of the same object if you do.
Scanning
To start scanning you simply navigate to the dedicated tab in the interface which shows all information in one place.
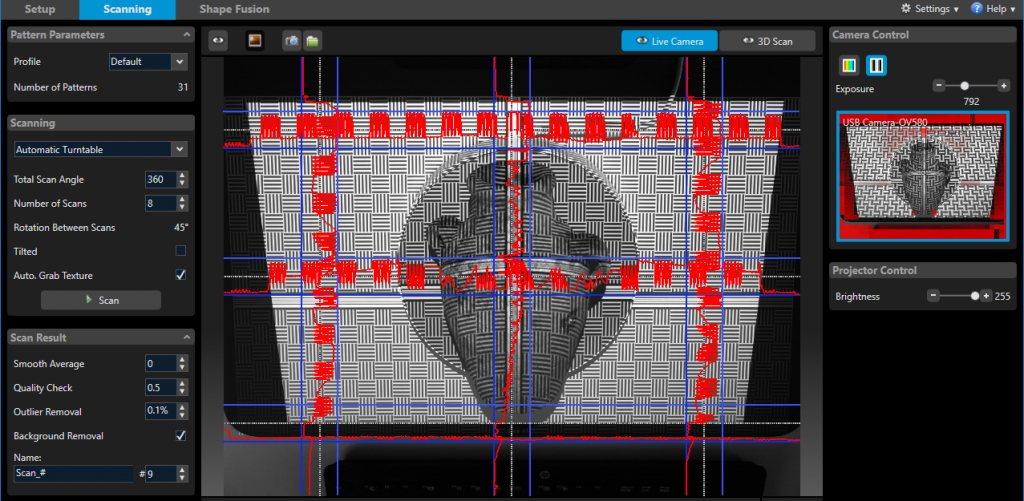
With the 3D Capture Stage, you can select Automatic Turntable and simply enter the amount of stops you want it to make. 8 usually works fine but for more complex objects I’d go for 16. You can record textures as well and unlike the SLS-3 that has only monochrome cameras, the Sprout’s cam is RGB so it can capture color textures without projection tricks.
Here’s what structured light scanning looks like on the HP Sprout G2 with the new HP 3D Scan Pro 5 software. The video is in real time to give you an idea of how long scanning an 8-scan cycle with the 3D Capture Stage takes.
As you can see the software performs coarse and fine registration after each separate scan, so cycles are correctly stitched 90% of the time (if not, increasing the amount of scans usually helps). However, it keeps all scans separately by default so I advice to combine all scans in the List of Scans in the right menu of the Shape Fusion screen after each scan by selecting and right-clicking them.
After using the Sprout for a longer period of time, I came to realize that I tend to put objects on their base by default like in the video above. But this isn’t usually the best placement for the Sprout’s down-facing camera. Instead, scanning object on their side or back often required less cycles. So I combined the cycle from the video with two cycles oriented sideways.
To align everything, group the scans of every cycle and then rotate and move each group more-or-less into the correct location by holding SHIFT and using the left mouse button to move and the right mouse button to rotate the object. After that, perform Pairwise Free Registration from the Alignment menu on the left to align sets of two scans to each other until they’re in the correct location.
If you still see slight imperfections in the alignment, you can un-combine all scans, select everything and perform a final Global Registration pass.
Fusing
To create a polygonal model from the raw scan data, all scans must be fused together. You can choose the Resolution, Sharpness (Tip: a negative value automatically smooths the result) and set the percentage of holes to fill. The default resolution of 500 processes is quite fast, but you won’t get the most out of the scan data this way.

I found that 1000 or 1500 is an ideal setting for the Sprout Pro G2 for most objects. These settings offer a good balance between actual geometric detail and polycount. Settings above 2000 might distill more details out of the scan data but also introduce severe geometric noise (examples below), especially on darker objects. That probably has to do with the light sensitivity of the 14-megapixel camera that isn’t the best of it’s kind when it comes to noise. If you want more details without noise, I guess you have to get yourself an SLS-3. If you do use that with the Sprout, you can easily switch between that and the internal camera.
Speed & Fan Noise
All these algorithms performed a lot faster on the Sprout Pro G2 than on the 2016 model I used while testing the SLS-3 with the same software. And even on high resolution settings on projects with a lot of separate scans, the system never became unresponsive. That’s probably due to the faster 7th gen Intel Core i7 processor and double the amount of RAM in this iteration of the Sprout. However, while the 7th gen Intel chips are known to produce a lot less heat than earlier generations, the Sprout G2’s cooling fan goes on full-force very often, and very, very loud. It’s truly annoying and is simply unacceptable for a computer with this price tag. The reseller told me that this is a known issue that will be fixed with a software update in the near future.
Sprout G2’s cooling fan goes on full-force very often, and very, very loud.
Example Scans (Structured White Light + HP 3D Scan Pro 5)
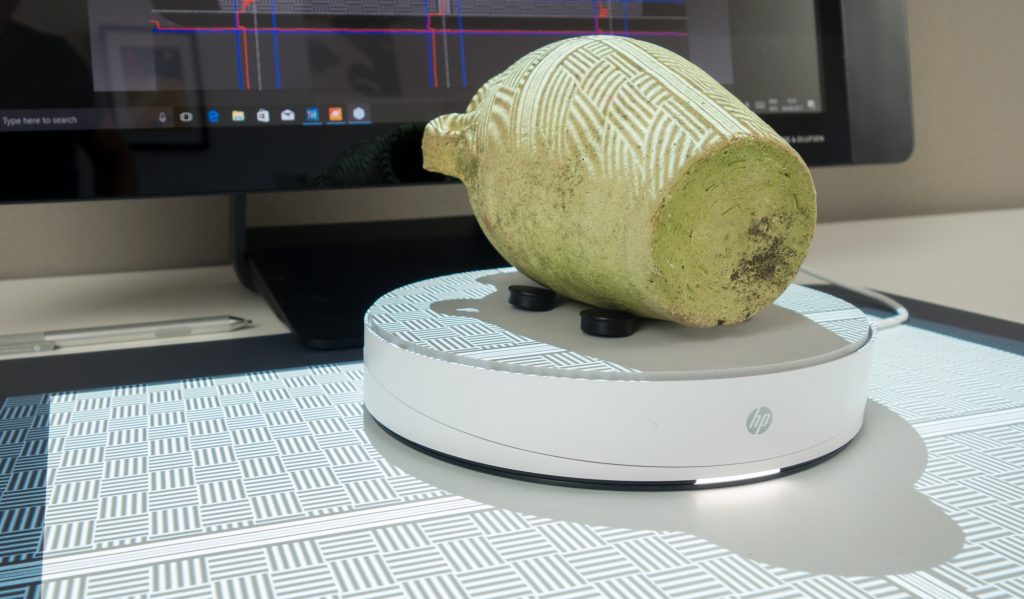
Let’s start with the 19 cm tall Old Jar I used in the photos above, made from 3 cycles (front, back, top) of 8 scans each and processed with the resolution set at 1000. This produced an OBJ file of 380MB, which is already quite big for most purposes in my opinion.
If you look at the texture you might feel that there’s something wrong with your eyes. It appears to be blurry. This is due to the very inefficient way the software stores texture data. It exported a 8192 x 7796 PNG file of a whopping 122MB with this layout:
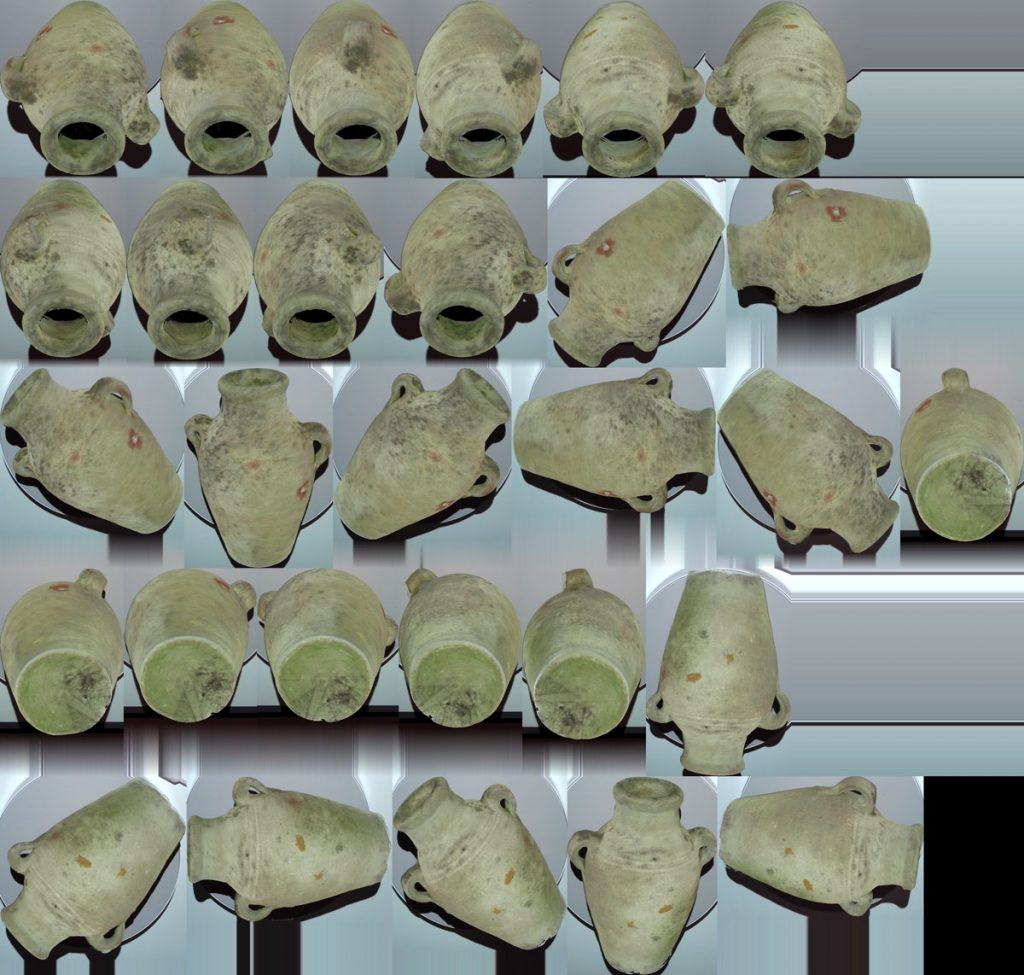
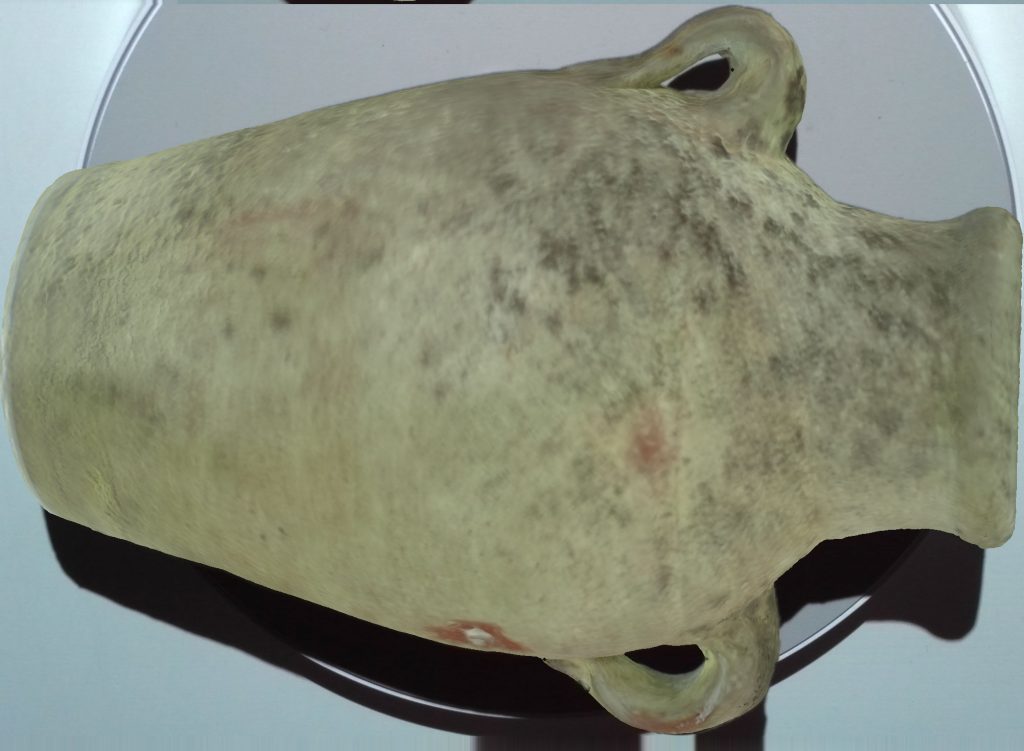
For people that work in 3D, a texture file like that is the stuff of nightmares. It’s simply a collection of photographs which is than projected onto the object. I really hope the developers include decent UV-mapping in a future version, because this is simply unusable for almost every purpose. And the blurriness doesn’t even seem to come from the multiple projections. Above you can also see a single photo and it’s blurry by itself. So clearly something goes wrong while capturing or processing the photos. I’m not sure if if this is fixable with software (I think it is) but I do know the exact same problem was present on the previous Sprout model as you’ll see later.
On the upside, if you put the Sketchfab embed above in MatCap render mode (through the gear icon) you’ll notice that the geometric quality of this scan is quite impressive. And if you compare it to the result of the same object from the SLS-3 professional 3D scanner used with the same software you can see that for an organic object like this jar, it’s very similar. There are some noticeable artifacts in the geometry as a result of registration errors, but nothing that can’t be fixed.
For my well-known adidas Toddler Sneaker (which again has become dirtier because of it being worn a lot) I captured 3 cycles again: two sides on a titled turntable (with double sided tape) and one non-tilted with the shoe on its sole.
For this scan, I took some time to manually delete information from each scan to get a cleaner result. Specifically, I used the nose and laces from the upwards-facing scans and the sides and sole from the side-facing scans. To compare the results from different resolution settings, I fused the scans with it set to 500, 1000, 2000 and 4000 respectively. All with the default Sharpness setting of 1. I did increase the camera exposure to be able to capture the black stripes. I uploaded the scans without textures to compare just the geometric detail.
Warning: the scans below get quite large and are best viewed on a decent computer — not a mobile device. Also, I advice you to close each embed after viewing by using the X in the top-right corner.
With the resolution set to 500, the result is clearly a bit undefined. Turning it up to 1000 results in a much better model and has a good balance between the geometry of the white and black parts of the sneaker. Stepping up to 2000 you can actually see the patterns of the leather, which I find very impressive. The downside is that the noise in the black parts gets over-amplified now. The step from 2000 all the way to 4000 shows no visible increase in quality anymore. So for an object like this, 2000 is the maximum, delivering a 10.3M polygon model with plenty of detail to work with.
For comparison, below is the same Toddler Sneaker scanned with the 2016 Sprout Pro which offered no resolution settings. As you can see it more or less resembles the 500-setting of the new Sprout Pro G2, a bit less even. But that could also be purely a software thing and if I’ve understood correctly the HP 3D Scan Pro 5 software is also (or will be made) available for the 2016 Sprout Pro.
Here’s a scan of a adult-sized sneaker processed with the 2000 setting, without textures.
I’m quite impressed with by that result. As long as objects are white, noise levels are really acceptable. So if you want to scan darker objects covering them with a temporary white spray can help to get better results.
As a final comparison, with textures, here is a small toy scanned with the new Sprout Pro G2 processed at quality setting 1000 (first) and the previous Sprout Pro (second):
Conclusion: texture quality is just as fussy but geometric quality on the new Sprout is a lot better. The funky noise on the shirt is probably due to the glossiness of that part.
So that’s all for 3D Scanning with Visible Structured Light on the Sprout G2. But I’m not of the hook with writing this review and neither are you with reading it, because there’s that other mode!
3D Scanning with the Integrated Depth Sensor of the Sprout Pro G2
As I wrote in the intro, the RealSense 3D Camera has been swapped for one from Orbbec and the Sprout now includes software to actually scan with it. And that software is actually very special. If you’re interested: It’s a custom version of Van Gogh Imaging’s Starry Night SLAM Technology which enables 3D scanning by simply rotating an object in front of the depth sensor — with your bare hands. The algorithm takes care of removing your fingers if they become visible. From the scan that is…
I made a short video that not only shows the (magical) workflow of the Camera 3D software but also included the (unbearable) cooling fan noise in as a soundtrack (okay, there’s also a scooter driving by at 1:19… it’s not that bad…):
As you can see this is a very easy and interactive way of 3D scanning and clearly aimed at beginners and students — it’s actually quite fun to do! It’s a nice addition to the Sprout’s software suite, since the HP 3D Scan Pro software I wrote about in the first half of this review might be too complex for first timers.
Camera 3D does contain onboarding instructions and guides you through the process step by step. It’s also a fully touch-optimized interface.

It works quite well but as you might expect it really depends on the object. If an object is too uniformly shaped, the software has a hard time with tracking it. But you’ll also quickly learn how to rotate certain objects make it easier for the software to track.
As you can see in the video and screenshots above, Camera 3D initially captures the geometry and low-resolution color information for reference. After that you have the option of placing the object in logical orientations and take high-resolution photos. These will then be mapped onto the object. This process takes surprisingly long but does produce good textures most of the times.
After that, you can export the model as an OBJ or the new 3MF file standard. Judging the screenshot below, you might think that you can also export directly to Sketchfab by using the blue button in the top-right corner that resembles the logo of the service but that’s the texture toggle button (which doesn’t actually toggle texture visibility but shows a colored wireframe).
Update January 2018
At CES 2018, HP released a software update that includes Sketchfab export and advanced texture map export like generating normal maps. HP also introduced the $599 Z 3D Camera, a small depth sensor that gives any (powerful) PC the 3D scanning capabilities of a Sprout with Camera 3D (not the visible structured light scanning feature).
Read More about the HP Z 3D Camera

Let’s take a look at the result:
The textures actually look quite good and don’t have the fuzziness of the HP 3D Scan Pro 5 software’s texture output. It’s also UV-mapped for maximum efficiency. The texture below was originally 3172 x 3172 pixels. Still no power-of-two resolution but at least it’s square.
But if you view the Sketchfab embed above in MatCap render mode, you’ll quickly see that the good texture is covering up a very low-poly (36.7k polygons) geometric 3D object with almost no details at all. Not even near the fastest output of the Pro software. That said, it does resemble the jar and and an object like this can be perfect for realtime purposes or as a game asset.

Here’s the adult-sized sneaker I also scanned with the Pro software:
The black areas in the texture seem to appear when you don’t take enough high resolution photos with the software. Geometry-wise the MatCap looks like a clay model of the sneaker instead of the real object. I guess it depends on you taste or purpose if that’s a good thing.
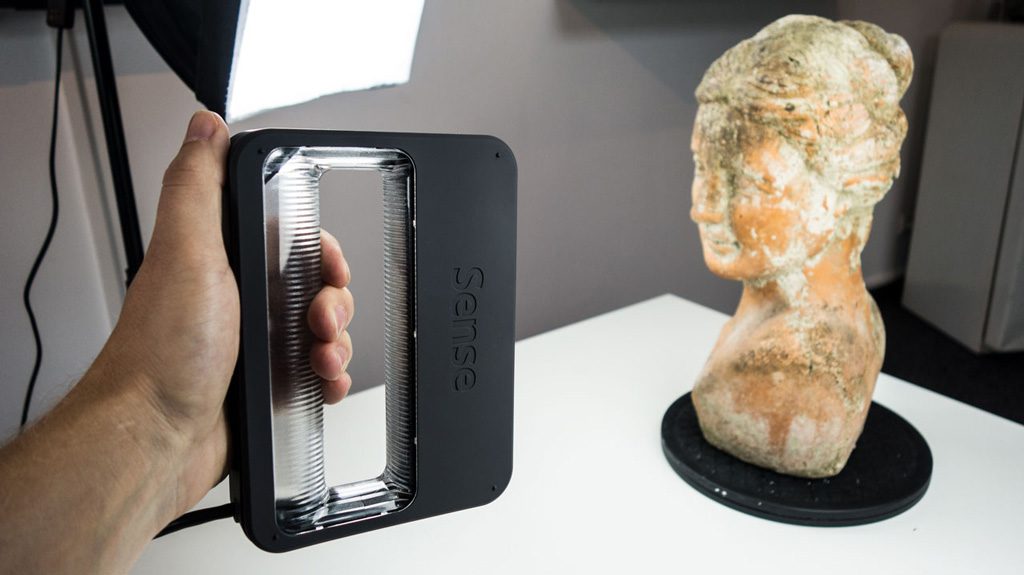
The problem with using a depth sensor for 3D scanning is that they’re never really good at scanning very small objects. The comfort zone of most sensors is medium to large objects. But with a bit of trial and error, you can scan objects that are larger than the Sprout’s A3-sized Touch Mat. Below is a scan of my 40 cm tall bust. It’s quite heavy so it required some effort, and it was hard to capture all the high resolution photos for the texture, but the result is very decent for a sensor scan:
For objects this size, the Orbbec Astra S sensor actually delivers more details in the geometry than the Intel RealSense SR300 sensor found in the 3D Systems Sense 2 handheld 3D Scanner (Review). For comparison here’s the same bust scanned with that device:
If you can get the texture complete, without black parts, the 14 megapixel camera in the Sprout G2 can also capture better textures than the RealSense SR300’s native Full HD RGB camera. Although that’s a bit of an unfair comparison between en embedded and an external RGB sensor. The embedded one on the Astra S is just VGA resolution, so without the high-rest external texture capture the color quality of the sensor itself isn’t good.
Since Camera 3D is more of a fun toy than a serious 3D scanning application, let’s end this review with a scan of my favorite toy:
Not the best Teddy I ever scanned but a source at HP told me that the Camera 3D app will be updated regularly with all kinds of new features. So I expect some improvements in scan quality in the coming months.
Verdict
As a computer, the Sprout Pro G2 is an upgrade in almost every sense. It’s faster, with a larger screen and better projector — it’s a better computer. It also looks and sounds better.
For 3D scanning specifically, the G2 offers two distinct solutions for two distinct audiences: fool-proof capturing with the Orbbec depth sensor and easy-to-use software or getting professional results with the ex-DAVID software that has a somewhat steep learning curve.
The combination of the two makes it unclear what the target audience for the Sprout is. Is it meant to be an immersive computer for education or a all-in-one 3D creation tool for professionals? It’s probably both but in both cases it will have to compete getting a cheaper system and a separate 3D scanning solution. Especially for the sensor scanning part, using a handheld depth sensor with a laptop or tablet is probably cheaper and more flexible solution that can also scan large objects and people.
The results of structured light scanning with the Sprout G2 and the 3D Capture Stage are a vast improvement over those from last years model. But I can’t say for certain how much of that is because of the upgraded hardware. For the biggest part, it’s HP’s tactical acquisition of DAVID and its well-developed industrial scanning software — now called HP 3D Scan Pro 5 — that let’s the user get more out of the hardware.
Once you get the hang of it, this software can produce 3D scans with impressively detailed geometry. And because of the 7th gen i7 processor and 16GB of RAM the Sprout G2 can even handle high-resolution fusion very well and without getting unresponsive like the 2016 model.
The weak spot of the new software is the way it captures and stores textures. That feature was probably never really important for DAVID because their professional scanners are mainly used for engineering and other purposes that don’t require textures. But the 3D scanning landscape is changing and the Sprout computer seems to be targeted specifically at this new, creative audience that wants to scan objects and share them online or use them for all kind of innovative purposes that do require good color. Adding efficient UV-mapping to the software is therefore a must in my opinion.
Ironically, the new Camera 3D software that is used to scan with the Orbbec Astra depth sensor does have a great texture mapping engine. It’s good enough that the textures make you forget that the underlying geometry is very basic. The upside of this is that the results look good and are light enough to share and view on mobile devices or be used in games or VR/AR applications.
The Camera 3D workflow is truly innovative and unique. It’s the first time I’ve been able to manually hold an object in front of a sensor to scan it. It makes the process very tangible and a lot of fun and I really think that’s attractive for education. I’m curious about how this software works 6 months from now, after many updates. My guess is I’d be happily surprised.
All HP has to do is integrate Van Gogh Imaging’s high-res texture mapper into the ex-DAVID software and everything will be fine!
Bottom line, I’m still very excited that HP’s effort to make 3D Scanning accessible. Even if professionals or educational facilities invest in the Sprout Pro G2 for other purposes it will lower the threshold to start experiment with 3D capture without the hassle of connecting cables or calibration. There’s simply nothing like it and the fact that it now included both professional and fun scanning options offers a lot of possibilities.
You may also like
Thanks for reading! If you think this review is also useful for your friends or followers I’d appreciate it if you share it on your favorite social network. Just click the buttons below (mobile) or on the top-left (desktop) of this post.
If you have a remark or question, feel free to leave a comment below. And if you’re interested in tailored advice about 3D scanning, please consider my Consulting Service. I’d be happy to send you a free quote to help you make well-informed decisions for your business.
And if you dismissed the annoying popup about my Newsletter… It’s just a monthly digest of my posts plus some exclusive material. You’d like it, really.


You said on your instagram you bought a Orbbec Astra S. What are you thoughts about it for just 3d scanning? I’m trying to 3d scan some bismuth crystals. I painted them gray and tried agisoft photoscan with a dslr with spotty results. The processing time for ultra and high detail is 8 to 10 hours on my end.
I need a decent depth sensor that can handle close range scans
I am interested to get your take on the relative resolution of the new Sprout in comparison to the SLS-3 and the ability of the former to scan relatively small objects. I recall the ultimate resolution of the SLS-3 is 50 microns. We will be scanning comparatively small objects on the order of 0.5 inches to 2.5 inches in the longest dimension. In your estimation, can the Sprout be used for this application and,if so, how does it perform relative to the SLS-3?
is this compatible to pro v, autocad,
Can you publish specs on the scan accuracy? My interests are more reverse engineering complex and sometimes obsolete parts. Poor fitting reproductions with gaps as small as a credit card width look non-original. For those who don’t want to spend 5000-10,000 on a professional scanner, what is the best desktop option(s) for parts range in size from 2 inches (50mm) to 10 inches (250mm) and if possible up 20 inches (500mm)?
Thanks