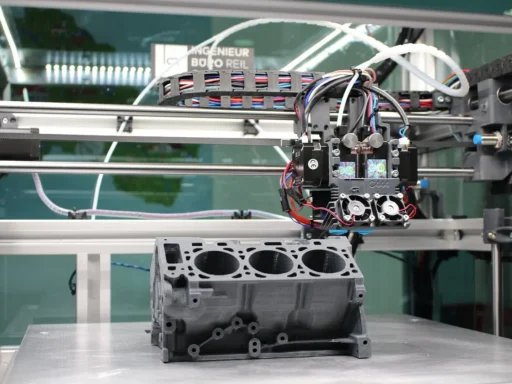
Over the last decade, 3D printers and in fact, 3D technologies in general, have caused quite a stir.
In Arizona, Mr Stubbs the alligator got himself a brand new tail. Yes. Living, breathing alligator, 3D printed tail. Elsewhere, King Tchala has had his Lexus LC 500 fitted with custom, 3D printed claws. And for the very first time in history, 3D printing has been used to create the bust of a US president.
That’s not the only way US Presidents have gotten in on the act. First Barack Obama said that, “3D printing has the potential to revolutionize the way we make almost everything.” Then Joe Biden rolled out the AM Forward program to drive the technology’s adoption across the country.
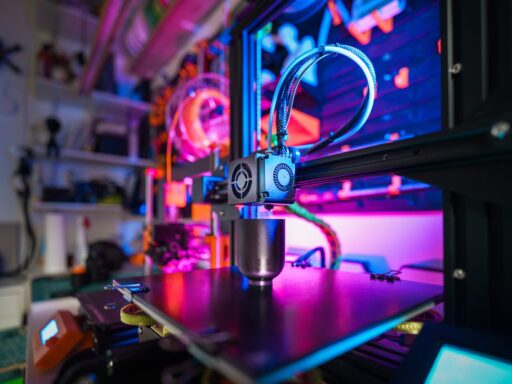
3D printers are also more popular and accessible than they have ever been before. So, that begs the question: How to get involved? And in 2024, what is the best budget 3D printer you can buy?

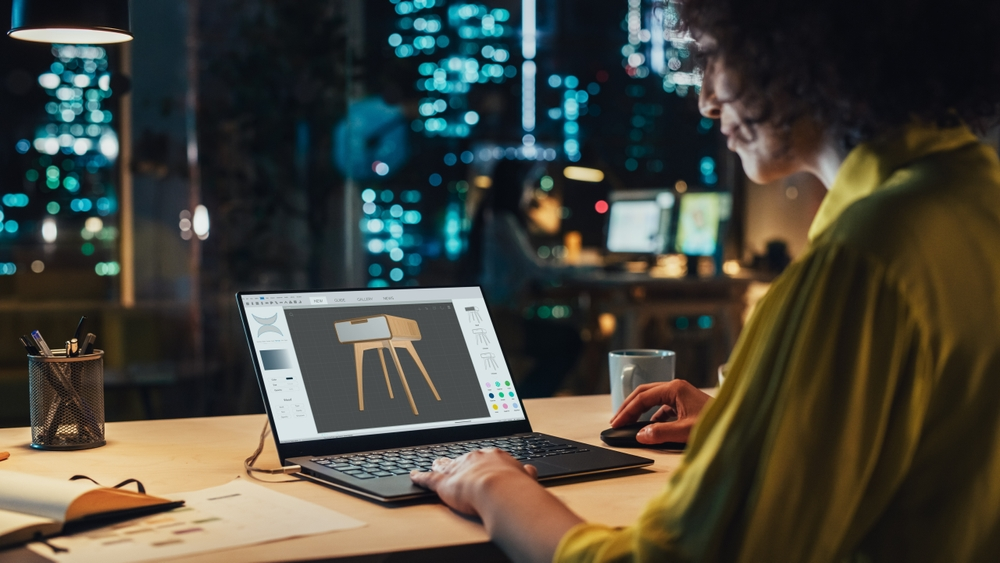
To choose the right 3D printer for you, you will always have to factor in a number of considerations: budget, skill level, and of course, the kinds of things you want to print.
There’s a plethora of options out there – advanced models that cater to the pros, and mid- to low-cost printers made for newbies, hobbyists, and students. The breadth of options can be bewildering.
With this in mind, we scoured the web (so you don’t have to), compiled a list of 3D printers that we think are worth checking out, and then got our in-house 3D-tech nerds and geniuses to bicker over which ones should make the cut.
What we’ve ended up with is a list covering different price brackets, from top-of-the-range pro models to options for tinkerers, enthusiasts, and DIYers. Along the way, we’ll tell you what’s great about each one and what’s not so good.
But first, a few technical details to get out of the way. If you already know about FFF, FDM, MSLA, SLA, DLP, resins, filaments, and all that stuff, feel free to skip ahead to the section where we list the printers. If you want a more detailed explanation, head over here. And if you need a bit of a refresher, read on!
If you’re curious about cheap 3D printers, take a look at our detailed rating to discover some great budget-friendly options.
Types of 3D printers
If you’re new to the game, the way 3D printer-related acronyms are nonchalantly thrown about can be off-putting. So we’ve whittled them down to just two groups: FFF/FDM and SLA/MSLA/DLP. These are terms for the most widely used 3D printing technologies because when you’re choosing, that’s one of the first considerations. So it’s kind of important. But not to worry, it’s all pretty uncomplicated. You can learn more about the types of 3D printers in our article.
Fused Filament Fabrication (FFF) and Fused Deposition Modeling (FDM)
Both FFF and FDM 3D printers work in the same way, using thermoplastic filaments. These are spools of plastic that are fed through a heated nozzle onto a build platform. The nozzle builds models using melting filament, layer by layer from the ground up, onto the build plate. The thermoplastic solidifies as it cools, forming the final object.

The filament itself could be made from different materials. ABS (Acrylonitrile Butadiene Styrene) and PLA (Polylactic Acid) are just two common ones you might hear about. All of them have different properties – melting points, how brittle they are, and so on. But we won’t get into that here.
In this article, we may occasionally use the terms FFF and FDM interchangeably because, apart from the fact that FDM is a Stratasys trademark and FFF isn’t, they are essentially the same, with only subtle differences seen in the technologies between units themselves.
Stereolithography (SLA) and Digital Light Processing (DLP)
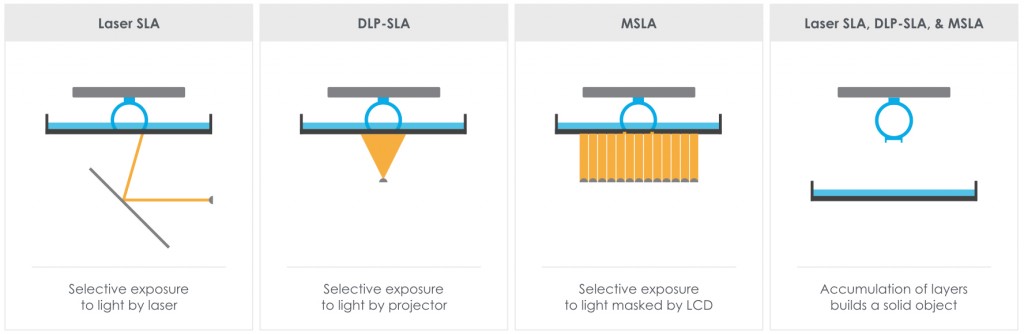
Stereolithography and Digital Light Processing use a different approach to 3D printing. The idea is simple. In a process known as photopolymerization, a liquid material known as a ‘resin’ hardens when exposed to certain types of light. Such printers are therefore often referred to, in general, as resin printers.
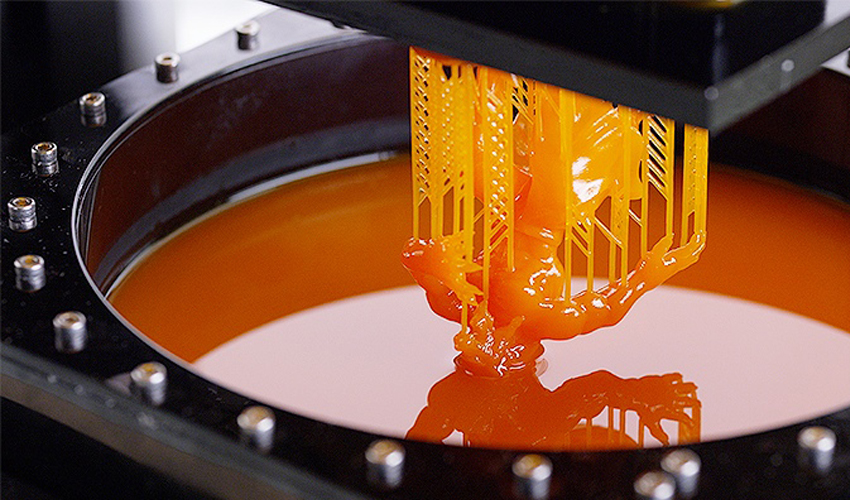
Resin is placed in a vat with a build platform submerged in it and a laser beam is focused onto the resin’s surface. The beam draws one layer of the model by selectively exposing the surface of the resin to light and thus ‘curing’ (or hardening) the material. The platform is lowered, a new coat of resin is applied to the top and the next layer of the model is drawn onto the new coat. The process is repeated until the complete model has been built.
DLP printers do precisely the same thing, except instead of a laser, a projector beams an image of the entire layer across the whole platform at once. You may also come across MSLA (Masked Stereolithography) units. These are essentially the same as DLP printers, except instead of a projector, a matrix of lights beams the image that cures the resin through an LCD.
After printing is complete, it might be necessary to cure the object again in a UV oven. The final object may also have to have holes through which to drain uncured resin when the printing is done.
As with thermoplastic filaments in FFF printers, there are different resins with varying properties. We won’t get into those here either.
FFF/FDM or SLA/DLP?
As with most things, it depends. But, in very broad strokes, here are some of the factors that might tip the scales one way or the other.
Surface finish and isotropy
Resin printers are popular because the models they produce have smooth surfaces, are highly accurate, and are isotropic. That means their material properties remain the same irrespective of orientation. For instance, bending SLA-printed material one way or another does not make it any easier or harder to break. As SLA models are isotropic, their layers adhere at a chemical level when cured, and their strength is even in all directions.
FDM or FFF printing, however, relies on heat to bond the layers together. Because the bonded layers adhere to each other mechanically, the structure is weaker along the seams of the layers. Resulting models also feature a finish that is not as smooth as with SLA printing. The layers are actually visually distinguishable.

Convenience
Sounds like resin printers are the obvious choice, right? Well actually, FFF does have its upsides. The first is convenience. FFF 3D printers are typically compact and easier to use and maintain.
With no extra equipment needed and the whole process taking place within the device, a filament-fed system can more easily be operated on a desktop. The FFF printing process does not require the use of strong, hazardous chemicals either, so there is little risk of contamination. These traits make FFF printers easier to scale up in size, and more popular among hobbyists and casual users.
With resin 3D printers, after the initial print, the object has to be cured again in a UV chamber to complete the process. The final object then has to be cleaned with chemicals like isopropanol. So you’ll need a washing station, and a post-curing station. Printing needs to be carried out in a well-ventilated area. The materials used in resin printing must also be handled with gloves, they have a strong smell, are flammable, and require special disposal.
Cost
Unless you are the type that builds a spaceship for the odd personal trip into the cosmos, affordability could well be another big consideration. SLA printers are, on the whole, pricier and more expensive to run than FFF printers in general, for reasons we’ve touched on under “Convenience”. But added to all that, with all those toxic chemicals, you need a dedicated printing area that’s well thought out and prepared. You wouldn’t want to just plonk one on your kitchen counter. You’ll probably need a spacious room with windows and/or ventilation gear.
Speed and volume
Finally, build volume and speed. FFF printers are in general capable of larger volumes than their SLA counterparts, and they tend to be quicker to boot. This is because SLA lasers have a very small surface area, meaning that they take longer to cover each layer, and resulting parts come with more extensive post-processing demands. With FFF systems, you can also reduce the level of infill in a part, something that helps drive down lead times.
Clearly, there are many considerations to take into account, and this is, at best, a cursory glance at the biggest things you might want to look into when making your choice.
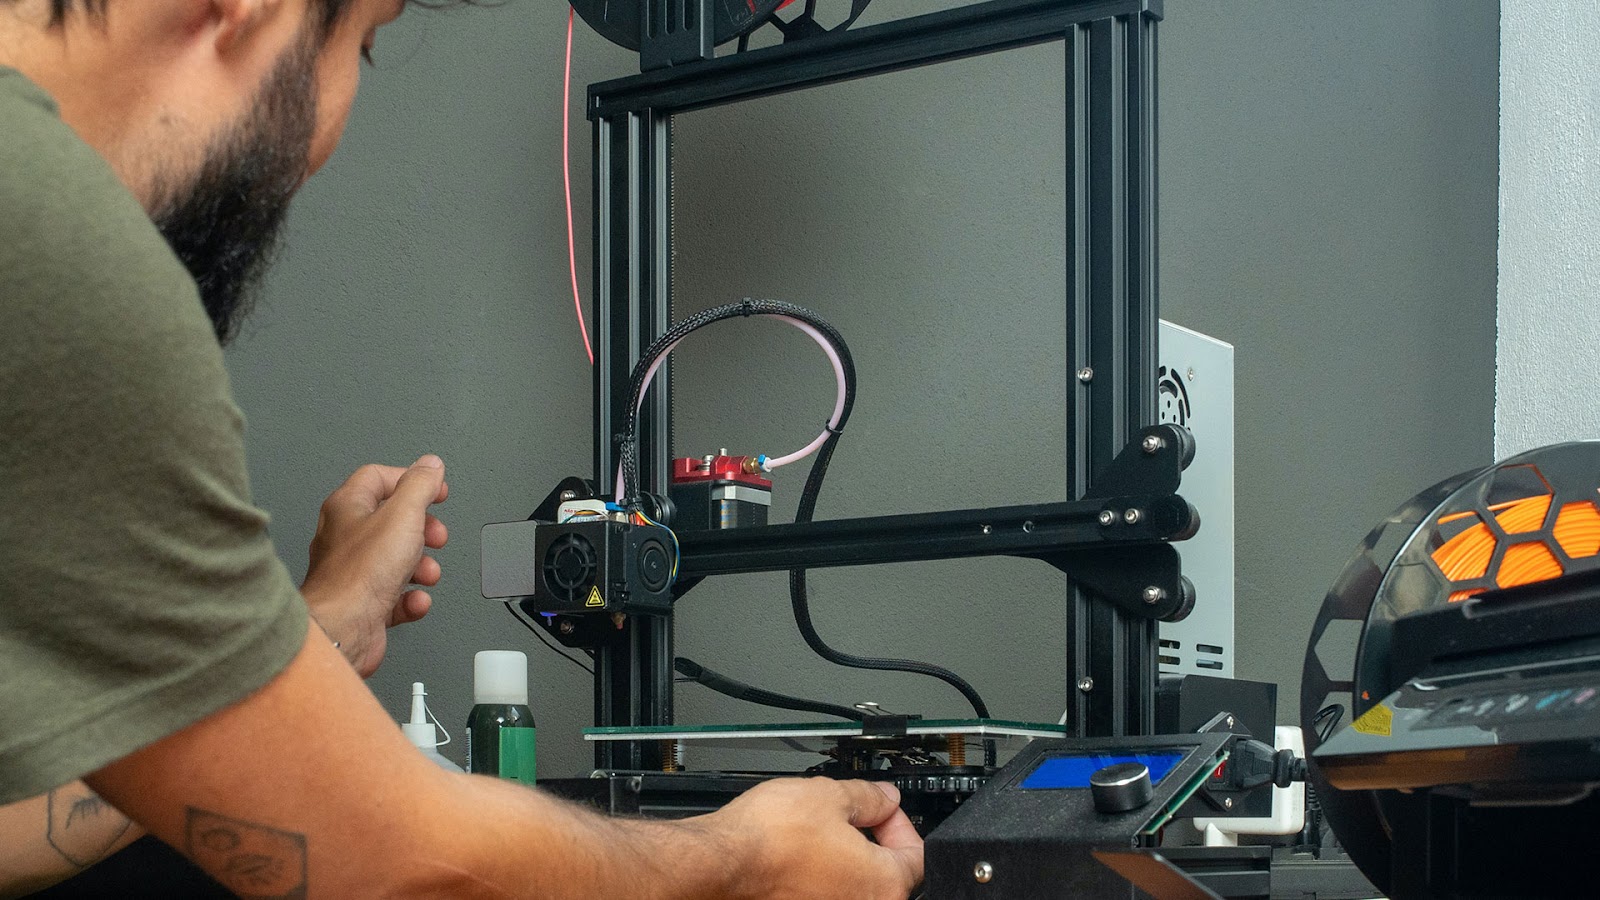
Let’s get into the printers themselves, starting with the budget options.
3D printers under $500
FFF/FDM 3D Printers
Creality Ender 3
From $159

With its sizable 220 x 220 x 250 mm build volume, the Creality Ender 3 makes a strong statement of intent right out of the gate. This 3D printer ships as a kit that you have to assemble yourself. Though the device uses an open-source design, the assembly is fairly uncomplicated and could be completed in about an hour or so – the manufacturers themselves say two hours. The package includes everything you will need to set it up.
This 3D printer is a great option for both beginners and just about anyone looking for an affordable 3D printer. It is much-loved largely because it offers decent printing capabilities at a very competitive price, it has a strong community around it, meaning plenty of support, and it boasts a generous capacity for its class. The Creality Ender 3 also comes with a heated build platform, a power recovery mode, and the ability to easily print with flexible materials.
Proper calibration is key to getting the best out of this device. Quality control has been reported to be a possible issue with the Ender 3. For example, some users have complained that the printer’s base is uneven, which makes the whole structure shake slightly.
With that in mind, there are a few things to make sure of while you set up your printer. It’s a good idea to make sure all the screws and nuts are tight on the device. You should also level the printer’s build surface relative to the nozzle tip. The tip must be the same distance away from the platform across the whole surface. The extruder itself requires calibration so it doesn’t under- or over-extrude material. It’s also a good idea to adjust belt tension to eliminate accuracy problems like ghosting and layer shifting.
If that sounds a little overwhelming, you’re right – it can be. But if you endure the hassle and get your Ender 3 properly calibrated and working perfectly, the printer is capable of producing parts with a quality closer to that of more expensive devices. It can print at a max speed of 200 mm/s, has a maximum layer resolution of 0.1mm, and a print precision of ± 0.1 mm.
Original Prusa Mini+
$459 (semi-assembled)
$429 (kit)
The Original Prusa Mini+ is an open-frame 3D printer with a build volume of 180 x 180 x 180 mm. If you settle on getting the DIY kit, you have to set it up and have the printer run a self test to ensure all is in order before you can use the device. And then the printer requires that you perform a first-layer calibration to make sure the nozzle is at the right height from the build plate to properly deliver molten filament. This calibration is much easier said than done and can be a trial and error process.
So, unlike pre-assembled machines, the Original Prusa Mini+ does require some tinkering and tweaking before you can enjoy the satisfaction of admiring your first print. Evidently this hasn’t been lost on the manufacturers as they very helpfully include a small packet of Gummy Bears to treat yourself to upon completion of certain steps in the manual. Taking notes, IKEA?
Once those hurdles have been cleared however, there is little to criticize. The Prusa Mini+ consistently delivers impressive print quality with good detail and no visible blemishes at both the default 150-micron quality setting, and the 200-micron setting that’s optimized for speed. It can print with different third-party filament types, and (for an open-frame printer) works quietly.
If you don’t mind the inconvenience of the initial set-up, and having to keep flammable objects, curious pets and toddlers away from the hot extruder, the Original Prusa Mini+ is a dependable printer, and for its price, a smart buy.
Resin 3D Printers
Anycubic Photon Mono 4K
$219
In the world of resin printers, the Anycubic Photon is about as inexpensive as they come. The initial set-up is relatively easy. The printer is shipped pre-assembled, with the manufacturers only requiring you to screw a knob onto the door and level the printer’s bed.
This LCD-based SLA 3D printer comes with gloves, a mask, filters, a flash drive with some models to test, and a bottle of resin to get you started. As you would expect from a resin printer, the Mono 4K yields good print quality with plenty of detail, at a horizontal resolution of 35 microns, and features a 4K screen resolution, which is pretty good at this price point.
Initial iterations of the printer came with the downside of a small build volume, but Anycubic has since worked on this, and the Mono 4K now ships with a capacity of 115 x 65 x 155 mm. Aside from that, are the usual issues that come with resin printers: the need for caution when handling toxic materials and managing their disposal, safety equipment like gloves, the required additional processing after the first print, the smell and need for good ventilation, and also the hassle of cleaning the printer properly.
If you understand the system’s limitations and have the requisite know-how for handling resin printers, this option is a good choice that certainly won’t break the bank. The price tag may seem suspiciously low, but the Photon delivers what it promises.
Elegoo Mars 3 Pro 4K
$300
The Elegoo Mars 3 Pro 4K is another budget resin 3D printer that makes a good case for consideration. Despite its name, the Mars 3 Pro does not necessarily deliver an otherworldly performance. But what it does, it does well enough.
Its manufacturer is at pains to point out that by using monochrome LCDs, this printer is capable of faster layer cure times, in a way that reduces part lead times. The device has a print speed of 30-60mm/h, which is in keeping with the Anycubic Photon’s 50mm/h, for example. This, and the Mars 3 Pro’s quality and ease of use, are the standout features that make it an appealing choice.
It comes fully-assembled, so you don’t have to fret about the hassle of putting it together. It also has a build volume of 143.3 x 89.6 x 175 mm, prints with a layer height of just 10 microns, and works with third-party materials. So, although its stats might not quite blow you away, it has all the bells and whistles you would expect from a system at this price point.
Again, bearing its price in mind, the limitations of this printer are more related to resin printers in general – the use of hazardous materials and the care and management that they demand – than faults in the printer itself.
Creality HALOT-ONE PRO
$239
Creality’s new HALOT range of budget SLA systems continue to gain traction among those seeking to take the step from filament to resin 3D printing. Thanks to its in-house developed light engine, the HALOT-ONE is said to emit light with at least 80% uniformity, something that ensures objects can be produced consistently, one after another.
For an extremely cheap machine, it also comes with a surprisingly large number of bells and whistles, including WiFi connectivity, remote print monitoring, and an integrated air filtration unit. Obviously, there are going to be some drawbacks when it comes to buying a low-end system. Resolution-wise, for instance, there are now plenty of 4K and even 8K 3D printers out there that would blow the HALOT-ONE away on this front.
However, if you’re looking for a way to get into resin 3D printing, whether that be for model-making or other desktop tasks, Creality’s HALOT line could be for you.
3D printers from $500 to $2000
FFF/FDM
Bambu Lab X1
$1200
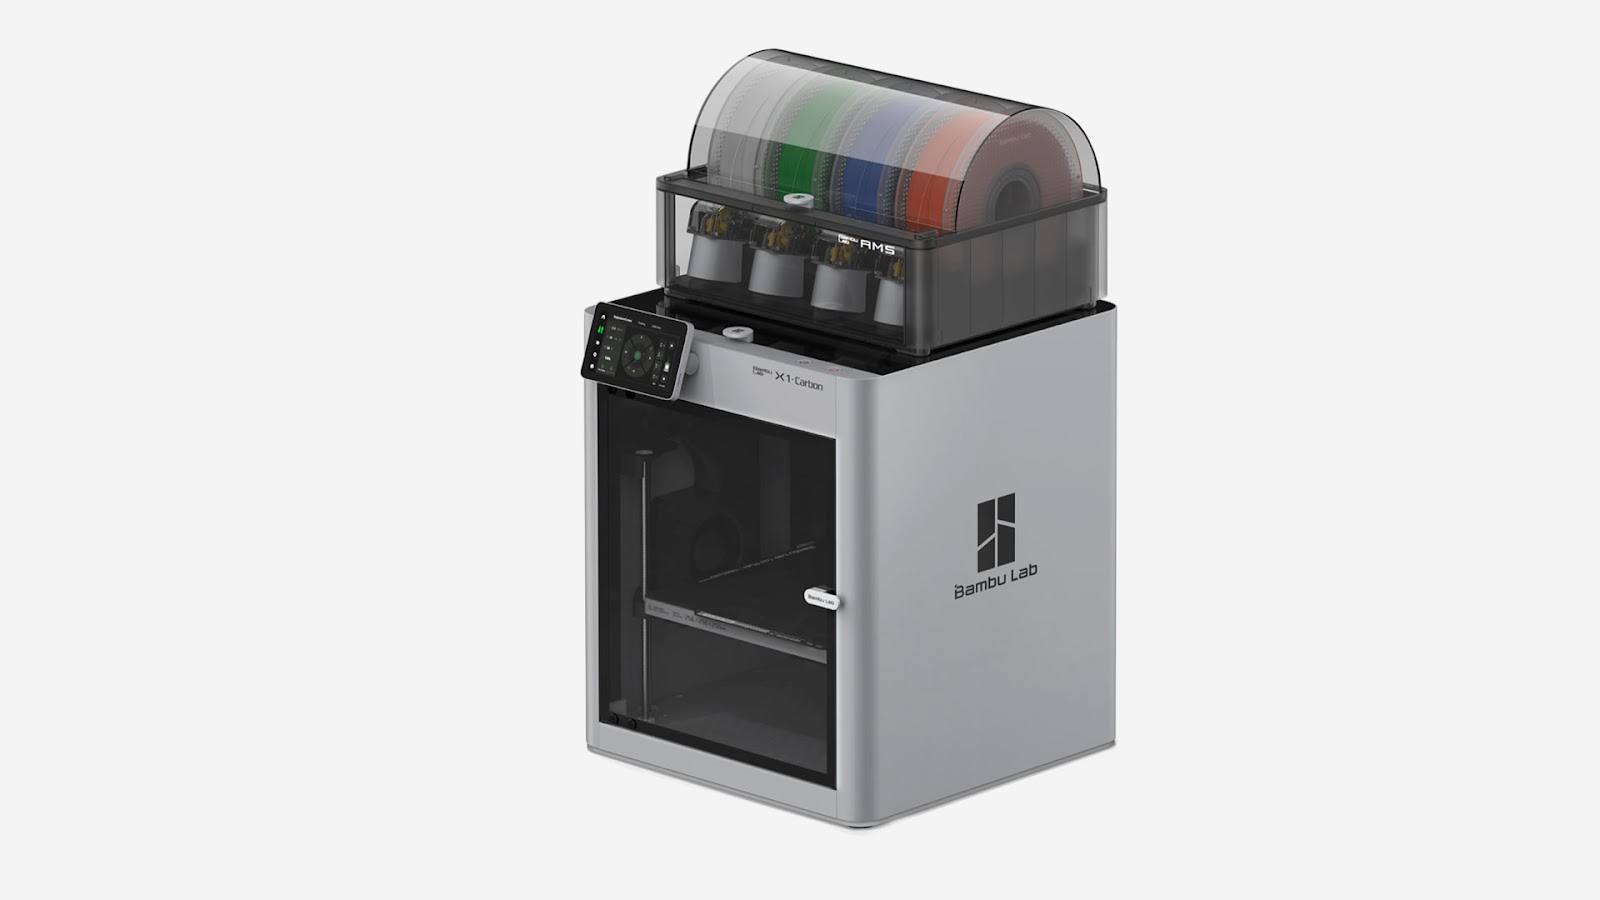
Developed using funding raised via a Kickstarter in 2022, the Bambu Lab X1 is one of the newer and more popular entries on our list. While the system features an eco-efficient design that’s said to reduce its carbon footprint by up to 80%, it’s not sustainable at the expense of speed. With a rapid 500 mm/s printhead speed and AI-driven automation capabilities, the Bambu X1 more than holds its own in this regard.
In fact, the machine pairs a Quad-Core processing chip and Bambu Micro Lidar sensor with 40 others to allow users to accurately inspect their first layer, ensure even bed leveling, and detect any dreaded filament spaghetti-ing that might occur. All this for less than $1,200. That’s a bargain… right?
Well, before you get too excited, some of those that got initial pre-launch access to the X1 were less than impressed. In particular, they noted hotend jamming and cable melting issues, and the system’s software appeared to be a reskinned version of PrusaSlicer, that had been appropriated without attribution. Okay, Bambu Lab has since moved to address some of these issues, even releasing a successor system, the P1P. But post-launch, the X1 continues to be a source of fierce debate on social media.
Overall, you can therefore expect to get great bang for your buck from the X1, but you may also get a lecture from any 3D printing friends you have over.
LulzBot Mini 2
$1,295

A print area of 160mm x 160mm x 180mm, minimum layer resolution of 0.05mm, a full on-board processor, display, open-source hardware and software, LCD with SD-card slot – there is plenty to like about the LulzBot Mini 2.
The system features a 3D Titan Aero hotend and a redesigned filament feeding mechanism. This means the Mini 2 is able to print with flexible filaments quite easily, whereas previously, you’d have had to install a custom toolhead. The printer now also has a redesigned print bed, to deal with any issues with warping and adhesion.
The Mini 2 comes fully assembled, and sports some meaningful improvements over its predecessor. New electronics and motors mean that the device is much quieter during operation. LulzBot has also maintained its dimensions, while managing to squeeze out an extra 20% in build volume, and most significantly, the system no longer needs to be tethered to a computer in order to print.
Ease of use is also a big thing with the Mini 2. It automatically sets the extruder height and levels the bed before each print, so there is no need for alignment. Additionally, instead of standard LulzBot heated build plates, the Mini 2 has a Modular Print Bed System which can easily be removed. So if desired, you could switch to a glass surface, lending the device the flexibility to print with a wider pool of materials.
The downsides are that there are reports of occasional issues when trying to change print materials, with melted filament sometimes clogging the machine’s extruder. Additionally, print quality is not always consistent, the printer doesn’t come with filament, and the fact that it has an open frame that doesn’t shield the nozzle is something worth keeping in mind.
Original Prusa i3 MK3S+
$899 (assembled)
$649 (kit)
Original Prusa features again, this time with the MK3S+, an upgrade on the previous MK3S. Apart from the headache-inducing mouthful that is its name, the Original Prusa i3 MK3S+ (henceforth referred to as “the printer” or “the MK3S+”) has a lot to be proud of and is clearly designed with the user in mind.
For instance, removing printed objects from the bed can be an issue with many desktop 3D printers. To get around this, Prusa offers three print surface types: smooth, textured and satin, to make it easier to process different materials without the need to add separation layers or carry out surface preparation beforehand.
The MK3S+ boasts a build volume of 250 x 210 x 210 mm, delivers very good print quality, works with third-party materials, and comes with handy features like auto-calibration, automatic mesh bed leveling, crash detection, an infrared filament sensor, quieter motors, and a whole roster of bug fixes and minor improvements. This culminates in a much improved user experience.
For a printer that costs under $1,000, it’s certainly a compelling value proposition. However, unless you are willing to fork out an additional $250, you’ll first have to slog through a few hours of assembling the kit. If you’re a glass half full type of person, it could mean you learn a lot about the printer in the process and can trouble-shoot later. The downside is you lose the full warranty and keep only the warranty on the parts.
According to the manufacturers though, the assembly is a breeze. There is no soldering required, and all the cables are pre-cut so all you have to do is plug them in.
Whether you opt for a kit or not, once you endure (the expense or the labor), there is a printer on the other side that will deliver high quality 3D models and is quite easy to use.
Ankermake M5
$699
As you’d expect from another of the Kickstarter-funded 3D printers on our list, the Ankermake M5 has also built up a following of passionate fans among the maker community. Just like the Bambu Lab X1, the M5 is marketed as a speed machine, in this case offering “up to five times faster printing” than its competitors.
Since launch, Ankermake hasn’t backed up these claims by naming the machines it tested the M5 against, but its highly-popular system has generally received positive reviews. These have tended to praise the accessibility provided by the M5’s auto bed leveling functionality, its ability to print at high speeds without vibration, and its print monitoring capabilities.
As such, Ankermake parent firm Anker Innovation has largely landed its first attempt to shift from the consumer tech space into desktop 3D printing. If we’re nitpicking, the M5 is said to be relatively noisy, while missing a few ports – for SD cards in particular. But if it’s an easy to use, budget desktop 3D printer you’re after, the system is hard not to recommend.
Dremel DigiLab 3D45
$1,999
Primarily, the 3D45 is billed as an ultra-safe and reliable system. The manufacturers go so far as to say the machine is the most reliable 3D printer on the market, having been “slammed, dropped, [and] dragged” in thousands of hours of testing.
At 255 x 155 x 170 mm, the 3D45’s build volume is not the largest in its class, but it’s decent enough to address multiple use cases. It has a fully-enclosed build chamber, not only to protect users from any potentially harmful fumes and keep the hot extruder out of reach, but maintain build chamber temperature, eliminate warping and make print removal easier.
The door and lid are transparent and can also be opened during operation so, should you want to, you can tinker with your build. The 3D45 is capable of 50-micron prints – enough to capture elaborate details, has a 4.5 inch LCD screen to enhance the device’s ease of use, ships with 8 GB of internal storage, and packs a 720p camera to monitor progress.
Other benefits include WiFi-compatibility, as well as built-in Ethernet and USB ports, so you can print from the cloud, over a wireless network, or by simply plugging in a flash drive. You can also connect several printers to one computer, or multiple computers to a single printer, to remotely manage print queues. If you’re using Dremel filament, the 3D45’s RFID reader will even detect the spool, recognize the filament type, and adjust its settings to match.
So clearly, apart from safety and reliability, the Dremel DigiLab 3D45 is also designed to provide a seamless experience with lots of flexibility. But there is a catch.
Although the 3D45 works best with its own proprietary materials, its performance dips with third-party filaments. For a start, Dremel spools are specially designed for the 3D printer’s side compartment; so if you are using others, you need to improvise and use the foreign spools outside the printer (with an external filament spool holder for instance), and feed the filament into the extruder system.
With third-party filaments, there are reports of the 3D45 under-extruding and even stopping altogether, resulting in poor finishes and incomplete 3D prints. So if you are a user that likes to experiment with different filament materials, the 3D45 might not be for you. However, if you stay within the Dremel ecosystem, this printer is a safe bet.
Resin 3D Printers
Anycubic Photon Mono X 6Ks
$349
The Anycubic Photon Mono X 6Ks is another MSLA unit kitted out with some exciting upgrades over its Mono predecessor. Apart from sporting a three-times higher maximum print speed (now up to 60mm/h), the system has a much larger 195.84 x 122.4 x 200 mm build volume, and the ability to control the printer using a mobile app.
Elsewhere, the Mono X features a Z-axis that reduces the risk of layer shifting – achieved using the improved motion stability from dual linear rails and a stepper motor and clearance nut combination. The machine also features a new matrix of quartz lamp beads that provide its UV light source, and a 9.1-inch 6K monochrome LCD to help deliver high-quality prints.
As well as enabling faster printing, the system’s newly-enhanced light source should last longer, for several thousand hours.
Performance-wise the Mono X does well enough. The prints are accurate and there is little to fault it for. It even comes with a handy Resin Exposure Range Finder (RERF) file which prints eight squares at varying exposures to find the optimal setting.
With its predecessor, its users reported occasionally finding scraps of cured resin that remain in the tank after printing but aside from that, you’ll be hard-pressed to find any glaring faults with this 3D printer.
Original Prusa SL1S SPEED
$1999

Prusa Research features again with another open-source device, this time with an MSLA printer – the Original Prusa SL1S SPEED.
The SL1S SPEED boasts improved print quality over the previous SL1, a 25% larger print area, and a 1.4-second exposure time per layer using transparent resin. With standard, opaque 405 nm resins, the printer can also achieve a 1.6-second exposure time per layer. So, it’s safe to say, Prusa Research has done quite a bit to improve on its previous release.
The SL1S also features a 2560 x 1620p, 5.96-inch monochrome LCD with a 2,000-hour lifespan. It has a print volume of 127 x 80 x 150 mm, a minimal layer height of 0.05 mm, and supports third-party resins. This increased capacity, coupled with the machine’s faster print speed mean that it can finish the largest print it’s capable of in less than four hours at a 0.05 mm layer height, or in three hours at an increased layer height of 0.1 mm.
Elsewhere, the SL1S’ heavy aluminum body is designed to minimize vibrations and improve print performance. It also has a quick-release mechanism which maintains Z-axis calibration, something that results in better quality prints.
There are a few other improvements that enhance the user experience with the SL1S as well. These include an angled build platform that allows uncured resin to drip back into the vat, an activated carbon filter which absorbs odors and reduces the toxins released from the device, and the ability to operate fully-remote where needed.
Unlike some of its other machines, Prusa does not offer a DIY kit with this printer. It comes fully assembled, so you do not have the option of saving a little by opting to set it up yourself. But given that many professional-grade SLA printers cost well north of $3,000, the SL1S is a device that’s certainly worth considering.
3D printers over $2000
FFF/FDM 3D Printers
UltiMaker S5
$6950

At $6,950, the Ultimaker S5 is a desktop FFF 3D printer that’s obviously aimed at the professional, high-end market. With a price tag like that, the S5 has little room for excuses and it sets about its task to justify that price quite admirably. It has a tasteful design that’s easy on the eye, with a well-illuminated interior that looks good and features a built-in camera, so it serves a functional purpose.
The machine has a build volume of 330 x 240 x 300 mm, which is generously large for a desktop 3D printer. This large print area enables you to build bigger models, or have more parts on the build plate to improve your efficiency. The S5 is compatible with over 200 materials including high-strength glass and carbon fiber filaments, comes with automatic bed leveling, and has WiFi and Ethernet connectivity so you can manage prints from your computer or mobile device.
The Ultimaker S5 also comes with a glass build plate, as well as an anodized aluminum build plate, which is supposed to make printing with engineering materials easier. Thanks to its enclosed build chamber, meanwhile, the system is able to maintain temperature and air flow control for more reliable 3D printing, while its sensors are able to pause printing should you run out filament, prior to prints being ruined.
The S5 also has dual extruders with printheads that can be removed and customized. Being able to deposit two materials unlocks more complex, technically difficult design 3D printing capabilities. For example, with spaces or overhangs, you can print using a material of your choice, in combination with PVA supports that can later be dissolved away in water.
Pretty impressive. But at that price, the S5 had better be. At the end of the day, if the price tag isn’t an issue, there’s not much to fault the S5 for. For pros and small businesses, it is a sensible choice.
Markforged Mark Two
$17,490 (approx.)
If you’re willing to part with a bit more cash, you can get your hands on Markforged’s flagship ‘CFD’ machine. While still technically powered by FFF technology, the Mark Two provides users with the unique ability to print carbon fiber-reinforced parts that are so strong and durable, they can replace machined aluminum alternatives. This makes the system small but mighty, in that it can be deployed on a desktop to create industrial-grade components.
Aside from being compatible with Markforged’s aforementioned Onyx material, the machine is also said to be easy to maintain – particularly for a higher-end extrusion unit. High-wear parts like nozzles and feed tubes are positioned in easily accessible areas, while its build plate can be cleaned and replaced without disrupting print repeatability. On the flipside, the Mark Two’s 320 x 152 x 154 mm build area is far from the most expansive on the market, so those buying the machine for larger builds are likely to be disappointed.
Given that the system is priced at just short of $20,000, it’s probably only ever going to be in the price range of design professionals and manufacturers. That said, the Mark Two’s carbon fiber reinforced-nylon 3D printing capabilities could be worth the outlay to some, especially if they aim to create parts for prolonged outdoor usage that would be impossible any other way.
Desktop Metal Fiber LT
From $3495 per year
Got a hankering for an industrial-grade 3D printer, but can’t afford to pay the initial cost of owning one? Desktop Metal may have just the system for you. Like Markforged with the Mark Two, Desktop Metal has built the Fiber LT around a proprietary FFF technology that allows for the continuous fiber reinforcement of parts. Only, unlike the Mark Two, the Fiber is marketed via a subscription model, in a way that could make it accessible to a wider audience.
Powered by a process called ‘Micro Automated Fiber Placement,’ the machine is said to enable the production of parts that are stronger than steel, lighter than aluminum, and capable of operating at temperatures of up to 250oC. Thanks to its broad compatibility with composites like PEEK, PEKK, and reinforced nylon, the Fiber is also said to have wide-ranging applications, including those in the lucrative automotive and electronics sectors.
Again, the machine’s 305 x 240 x 270 mm build volume will likely be the major limiting factor to deploying the Fiber at scale. However, we are still talking about a desktop system after all, and its compact form factor may actually be positive for those working in cozy workshops.
Resin
Formlabs Form 3+
$2499
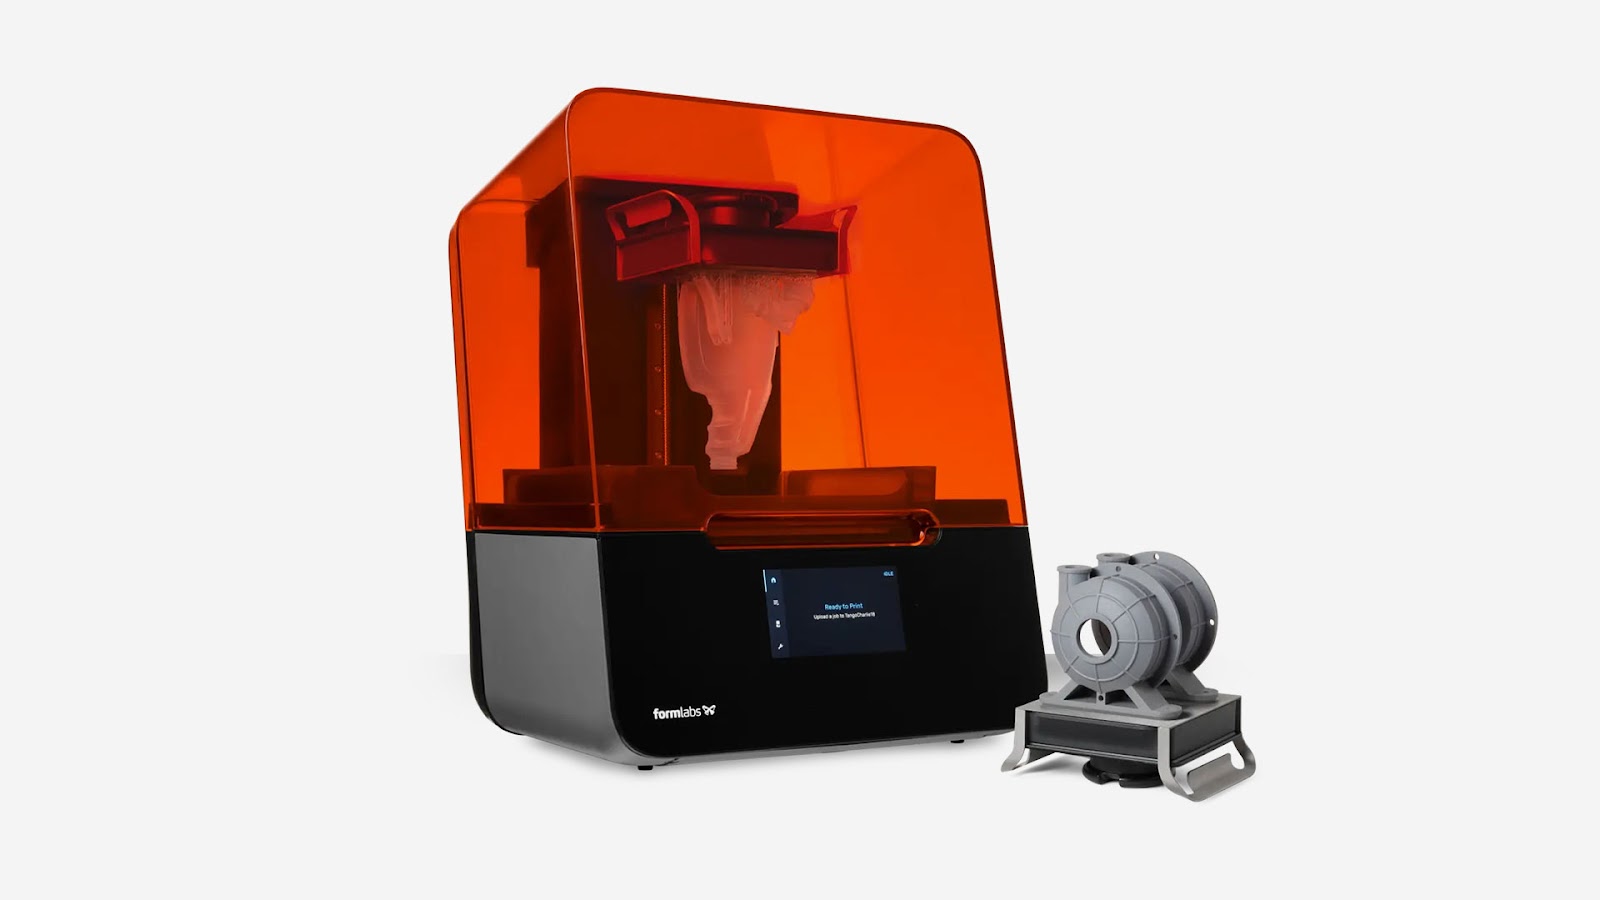
The Form 3+ is an SLA system with a build volume of 145 x 145 x 185 mm that delivers prints with a minimum layer resolution of 25 microns – well under the 40 microns that can be seen by the human eye! According to Formlabs, the printer owes this accuracy to a custom Light Processing Unit (LPU) that uses an efficient array of lenses and mirrors.
The Form 3+ also comes with some nifty features, including closed-loop calibration, where the printer’s optical sensors continuously correct for scale and power, even detecting dust. Formlabs calls this ‘non-stop printing.’ The system is said to constantly monitor performance using sensors that will alert you whenever necessary to ensure optimal print conditions are maintained.
Other than that, there are the usual trimmings that come with a printer in this price range: USB, Ethernet, and wireless connectivity, remote printing over the cloud, a 5.5-inch interactive touchscreen with 1280 × 720p resolution, and software that enables you to control a fleet of printers should you decide to set up a print farm.
When it comes to the usual complaint about SLA printers being the need to handle messy resins, Formlabs have come up with a clever workaround as well. The Form 3 uses a cartridge of resin that you can insert into the machine with a resin tank, and let the printer figure out the rest. The Form 3+ utilizes sensors to determine whenever resin levels are low and refills the tank using the cartridge as needed. You can also get the Form Wash and Form Cure products to ease the processes of rinsing and post-curing your prints.
The idea is clearly to make the stages of SLA-printing, support removal, and post-curing, as simple and hands-off as possible. Formlabs are so confident you will like their printer, they offer a 100% refund within a 30-day period if you are unsatisfied with it. Although this is available to US customers only.
If you decide to take the plunge on an SLA 3D printer above the $2,000 mark, the Formlabs Form 3+ offers great value against its competitors.
Stratasys Objet30
$24,500 (approx.)

As with filament-based 3D printers, you can spend a little more to get a high-end resin system as well. One of the more versatile options out there is Stratasys’ Objet30. Designed to bring higher-resolution resin 3D printing into office and workshop environments, the Objet30 is just 82.6 x 60 x 62 cm in size, making it smaller than most industrial units, yet incredibly precise.
This means the system is ideal for creating intricate parts like shoe insoles and dental models, as well as prototyping in workshops where space is at a premium. The Objet30’s additional ability to process both rigid and malleable materials like Stratasys’ DraftGrey and SUP711 resins, only strengthens its credentials as a serious production tool.
While upfront cost may be a turnoff to some would-be adopters, it should be noted that Stratasys offers quotes to each customer individually. So it could be worth reaching out directly. The firm has also built a range of machines like the Stratasys J750, which is said to be brilliant for medical use cases. As a result, it can be said that if you need a high-resolution resin 3D printer the Objet30 is great, but you’re not going to be short of options.
How about large-format 3D printing?
FFF/FDM
UltiMaker Method XL
$13,999 (approx.)
If you’re looking to address larger, industrial-scale applications, UltiMaker may have just launched the perfect solution. Featuring a 305 x 305 x 320 mm build volume, the new Method XL allows users to take on more ambitious projects in prototyping or end-production.
The system also comes with a heated chamber and build plate, which protect against warping, deformities, and layer adhesion issues when 3D printing ABS – a popular material among engineers. By introducing these kinds of upgrades, UltiMaker is pitting the Method XL against more capable, higher end machines and this is reflected in a loftier price.
That said, as it falls between the personal and professional-grade system categories, it may offer the perfect way for hobbyists and education users to scale their project ambitions.
Builder Extreme 1500 PRO
$24,900 (approx.)
Willing to invest more for an even larger 3D printing capacity? The 1100 x 500 x 820 mm build volume, dual extruder Builder Extreme 1500 PRO could be ideal.
With a heated build plate and print speed of 500 mm per second, the machine’s specs are off the chart compared to many cheaper filament-based rivals. As such, the 1500 PRO is better suited to large-scale prototyping, where pace can help bring products to market faster.
Nearly $25,000 may sound expensive to desktop users, but that’s actually quite competitive for a large-format device. The likes of BigRep and Photocentric charge similar amounts for similarly-sized entry-level 3D printers, so it’s in the right ballpark.
Shipping with the Simplify3D slicer, three nozzles, and a maintenance kit, the 1500 PRO also comes well-equipped, so it’s hard not to recommend… if you’ve got the budget for it.