Update August 2017
The 2016 model of the Sprout has been replaced by a new model: the HP Sprout Pro G2.
Naturally, 3D Scan Expert has you covered with an in-depth, hands-on Review!
3D scanning is getting increasingly popular, and affordable. This not only leads to lots of new 3D scanning hardware you can connect to a computer or tablet, but also integrating it into these devices. There have been quite a few manufacturers that have build Intel RealSense depth sensors into laptops and tablets, but HP has taken a different approach. The company that “reinvents everything” has build a all-in-one desktop computer, that has a bit more emphasis on all.
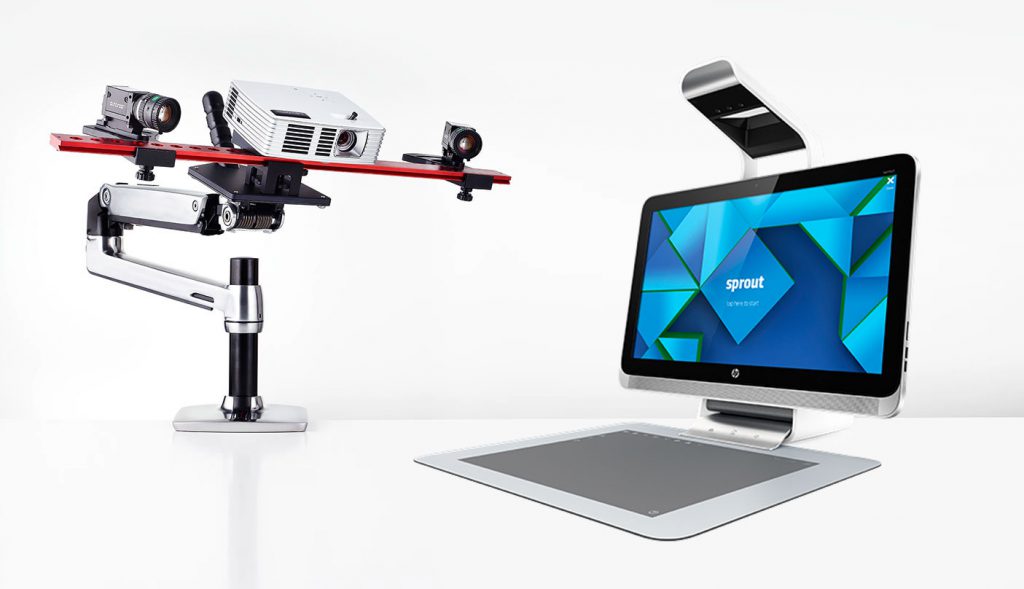
The Sprout by HP, as it’s called, not only has all the computer’s hardware inside the 23.6 inch touchscreen, but also has an integrated Sprout Illuminator. This overhead device houses a digital camera, Intel RealSense 3D Camera, a reading lamp and a DLP projector. The latter projects a second screen down onto the TouchMat a pressure-sensitive placemat that can be operated with fingers as well as the included stylus.
The Sprout comes with many applications that are specifically designed to use the TouchMat. It contains all kinds of creative apps that let you draw, make music and even stop-motion animations. It also comes with many educational apps. Some of them even use Augmented Reality (AR) to overlay virtual information on top of printed classroom materials.
I am, however, not going to talk about any of these features. There are many reviews online that do this already. In this review I’m just going to test the Sprout’s 3D scanning capabilities. But I’ll go quite a lot deeper into this than any other review out there.
My review hardware was kindly provided by Dutch Sprout Reseller De Rekenwinkel, which even made a dedicated website for the machine.
Hardware
Originally launched in November 2014, the Sprout was updated in January 2016 and relabelled Sprout Pro. I’m testing that version with a 6th Generation 3.4 Ghz, Intel Core i7 processor, 8 GB of RAM and an Nvidia GeForce GT 945A graphics card. It’s a powerful machine — possibly even a bit overpowered for educational purposes. Prices vary, but you should count on spending a little over € 2500 (ex. VAT) for this machine. I’m testing it with the optional 3D Capture Stage accessory, which costs € 300 (ex. VAT).
I discovered something about the Sprout’s RealSense that might surprise you
HP has done a great job of making this computer look stylish. True, it looks like an iMac but that’s not a bad thing. At over 15 kg (33 lb) it’s almost three times heavier than an iMac, but that’s for the better considering it has a touch screen — and is intended to be used in class rooms. The resolution of that touch screen is “just” 1920 x 1080 pixels, but I think that’s enough for educational purposes. More importantly, it has a great viewing angle — both horizontally and vertically — so you can use it with groups.
Now, let’s take a look at that Illuminator. It’s good to realize that the HP DLP Projector is housed at the back of the computer, beaming upwards.
The projected image is reflected downwards by a mirror in the overhead unit. The resolution of this projection is 1024 x 768 pixels, which seemed enough for most dedicated apps. The projection is very bright, which I found a bit annoying at times, especially in a dim-lit room. There’s also a difference in color temperature between the projection and de build-in display. It would have been nice if these two were more closely matched.
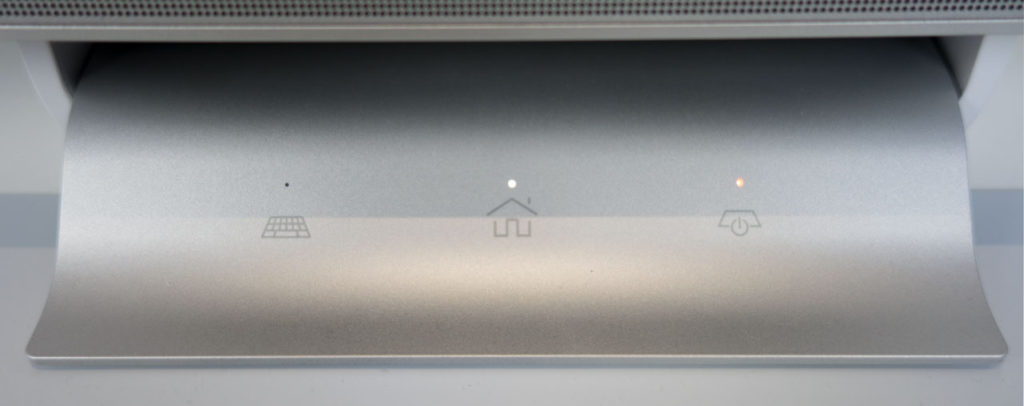
The projector is on by default, but you can turn it off by long-pressing the TouchMat button underneath the screen (single-pressing just disables the TouchMat). The button on the left toggles an on-screen keyboard, but a physical wireless keyboard is also supplied.
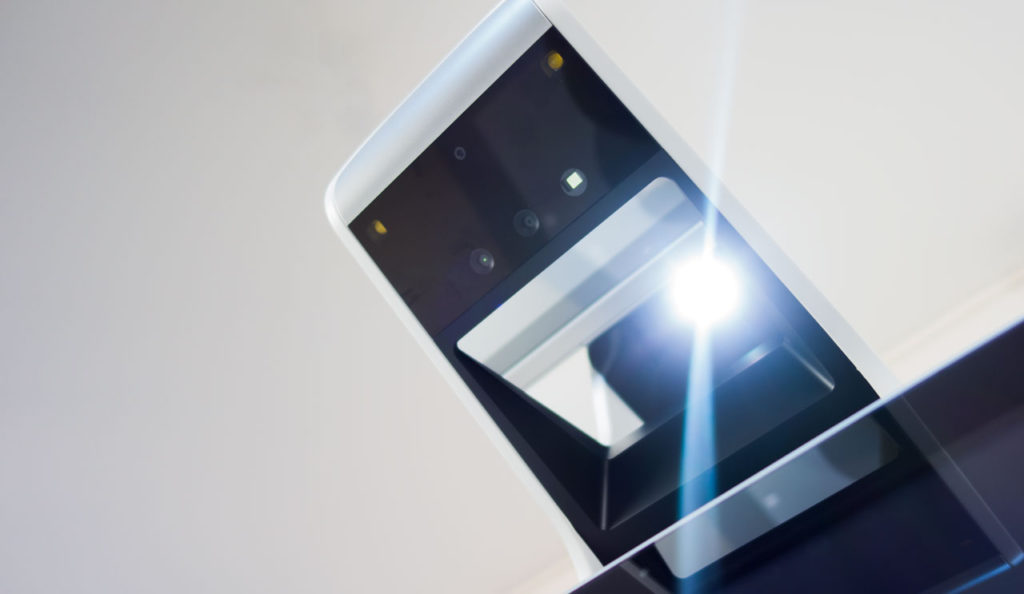
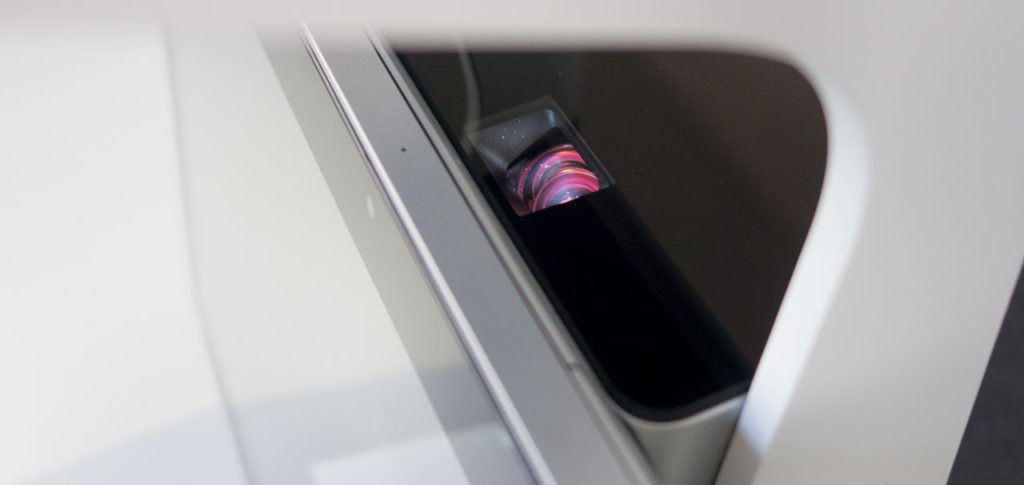
Starting at the top top left, you see the high-res (14.6 megapixels) digital camera in the center and two white LEDs in the corners that can me used as a reading lamp.
The next array is the Intel RealSense 3D Camera. Manufacturers are somehow always a bit secretive about the specifics of this device, but I can tell you that it’s a RealSense F200—a first-generation sensor that has recently been succeeded by the SR300. I reviewed the RealSense F200 earlier in the form of a handheld 3D scanner. Teaser: I discovered something about the Sprout’s RealSense that might surprise you — more about that later.
Then there’s the mirror and in the bottom right corner (above the screen) is a 1 megapixel webcam.
Making “3D Snapshots”
HP has put a lot of effort on making a dedicated user interface (UI) for the Sprout. It somewhat resembles a tablet and allows users to start everything through touch. I almost never used the supplied wireless mouse and never used the stylus.

Like I wrote earlier, almost all included (and downloadable) apps are specifically designed (or adapted) to work with the projected second screen and the TouchMat. When not in used for applications, the projections serves as a handy app launcher.

When starting the 3D Capture application, there’s one choice to make:
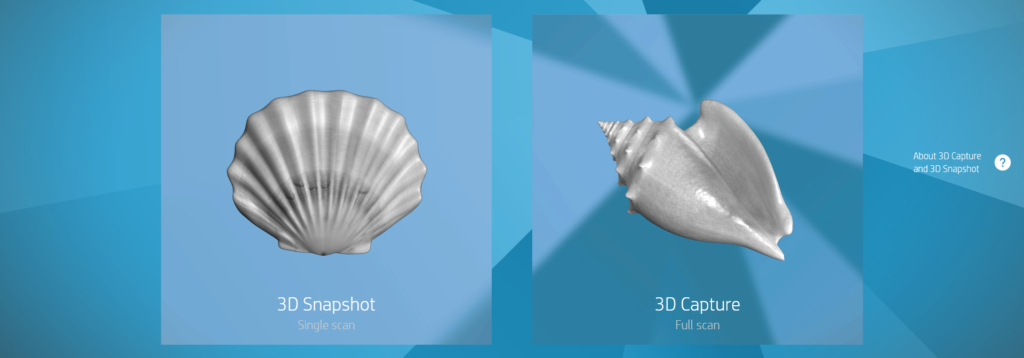
The 3D Snapshot is quick, single scan. You can put anything on the TouchMat that fits within the projected area to make a 3D scan of the part thats facing upwards. But before you do, it will make a Background Scan without anything on it.
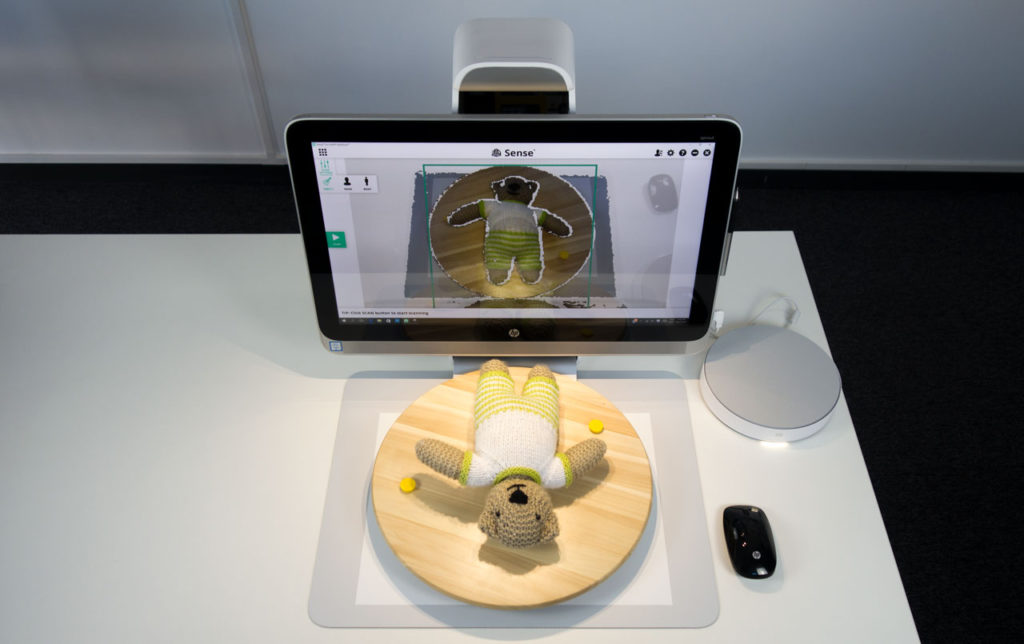
As usual, Teddy was my first test subject because I can compare the result with that of all other 3D Scanners I’ve reviewed so far.

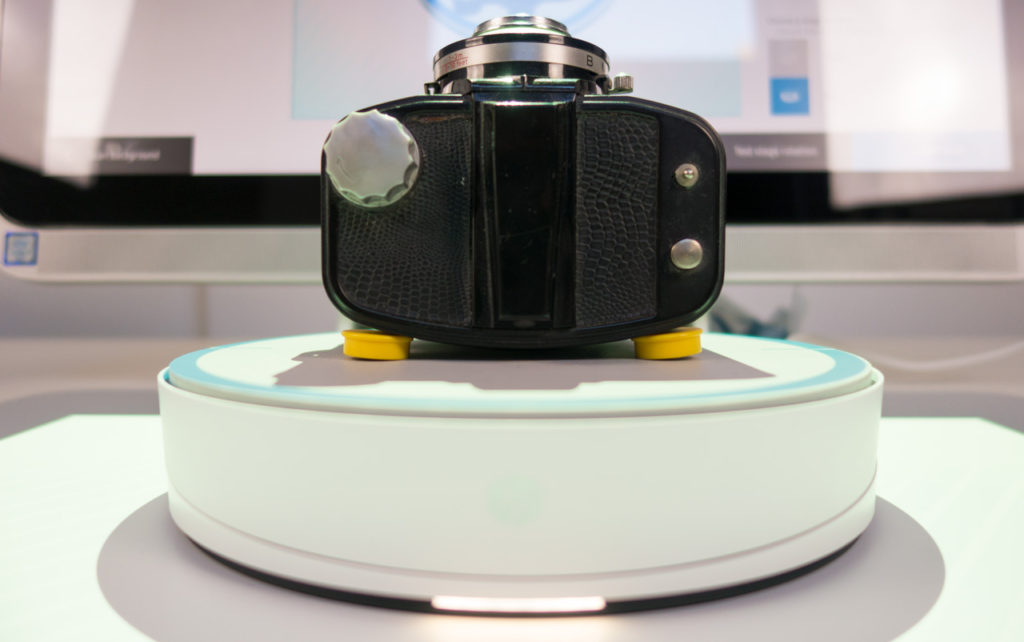
If you have any knowledge of 3D scanning, your reaction to the photo above might be the same as mine: Visible structured light? I thought it uses an Intel RealSense?
According to HP’s product website, the Sprout indeed has an “Intel® RealSense™ 3D Camera for instant capture of 2D and 3D objects”. But in fact, it doesn’t use the RealSense at all for 3D scanning. I put a piece of tape over the sensors to be sure, and my tests worked fine. This is actually positive, because the 3D capturing technique used by the Sprout delivers better scans than a RealSense F200 can make. To illustrate this, I’ve made a scan of Teddy with the RealSense (through a workaround) near the end this post.
It doesn’t use the RealSense at all for 3D Scanning
The technique that is used is Structured Light Scanning, projecting a visible array of line patterns with the beamer and recording it with the down-facing camera. Similar to the EinScan-S and EinScan-Pro I tested earlier. Here’s a video of the actual scanning process of Teddy in Snapshot mode. It’s indeed pretty snappy: takes a few seconds to capture and another few seconds to turn the scan data into a 3D mesh.
Next, the result is projected onto the TouchMat (shown below as a screenshot). You can’t do a lot here. You can delete unwanted geometry that’s not connected to the main mesh (through the planet-like icon on the left), but you can’t delete parts that are connected. You can apply funky textures and colors to the scan, which might be awesome for first graders, but I rather have the original texture. More about textures — and their quality — later.
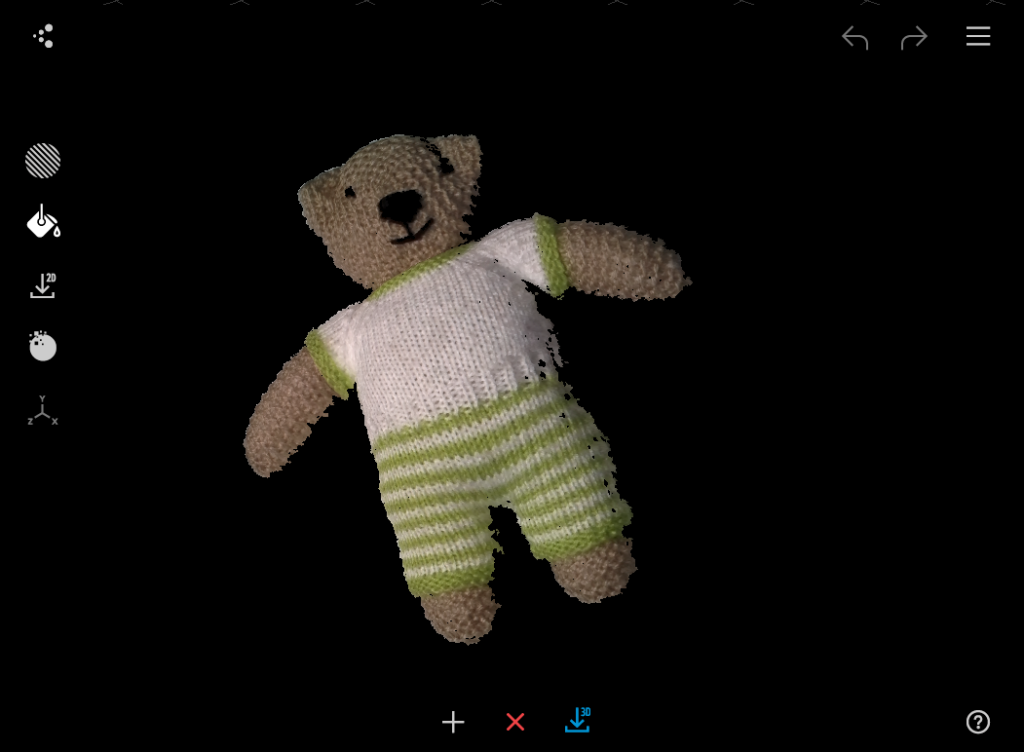
On the bottom of the screenshot, you can tap the 3D button to save the model to the Sprout’s library. But you can also export it via the menu in the top right corner. The only option is an .OBJ model file with textures in PNG format. But that’s my favorite, because it offers the best compatibility with other 3D software and give you easy access to the texture map.
It’s noteworthy that in Snapshot mode, you don’t get any options for making the mesh water tight (usually called a manifold mesh). The back is totally open now. I would have liked an option that adds the back as a simple plane (it knows it’s there, because it scanned the background) and fill the remaining small holes.
Here’s the unedited result of the 3D Snapshot of Teddy:
If you put the Sketchfab embed above in MatCap rendering mode (via the gear icon in the bottom right corner) you can see that the amount of geometric detail is very good. You can clearly see the different knitting patterns. The exceptions are the black parts like the nose and eyes. As with other Structured Light 3D scanners, dark areas are problematic. The same is true for glossy or transparent objects, which are impossible to scan.
The amount of geometric detail is very good
The texture of a 3D Snapshot is simply the photo it took with the down-facing camera, but as you can see in the unedited texture map here, is downscaled to 1612 x 1460 pixels (2.3 megapixels). This isn’t particularly bad for a scan of this physical size, but it would have been great if the software also saved the full-resolution photo as well.
I was also curious if it’s possible to take a 3D selfie with the Sprout by laying down with my head on the Touch Mat. And it turnes out this is possible in Snapshot mode:
This is probably something that will be done a lot in classrooms (and offices alike) but if you plan on doing this please note the epilepsy warning on the Sprout’s splash screen. The result isn’t bad, but somehow the projected lines are visible in the geometry.
Making Full 3D Captures
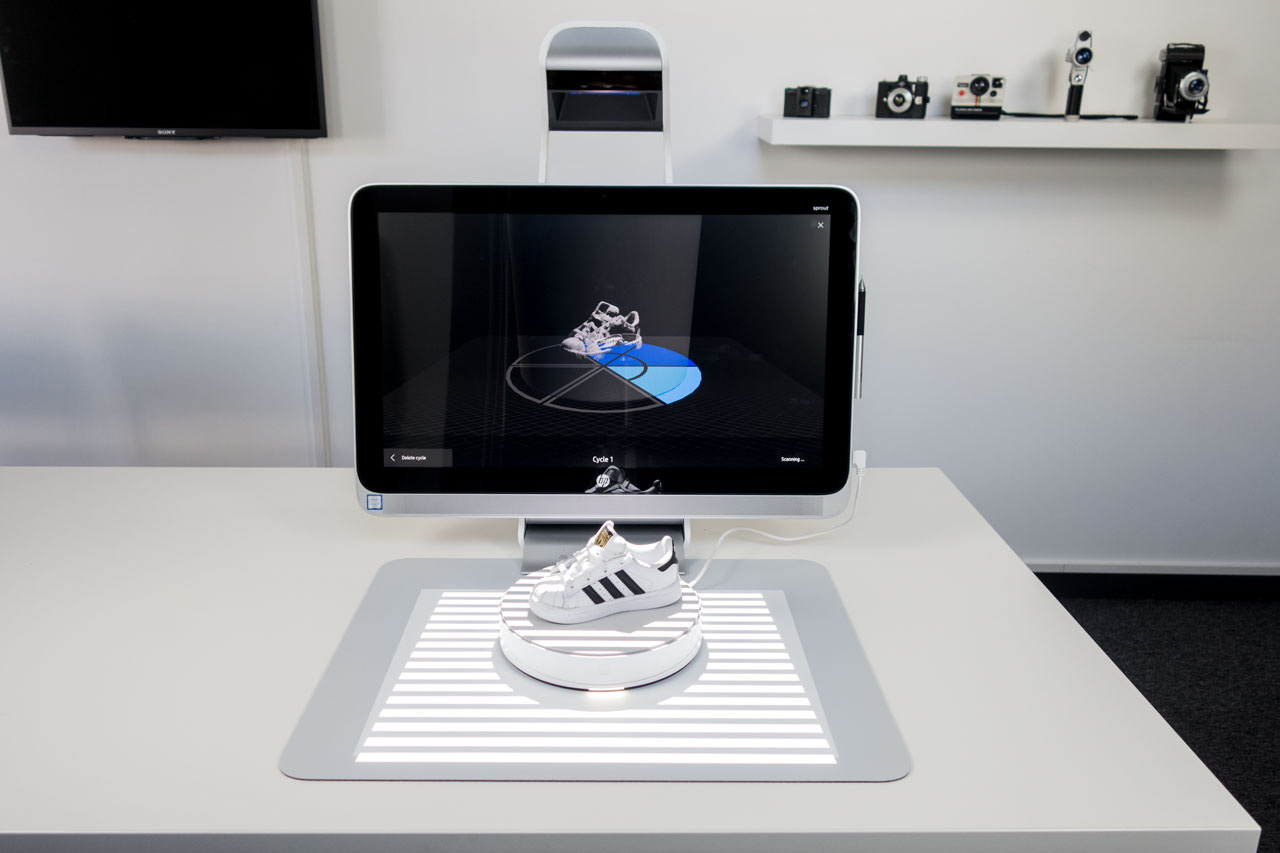
While making 3D Snapshot is quick and easy, the uses of the result are limited. Luckily, the Sprout can also make full 360° 3D scans. For this, you have two options: Manual Scan and Automatic Scan. The latter requires the optional 3D Capture Stage but let’s start with the former that — like the word implies — requires you to rotate your object manually.
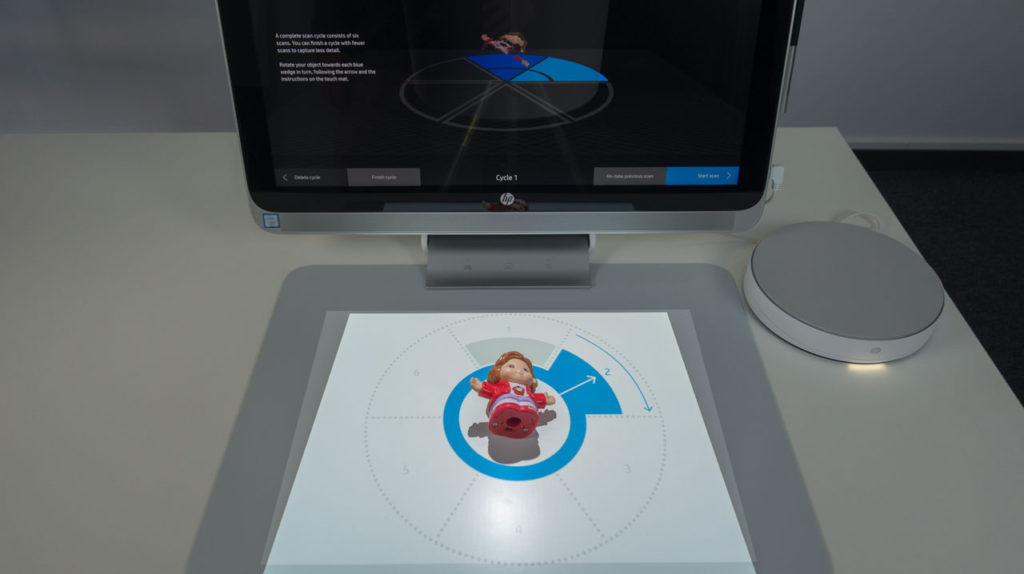
Again, this procedure shows how much HP cares about user interface design. Plus, it is a perfect example of how useful the projector is in guiding the user through the process. This process works by scanning “cycles”, each containing 6 scans from different angles. As you can see in the photo above, the projection shows you exactly what to do and the normal screen shows a preview of what has been scanned.
3D capturing works good this way, but I recommend the Capture Stage if you plan to integrate 3D scanning into the classroom, because you can simply walk away while the computer does its thing. And it does it faster and more precise than a human can. The placement of the Capture Stage is clearly guided with projections.
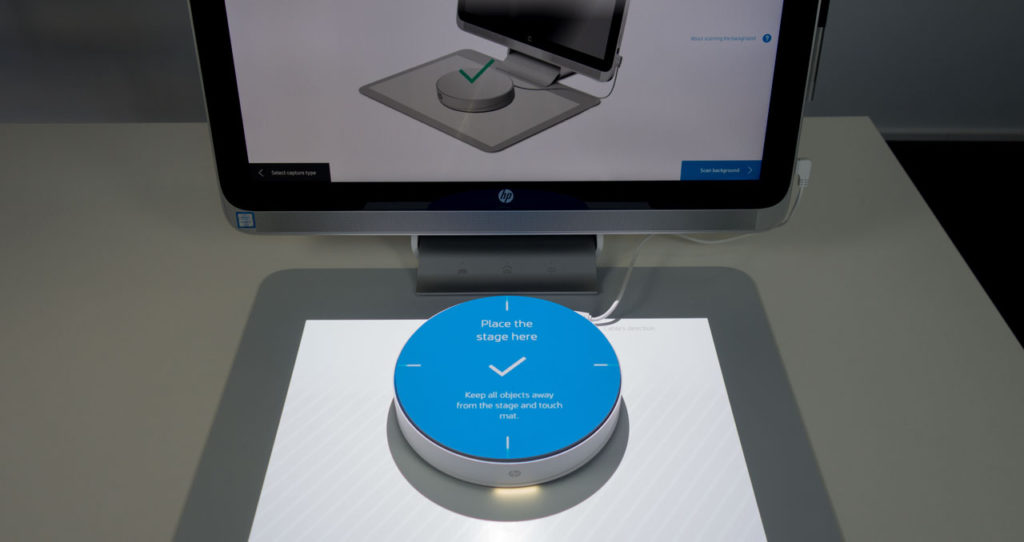
Although many desktop 3D scanners use visible structured light technology, the Sprout is different because it scans from above instead of from the side like every other scanner does. Basically, this is not ideal because most objects can only stand perfectly stable on their bottom surface. The Illuminator has a slight angle, but you’re still looking at your object top-down.
I recommend the Capture Stage if you plan to integrate 3D scanning into the classroom
To compensate for this, HP’s 3D Capture Stage can do a very clever trick by tilting the top half so objects stands under an angle:

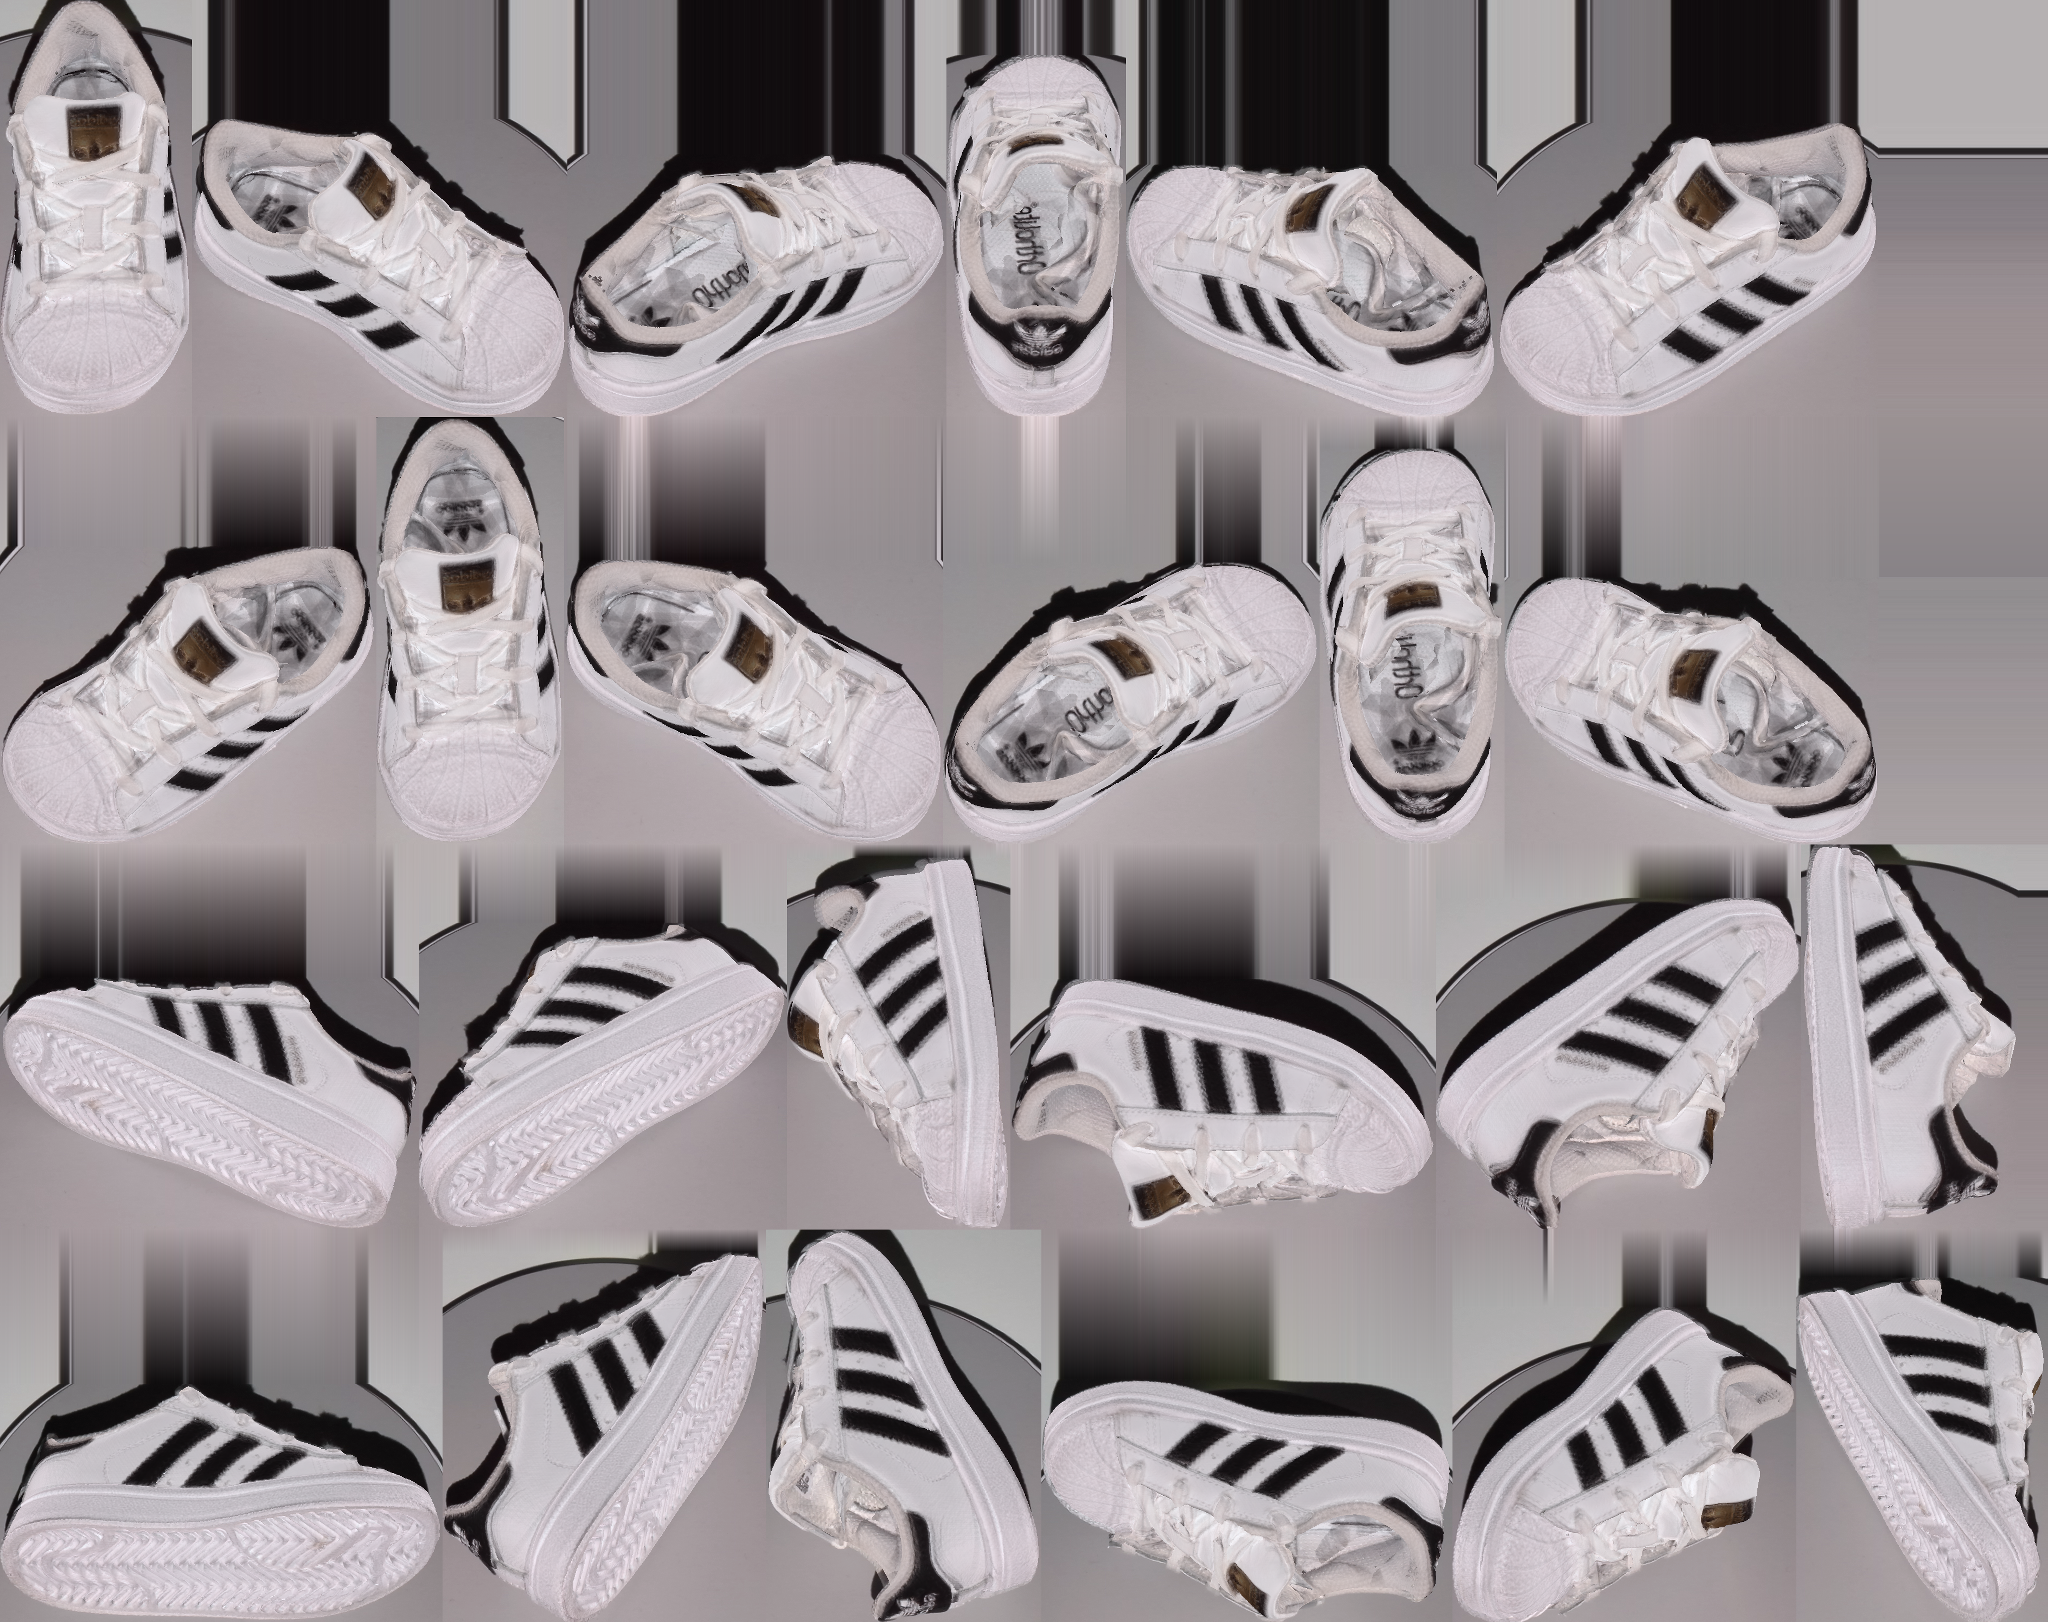
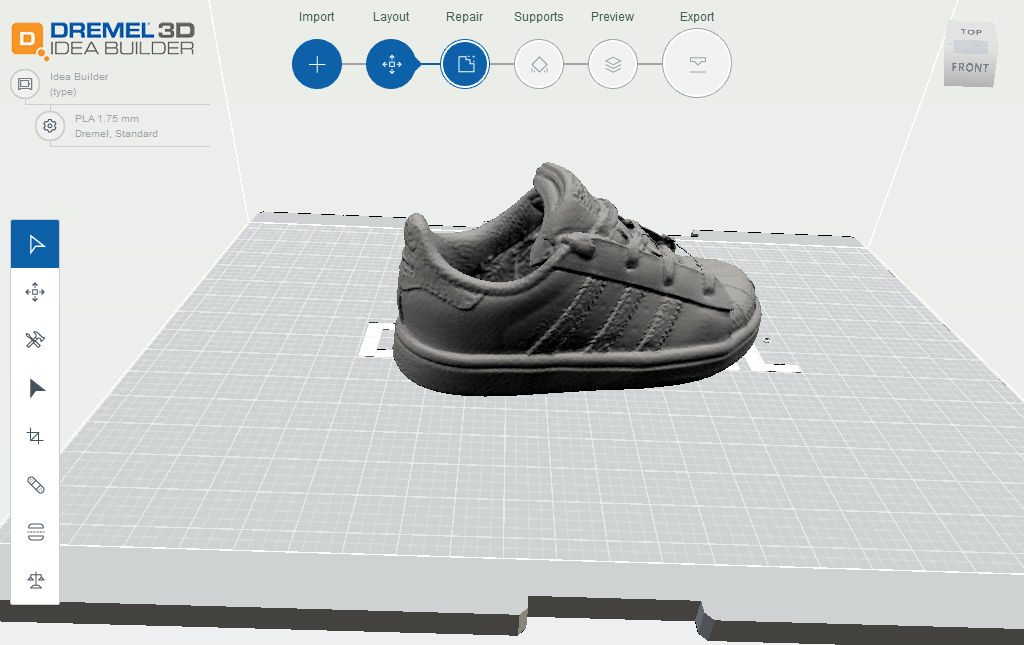
This tilted mode, combined with the angle of the Illuminator, still doesn’t give a straight-on side view, but it helps a lot. Plus you can choose the orientation in-between cycles, so you can do one cycle flat and the other tilted. This allowed me to scan the inside of the sneaker above.
The top of the Capture Stage is rubberized but keep in mind that the angle in tilted mode is pretty steep and not all object will stay upright this way, especially because the plate also rotates. HP advises to use removable adhesive gum to make objects stick better, but I also discovered that the plate contains enough metal to stick white board magnets onto it. This way I could lay rounded objects sideways and prevent them from wobbling.
Automatic Fusing
Scanning a single cycle is straightforward and fool proof and all 6 segments — which are basically separate scans — are almost always combined (a process known as stitching or fusing) perfectly.
Unfortunately this is not always true for fusing multiple cycles, something that is required to make a full 360° scan of most objects. The fusing process is fully automated and based on algorithms that search for overlapping parts of geometry to guess how different cycles should be combined. The result is shown in-between so you can decide if it’s good. But if it’s not, you can’t do anything about it.
It would be helpful if HP would add some form of manual control over this process.
Here are some examples. First the camera you see above (which was captured relatively well, even though its black). I tried a cycle standing upwards and one laying on it’s back. But the differences are probably to big for the software to understand how it should fit together.
I also tried to scan Teddy’s front and back. I do understand that it failed to stitch them together at my first attempt, because the front and back are almost identical (minus his face, of course). So I jammed a pencil into his side (sorry, fans!) hoping to give him a clear left and right side, but again the front and back cycles were fused facing the same direction.

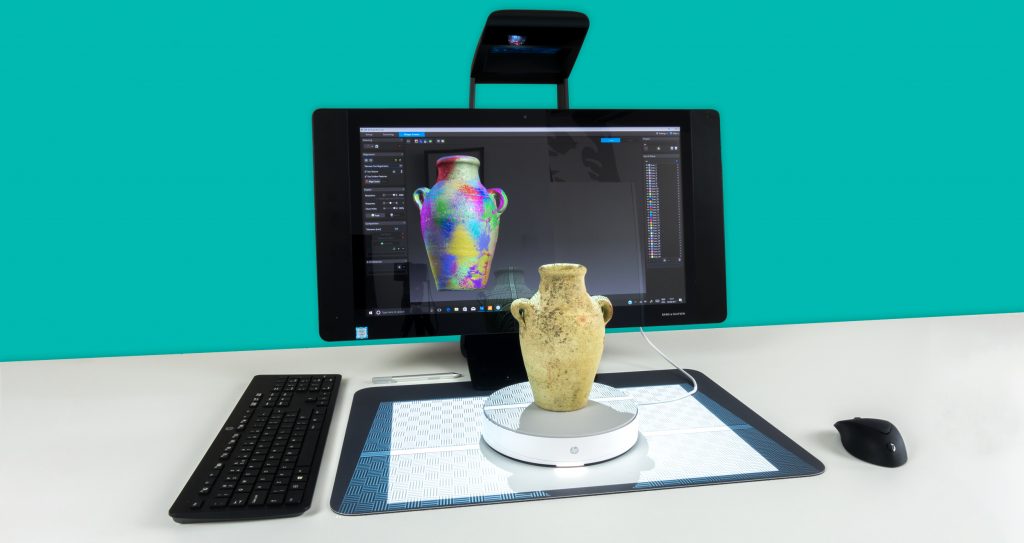
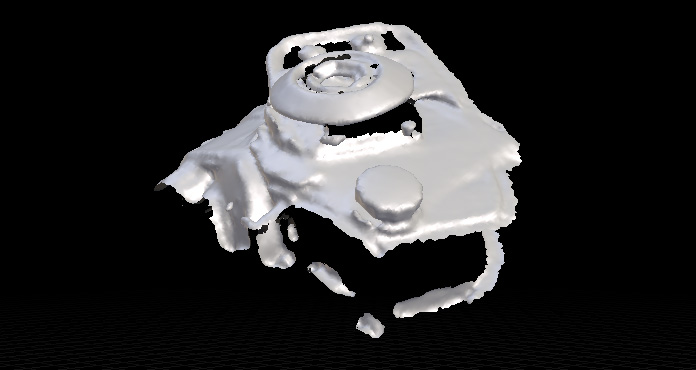
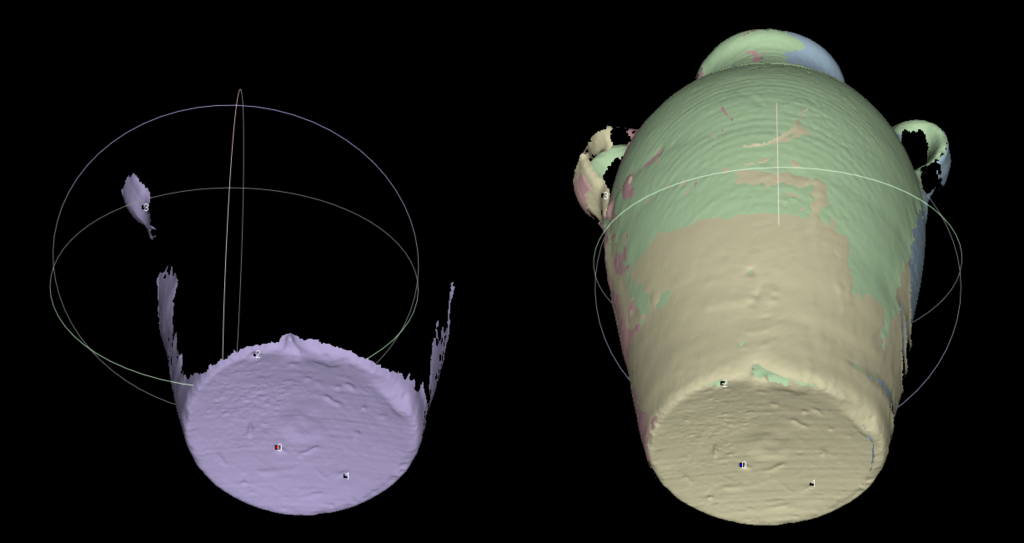
And when I tried t0 scan an Old Jar the software also didn’t realize that I was trying to combine a top-facing and bottom-facing scan.
Truth be told, it’s nearly impossible for computers to combine scans like this automatically. The technique used here is called an ICP (Iterative Closest Point) algorithm that searches for matching patterns in the geometry. But that requires quite a lot of overlap to function correctly. And it’s impossible to make scans with only slight variations in angle to accommodate this.
It would be helpful if HP would add some form of manual control over this process. To illustrate this, I made 6 3D Snapshots (front, back, left, right, top, bottom) of the Old Jar with the Sprout and loaded them into the open source (free) application MeshLab and aligned the different sections with it’s excellent Align Tool:
Automatic Hole Filling & Geometric Detail
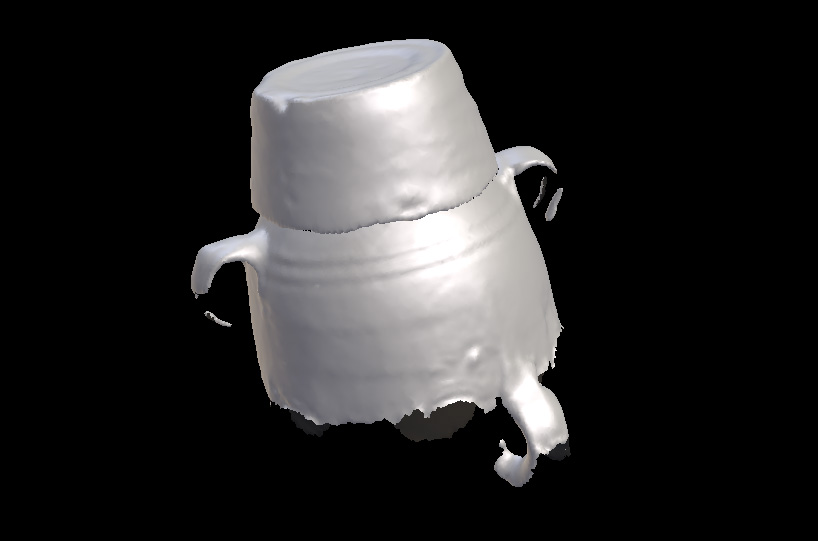
Opposite to making 3D Snapshots, the Sprout software does offer automatic hole filling in 3D Capture mode. It does a good job filling small holes and even does a decent job on parts with larger holes. Below is a single-cycle capture of the Old Jar with hole filling turned on:
I scanned it with the top facing the scanner, so the software has to fill up the bottom part, which had very sparse geometry, and the bottom side of the handles. It did a very good job at this and even succeeded in coloring the newly added geometry with matching colors.
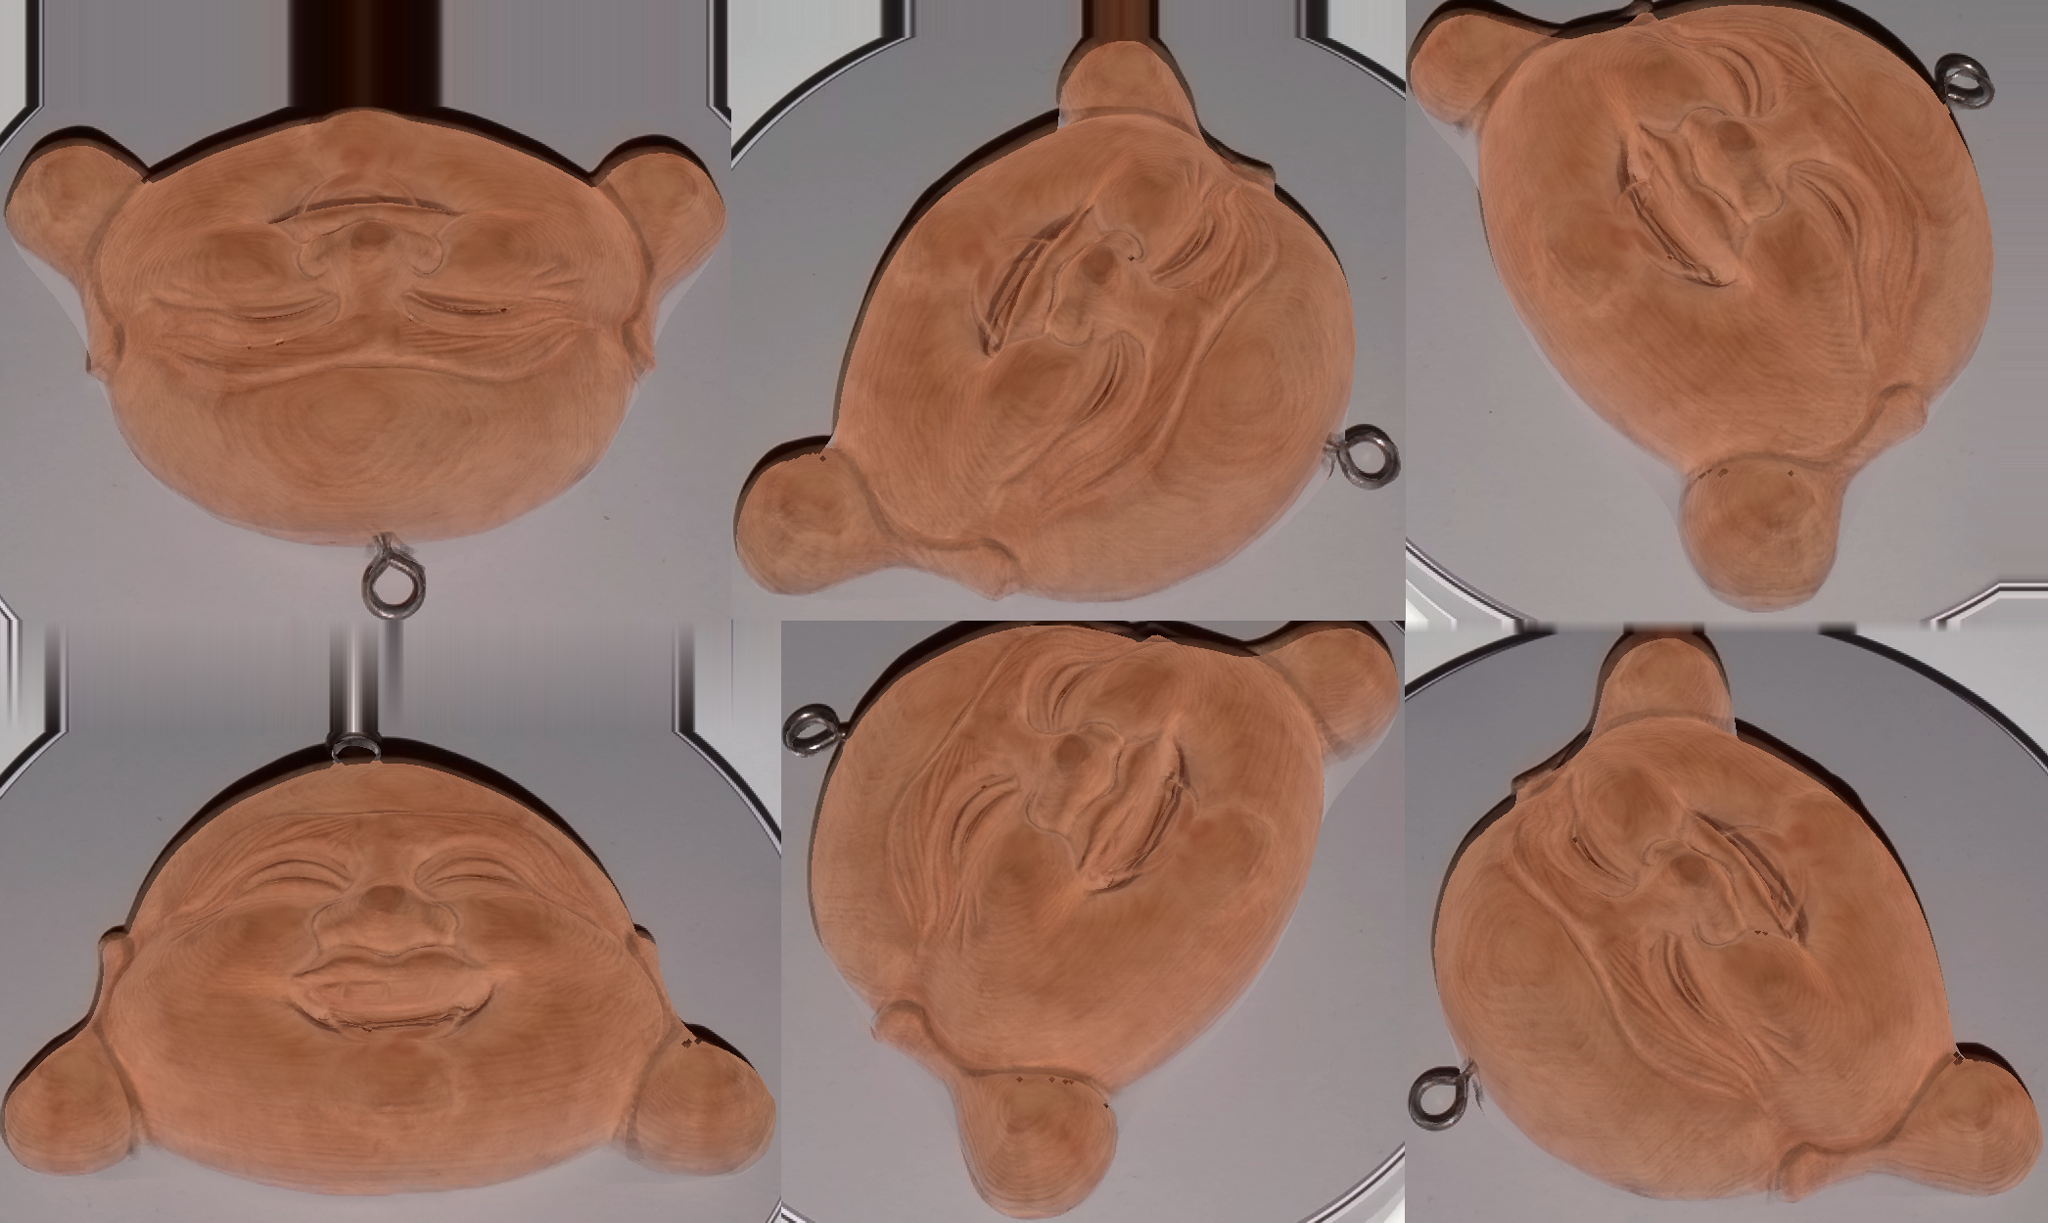
But as you can see the bottom of the jar isn’t flat. This problem gets more intense when you want to fill objects with a larger, more complex footprint, that have flat bottoms. To illustrate this, I scanned this wooden Buddha hanger. Here’s what the software does when you want to fill the floor plane:
Not very handy if you want to 3D print this scan. And since this scan was made with a single, tilted cycle, the software knows exactly where the floor plane is.
That said, the geometric detail the Sprout captures is impressive:
For comparison, here’s the same object scanned for my Fuel3D Scanify Review:
The Sprout’s scan has twice the polycount (671.400 vs 325.700). Both scans are detailed, but that from the single-snap Scanify is quite shallow when it comes to deeper details like the wrinkle above the eyes.
The geometric detail the Sprout captures is impressive
Luckily, HP’s stitching algorithms isn’t always wrong. And if it works you can simply scan the bottom of an object to solve the hole filling problem. It works a lot better on objects with a lot of specific geometric details (the algorithm doesn’t use the texture information).
The sneaker above was scanned in 4 segments (top, bottom, left, right) which were fused together perfectly. It has 1.4 million polygons and if you put the embed in MatCap render mode you can see that the Sprout has captured a lot of geometric detail.
However, if you compare it to the scan below I made with the EinScan-S — which uses a similar pattern-based structured light scanning technique — you’ll notice that that one contains more details and less geometric noise.
The original EinScan-S model had a polycount of 7.2 million which I had to reduce to 1.8 M to upload on Sketchfab. The Einscan-S projector has a resolution of just 800 x 600 vs. the Sprout’s 1024 x 768, but it uses two monochrome cameras instead of one color camera to register the patterns.
Here’s the toy figure. Again, please put it in MatCap render mode to judge the geometry. I’ll go into the texture quality in a second.
The Sprout’s capture has 432.400 polygons, while the same toy scanned with the EinScan-S has 3.9 million (the embed below is not decimated) — that’s 10 times more. But keep in mind that the EinScan-S alone costs about € 1.000 (ex. VAT).
Texture Quality
If you look at the Sprout models above you might notice that the color textures aren’t very sharp. I found this surprising, because they’re captured with a 14.6 megapixel camera. I can understand that some downscaling has to take place to prevent enormous texture maps but the Sprout’s textures are generated in an unusual way:
The texture map simply consists of a collage of all the photos. And the image above has a total size of 2048 x 1622 pixels (click image for full resolution, unedited). So it’s less than 2K and this can never result in a sharp texture because it’s the least efficient way of texture mapping possible.
it’s the least efficient way of texture mapping possible
I discovered that the width of the texture maps is always fixed at 2048 pixels, but the tiles will simply get smaller when more photos are taken. So doing more cycles means worse textures. Below is the texture map of the Buddha hanger I showed earlier, which was done with a single cycle.
Scanning with the RealSense 3D Camera
Like I said in the introduction, there’s a huge misunderstanding online about the integrated RealSense F200 sensor. But while it’s not used for scanning with HP’s application, it is possible to do this by installing RealSense-compatible scanning software. One good example is the Sense for RealSense software which I tested as part of my XYZ Scanner / RealSense F200 Review.
The 3D Capture Stage doesn’t work with the Sense software, so I put Teddy on my trusted IKEA SNUDDA turntable (you can read more about that in this post with general 3D scanning tips). The desk lamp feature (enabled by disabling the projector and then touching the metal part on front of the Illuminator) came in very handy for this.
I put the results of the RealSense scan beside that of a 3D Snapshot and a 3D Capture made with HP’s solution, but you can also check the 1-on-1 output of the Sense software in 3D here.
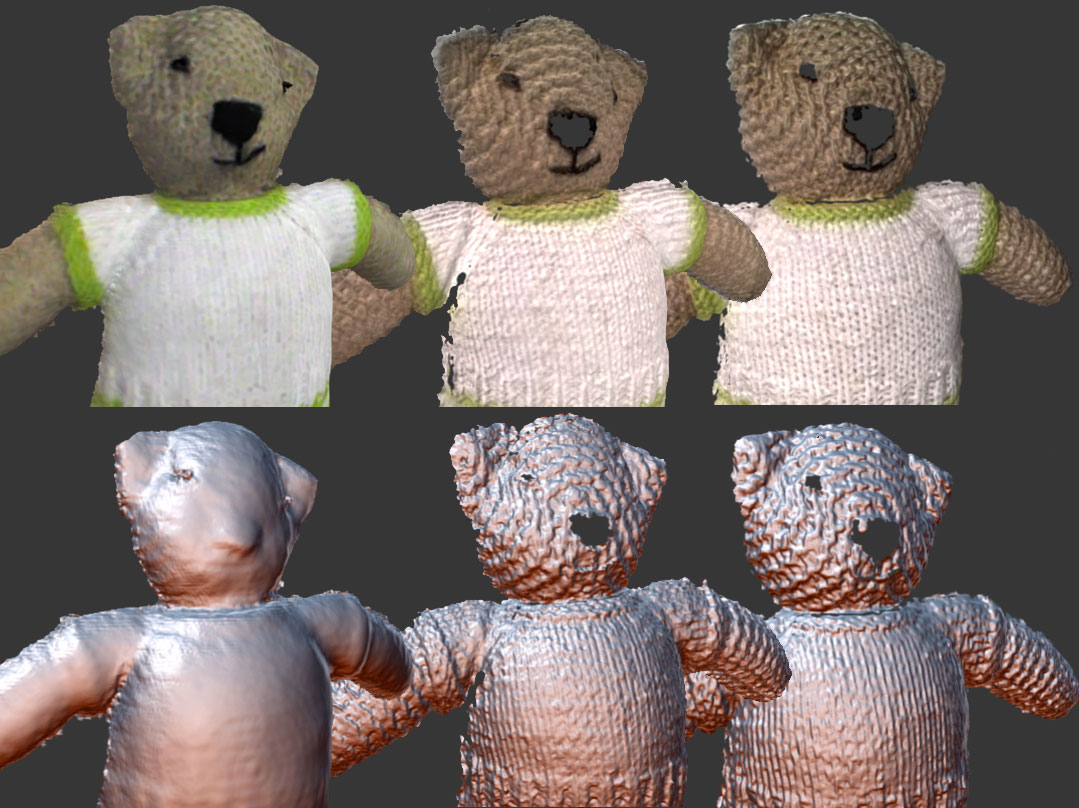
As you can see the RealSense capture has a lot less details than the two scans made with visible structured light and HP’s dedicated Sprout 3D Capture software. To quantify: the RealSense model has 311.600 and the HP 3D Capture has 783.700 polygons. And even though the HP textures are made out of downscaled photos, the result is still better than those taken with the RealSense F200’s color camera.
Sharing, Editing & 3D Printing
I’ve been building a nice library of 3D Captures for this Review:
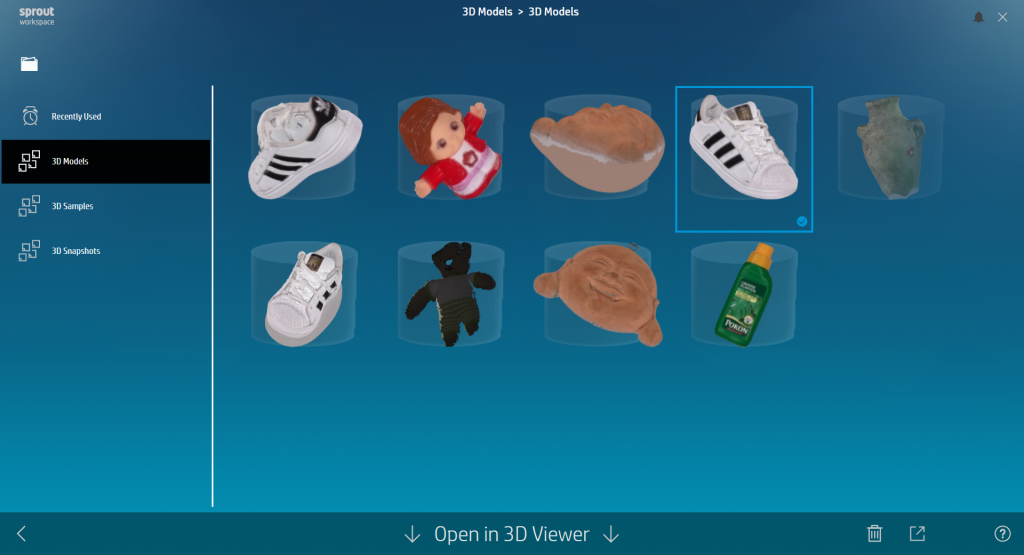
As you can see the Sprout interface does a decent job of archiving and presenting captures. But what are you going to do with them?
You can export them directly to an .OBJ file like I wrote before, but that’s it. There’s no button to share them online easily. Of course, you can manually upload them to Sketchfab to view and easily share the capture in 3D online, on social media and in VR (How? Check this Tutorial) but it would have been easier if sharing was an integrated feature.
You also can’t send a 3D capture to any of the included apps, which makes me wonder what’s the point of the nicely designed Sprout launcher. The Sprout is a full Windows 10 PC, so you can install any 3D editing software on it that you want. But there’s also an integrated app store that let’s you install Sprout-optimized apps that make use of the TouchMat.
The current software included with the Sprout doesn’t let you do anything with your 3D captures except 3D print them one-on-one
There are a few 3D-centered apps, including Autodesk Sculpt+ that let’s you make digital sculptures using the included Stylus. Unfortunately, this app can’t import 3D models so there’s no way to use a 3D scan as a base model for a new sculpting project.
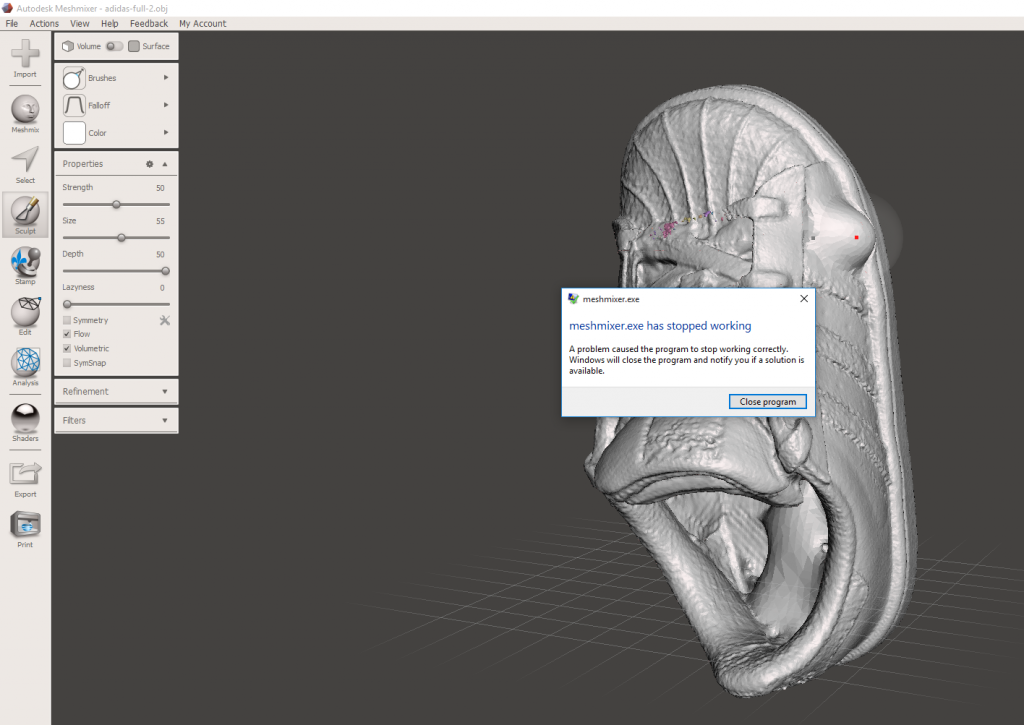
Also included is Autodesk MeshMixer. This is quite useful 3D editing software that is mainly used to prepare models for 3D printing. But is has no texture map support and is not optimized for the Sprout’s TouchMat. It does have sculpting functionality, but that couldn’t cope with the extremely detailed polygon mesh of a Sprout 3D scan.
Since HP clearly has a deal with Autodesk it would be more useful to include an TouchMat-optimized (and maybe simplified) version of the Mudbox sculpting software (which is free for educational purposes, by the way) that does allow importing & editing 3D scans.
It’s clear that HP’s focus with the 3D Capture feature is mainly to scan models and 3D print them. The Sprout is promoted in combination with the Dremel Dream Builder 3D Printer and comes with Autodesk Print Studio. This software can be used to prepare 3D scans for 3D printing and does a decent job of automatically repairing models if needed. But although the interface itself (shown below) is projected on the TouchMat, it’s really designed to be used with a mouse on a phyical screen. The low resolution of the projected screen didn’t play well with the small typography of this software.
Ultimately, the current software included with the Sprout doesn’t let you do anything with your 3D captures except 3D print them one-on-one. This makes the aforementioned problems with hole-filling extra problematic.
Not integrating AR, VR or even online sharing in general is truly a missed opportunity
Imagine a one-click export to Aurasma, online software solution — owned by… HP! — that let’s you create Pokémon GO-like mobile Augmented Reality (AR) experiences by projecting 3D scans onto physical objects. I made a step-by-step tutorial for this, which makes clear that as stand now, it’s way too complex for students. Simply integrating the Sprout with Aurasma (or even letting the scanner application export to the required 3D file format) would offer so much more versatility — and fun — with 3D captures inside and outside the classroom.
Not integrating AR, VR or even online sharing in general is truly a missed opportunity in my opinion, especially if you own solutions that can do this in an awesome way.
Verdict
With the Sprout Pro, HP has taken the concept of the all-in-one PC to the next level, but it needs better, smarter 3D software and sharing features to make its 3D capture capabilities more useful and fun.
Let’s start with the fact that nobody will buy the HP Sprout Pro just for 3D scanning. It’s simply part of the many things you can do with it. And both the camera and projector are used for all kinds of things. That’s makes it impossible to say anything about price vs. quality of 3D scanning alone—so I won’t. I’d like to see it the other way around: if you buy this computer, you also get a structured light 3D scanner that will cost at least € 1000 separately.
Looking purely at its 3D scanning capabilities, the Sprout proves that it’s possible to create 3D capturing hardware and software that looks good and is easy to use for everyone. That’s great news for classrooms, but the downside is that the 3D capturing software offers no real control over the process. A cycle is always build from 6 separate scans and fusing cycles is a fully automated process that only works with very distinct geometric shapes. It would be great if future versions would let the user help the algorithm—this would be very educational as well, in my opinion.
I’m happy that the Sprout uses the projector and camera for 3D capturing using visible structured light, instead of using the (somewhat dated) built-in RealSense F200 3D camera. This results in significantly better geometric details. The geometry does contain some noise compared to dedicated structured light scanners, but overall it’s impressive.
Unfortunately, the high geometric quality is counteracted by low-quality textures. This is a pity if you want to do anything with the scan beyond single-colored 3D printing and greatly limits the general usability of the 3D models. The Sprout has a 14.6 megapixel camera, so it’s technically capable of beating a lot of other 3D scanners when it comes to texture quality. The Sprout’s 3D capture app just needs a smarter texture-mapping technique.
The 3D Capture Stage is a nicely designed device and the tilted mode cleverly optimizes the scanning angle. If you plan on getting a Sprout and using it for 3D scanning often, I would totally get the Capture Stage too. However, for many everyday objects even the tilted angle is still too top-down for a full 360° scan in one or two cycles.
Overall, the 3D capture software looks nice but relies too much on automation and is very basic feature-wise. That might be intentional, but in my opinion that wouldn’t match with the Pro label this 2016 version of the Sprout by HP has.
It truly boggles my creative mind that the included, TouchMat-optimized, software doesn’t let you do anything with the Sprout’s 3D captures except 3D print them. Especially considering the target audience of kids that are used (and should be encouraged!) to share anything they create digitally so they can inspire each other and collaborate on creative projects. There are so many sharing options for 3D models available today. Most of them, like Sketchfab, are free and one of them, Aurasma, is even owned by HP! How do we plan to inspire kids to think out of the box if we don’t do it ourselves?
All that being said, I totally see the potential of a product like this—especially for educational purposes. The core software for this machines is in constant development (it gives you a notification if there are updates) by HP and an increasing amount of third party developers seem to be making apps specifically for the Sprout. As with tablets and smartphones, tailored apps are what will drive the platform.
Hopefully someone will make powerful-but-easy-to-use 3D scanning and editing software specifically for this innovative system—it needs it! The hardware is all there, it just needs smarter software to get the most out of it. If the Sprout follows the same evolution as smartphones have had in the last decade, the future of classrooms looks awesome!
Personally, I think that 3D capturing isn’t the biggest USP of the Sprout. The machine has actually opened my eyes to how useful top-down projected interfaces are. It works great with touch input, but it’s also surprisingly useful to physically guide the user through otherwise complex processes. That’s actually a form of Augmented Reality, and that notion is what could make the Sprout disruptive for educational purposes. The best example for this is Origami Apprentice, but you can also learn to play piano easily.
Update 29 October 2016
If you have been following 3D scanning news, you might know that HP acquired 3D scanner manufacturer DAVID in June this year. It seems that the Sprout Pro will especially benefit from this, as software teams are currently adding the finishing touches on seamlessly integrating the DAVID 3D Scanners and DAVID 5 Software with the Sprout Pro.
This will mean that you can use professionalg-rade 3D Scanning software on the Sprout and choose if you want to use the integrated 3D Scanner and Capture Stage like I did in the review above, or a professional 3D scanner like the SLS-3 Stereo (pictured below) and the TT-1 Turntable.
In either scenario, you will get an improved workflow and better results. I’ve arranged the setup below, including the turntable to review soon so stay tuned!
I hope this review was useful for you. If you own a Sprout and have something to add (maybe because of later software updates), please let me know in the comments and I’ll consider it for an update.
If you want to be the first to know when similar posts are live, please follow me on Twitter, Facebook or Instagram. And if your think this article can be useful for your friends and followers I’ll appreciate it if you share it by clicking one of the social sharing buttons below!


Great write up! I was wondering if you could give me your recommendation if the HP Sprout would be good for scanning die cast car toys… hotwheels , matchbox etc. I read somewhere that it does not scan reflective or shiny objects well. I was looking for a way to scan 3d objects then export them as jpeg or png; can the HP Sprout do this? What would be the device to do this?
Lastly, what is the current status with Sprout? Is it going to be discontinued… No local retailers near me (boston, MA) has the HP Sprout in stock or demo. On HP’s store website they don’t even have the 3D capture stage available to order and Sprout pages have broken links. I’ve googled and checked out HP’s sprout forums, but its mostly bugs and problems… kind of hesitant to purchase this because of lack of support and usability (3rd party apps). Thank you in advance for any advice!
Would have love to see a picture of you scanning your head.. heh