Over the past two years, HP has been entering the 3D scanning market. They started by introducing the first generation Sprout Pro all-in-one computer with built-in structured light scanner (Review). Then, they acquired 3D scanner manufacturer DAVID and e-branded its SLS-3 as HP 3D Scanner Pro S3 (Review).
Then they combined everything and launched the Sprout Pro G2 (Review), an all-in one computer that featured both a structured light scanner with the ex-DAVID software and an Orbbec Astra S depth sensor with an interactive scanning method that let users scan objects by simply rotating them in mid-air.
Recently, HP has taken that concept apart again with the release of the HP Z Camera. This product features the same depth sensor and high-res color camera (so not the structured light DLP projector) as the Sprout Pro G2 but in the form as a separate add-on that can be attached to an existing computer screen.
Pricing
The Z Camera’s retail price is normally $599 but you can currently buy it on Amazon for less. Either way it makes this depth sensor-based 3D scanning solution more expensive competitors like the $434 3D Systems Sense 2 (Review) or the $379 Structure Sensor.
Unboxing
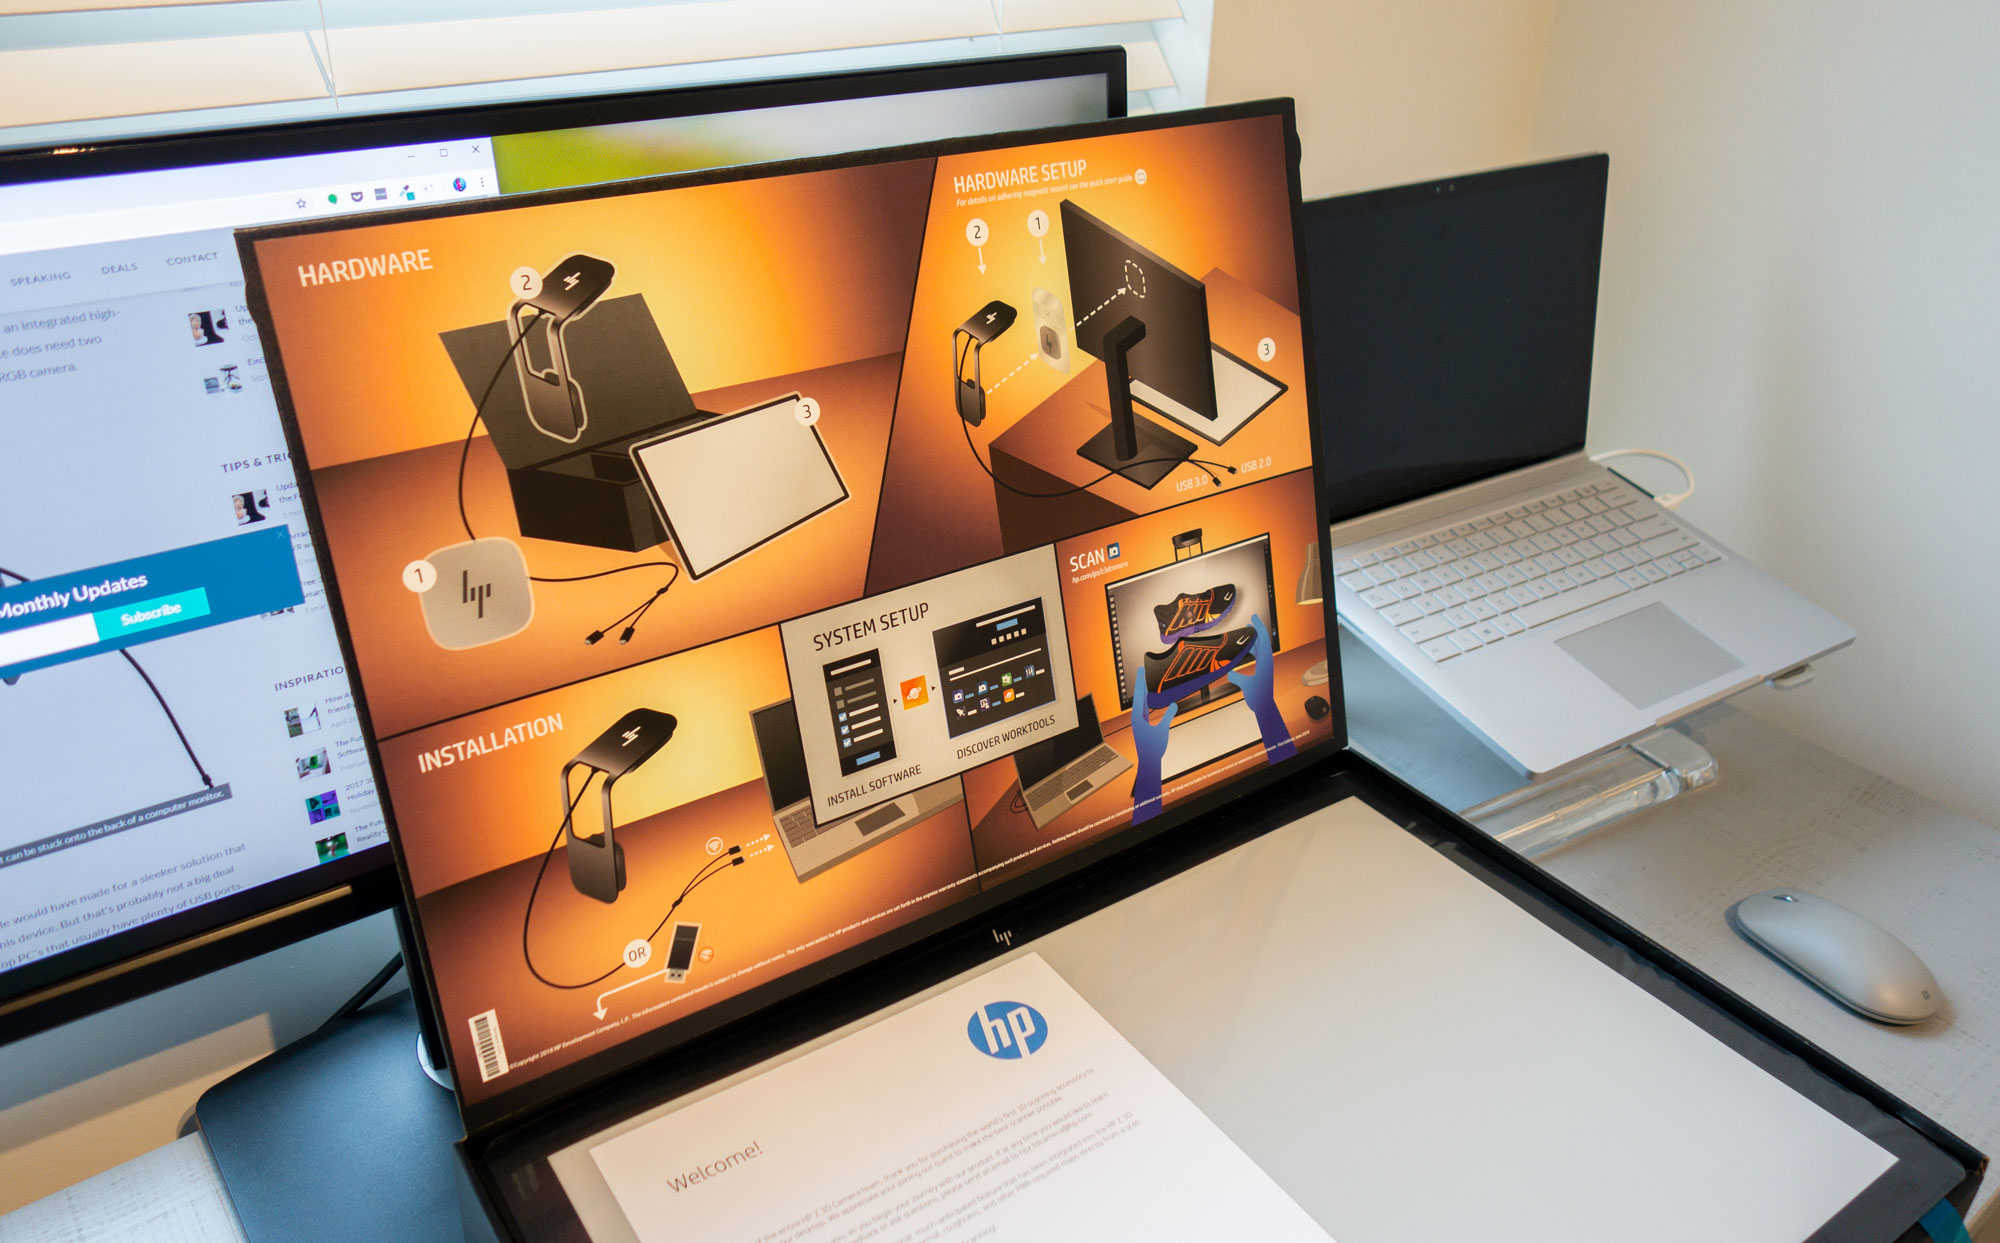
Most depth sensors come in small boxes so I was surprised by the large box of the HP Z Camera. This is due to the included desktop mat. The box itself is completely matte black with just the HP Z Camera logo, making it look like a luxury product. HP made good use of the size of the box by introducing the user with a nicely illustrated quick start guide printed on the inside of the lid.
Besides the mat and the Z Camera itself, the box contains three magnetic stickers for attaching it to different screens, a USB drive with the software, a cloth and a USB-A tot USB-C adapter.
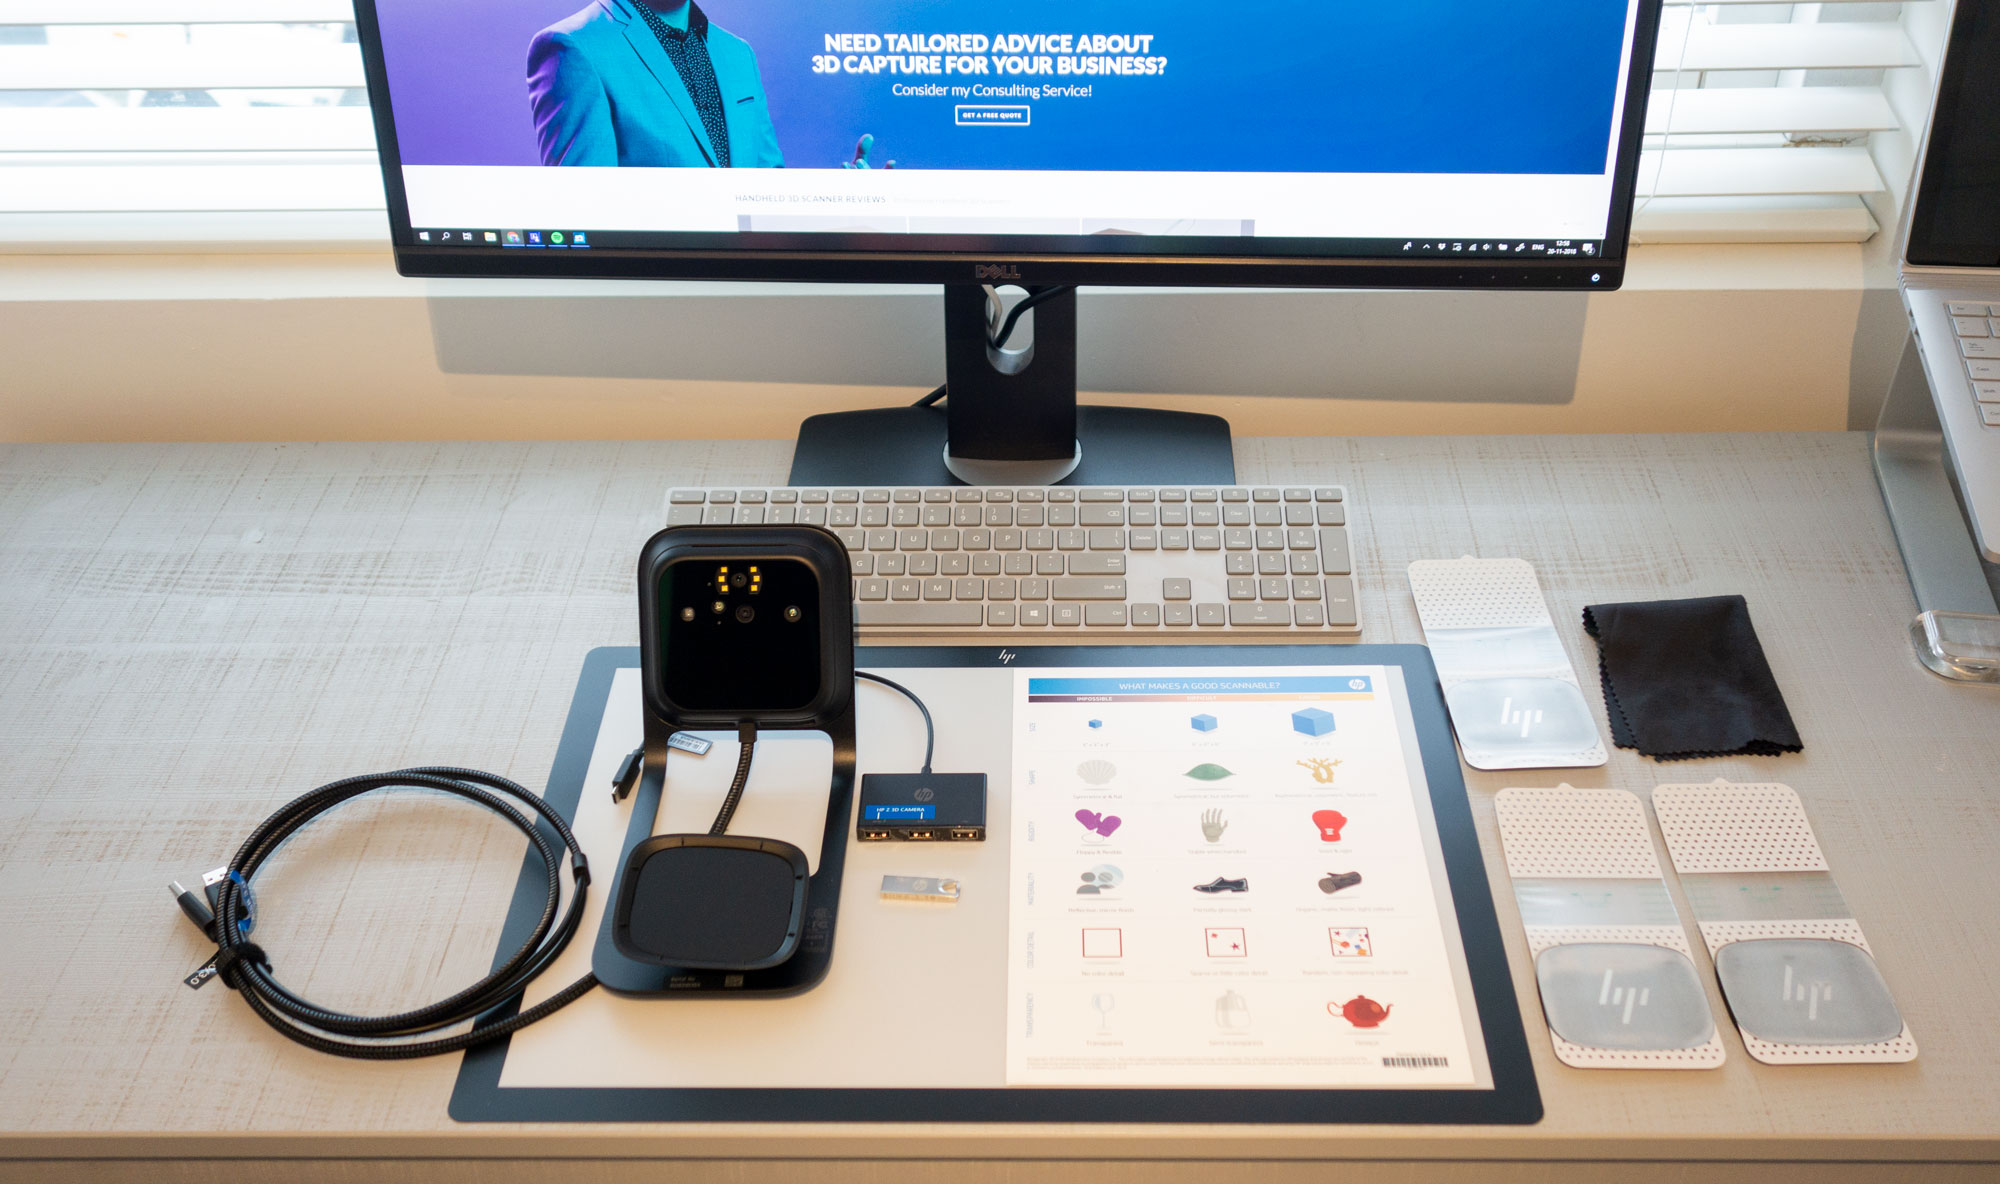
Als included is a printed sheet that explain what kind of objects are impossible, difficult or easy to scan. HP clearly realized it needs to manage the expectations of 3D scanning to prevent people to have a bad first experience. And that most users of the Z Camera haven’t done any 3D scanning before.
Hardware Setup & System Requirements
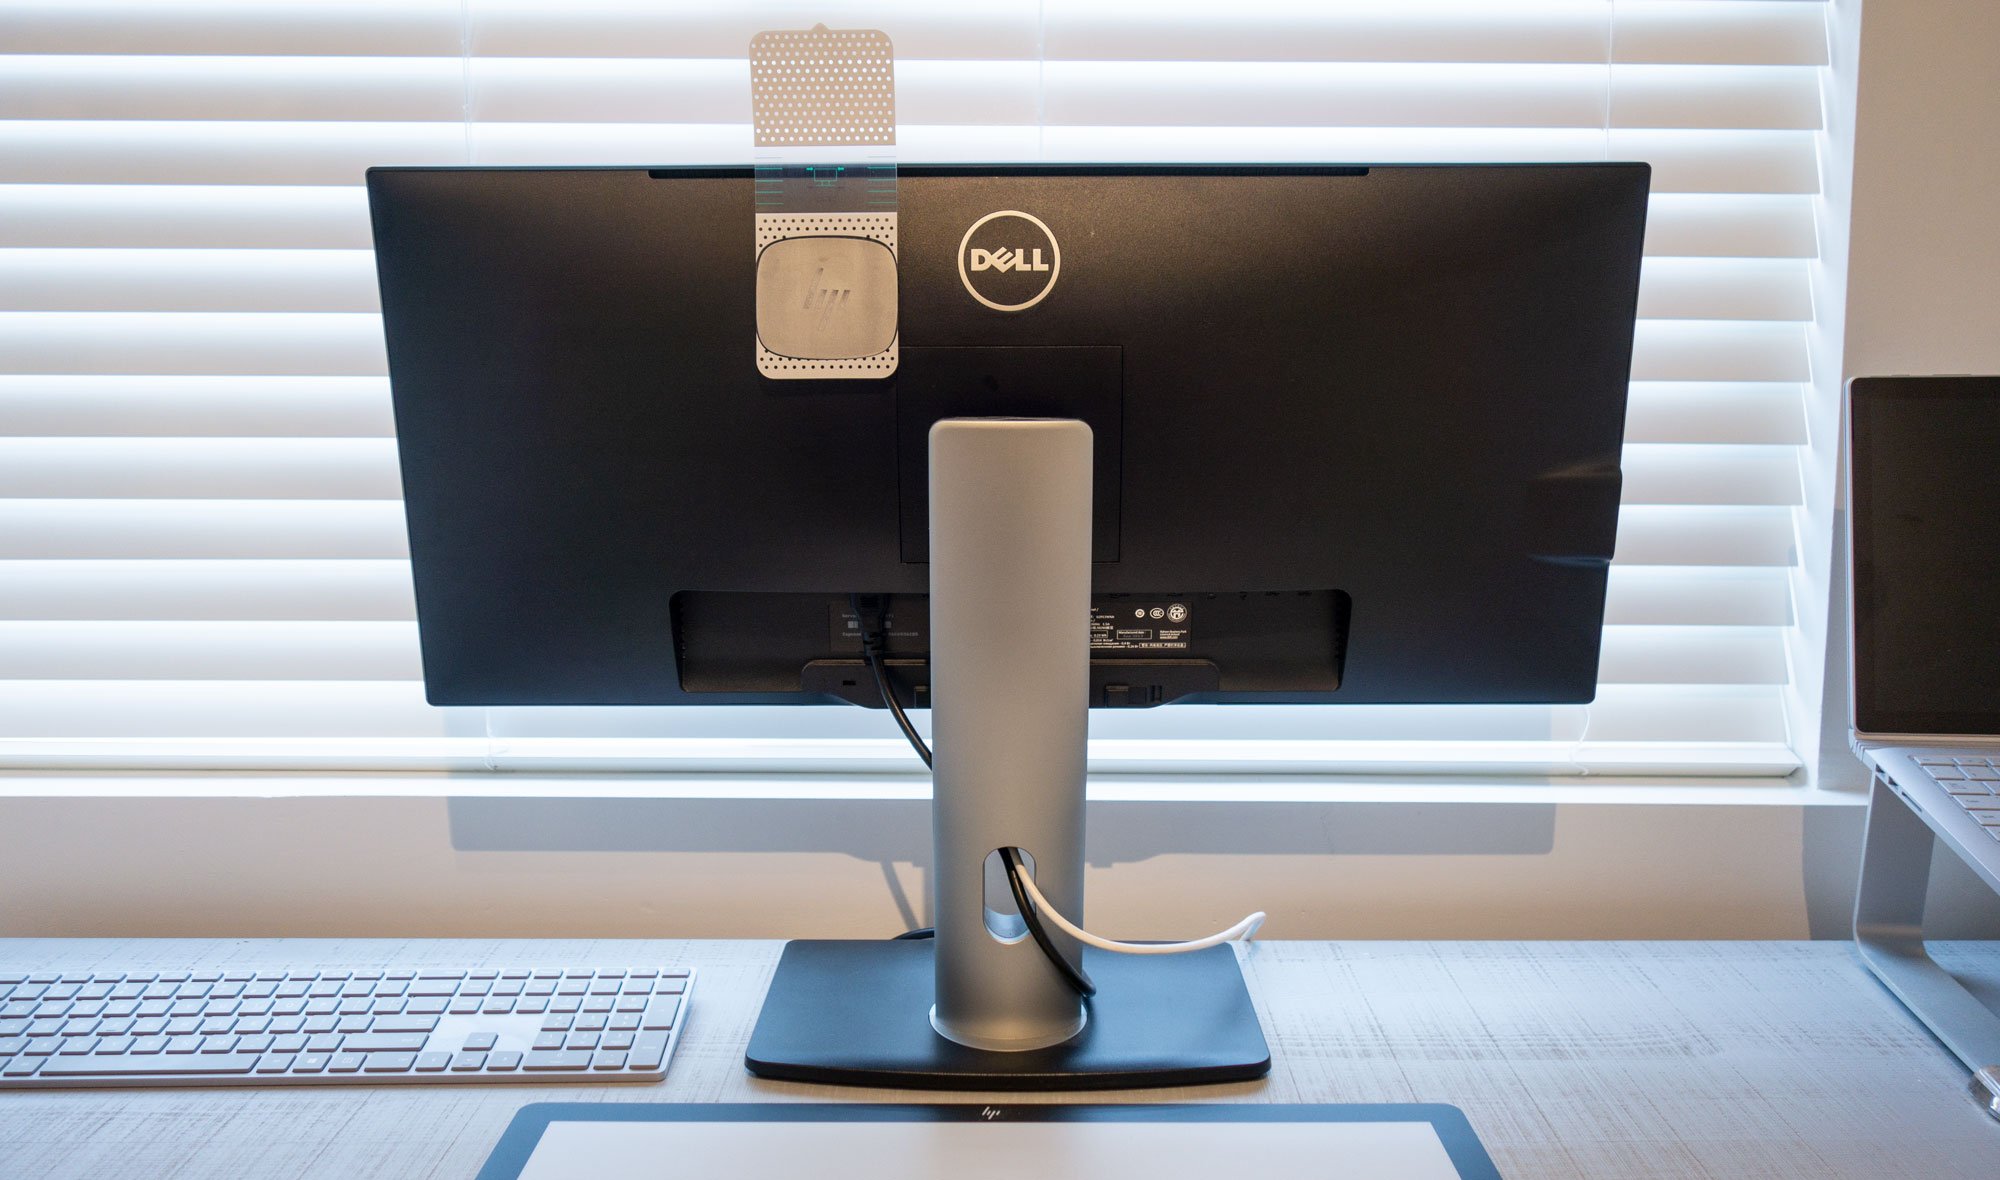
To be able to attach the Z Camera to a screen you will need to stick a metal mount to it. It contains foam and strong but removable adhesive on one side and a piece of metal on the other side. A sheet of transparant plastic with lines in meant to guide the user to stick the mount at the right height. Although it looks best when the Z Camera is attached in the center of the screen this position proved impossible with my Dell screen which has an embossed logo in the center. The adhesive simply wouldn’t hold there. So I put it off-center, which doesn’t really affect the usability.
It’s good to realize that most screens contain a lot of dust on their back and it’s essential to clean it thoroughly before attaching the sticker. The instructions say you must keep pressure on it for 15 seconds but I’d recommend to leave the sticker on for a few hours before attaching the Z Camera so the adhesive gets a better grip on the plastic before adding weight. The Z Camera is made of metal, which makes it feel really premium but also makes the strain on the adhesive quite large. I have had an occasion where it fell of after a few weeks on a warm day. So I’m not sure if I’d leave the Z Camera on my screen all the time or only attach it when I want to use it.
In general, I’m curious why HP has chosen to make this device screen-mounted at all. If it just had a stand like a desk lamp you wouldn’t need an external screen and could use it anywhere you want. The box is big enough…
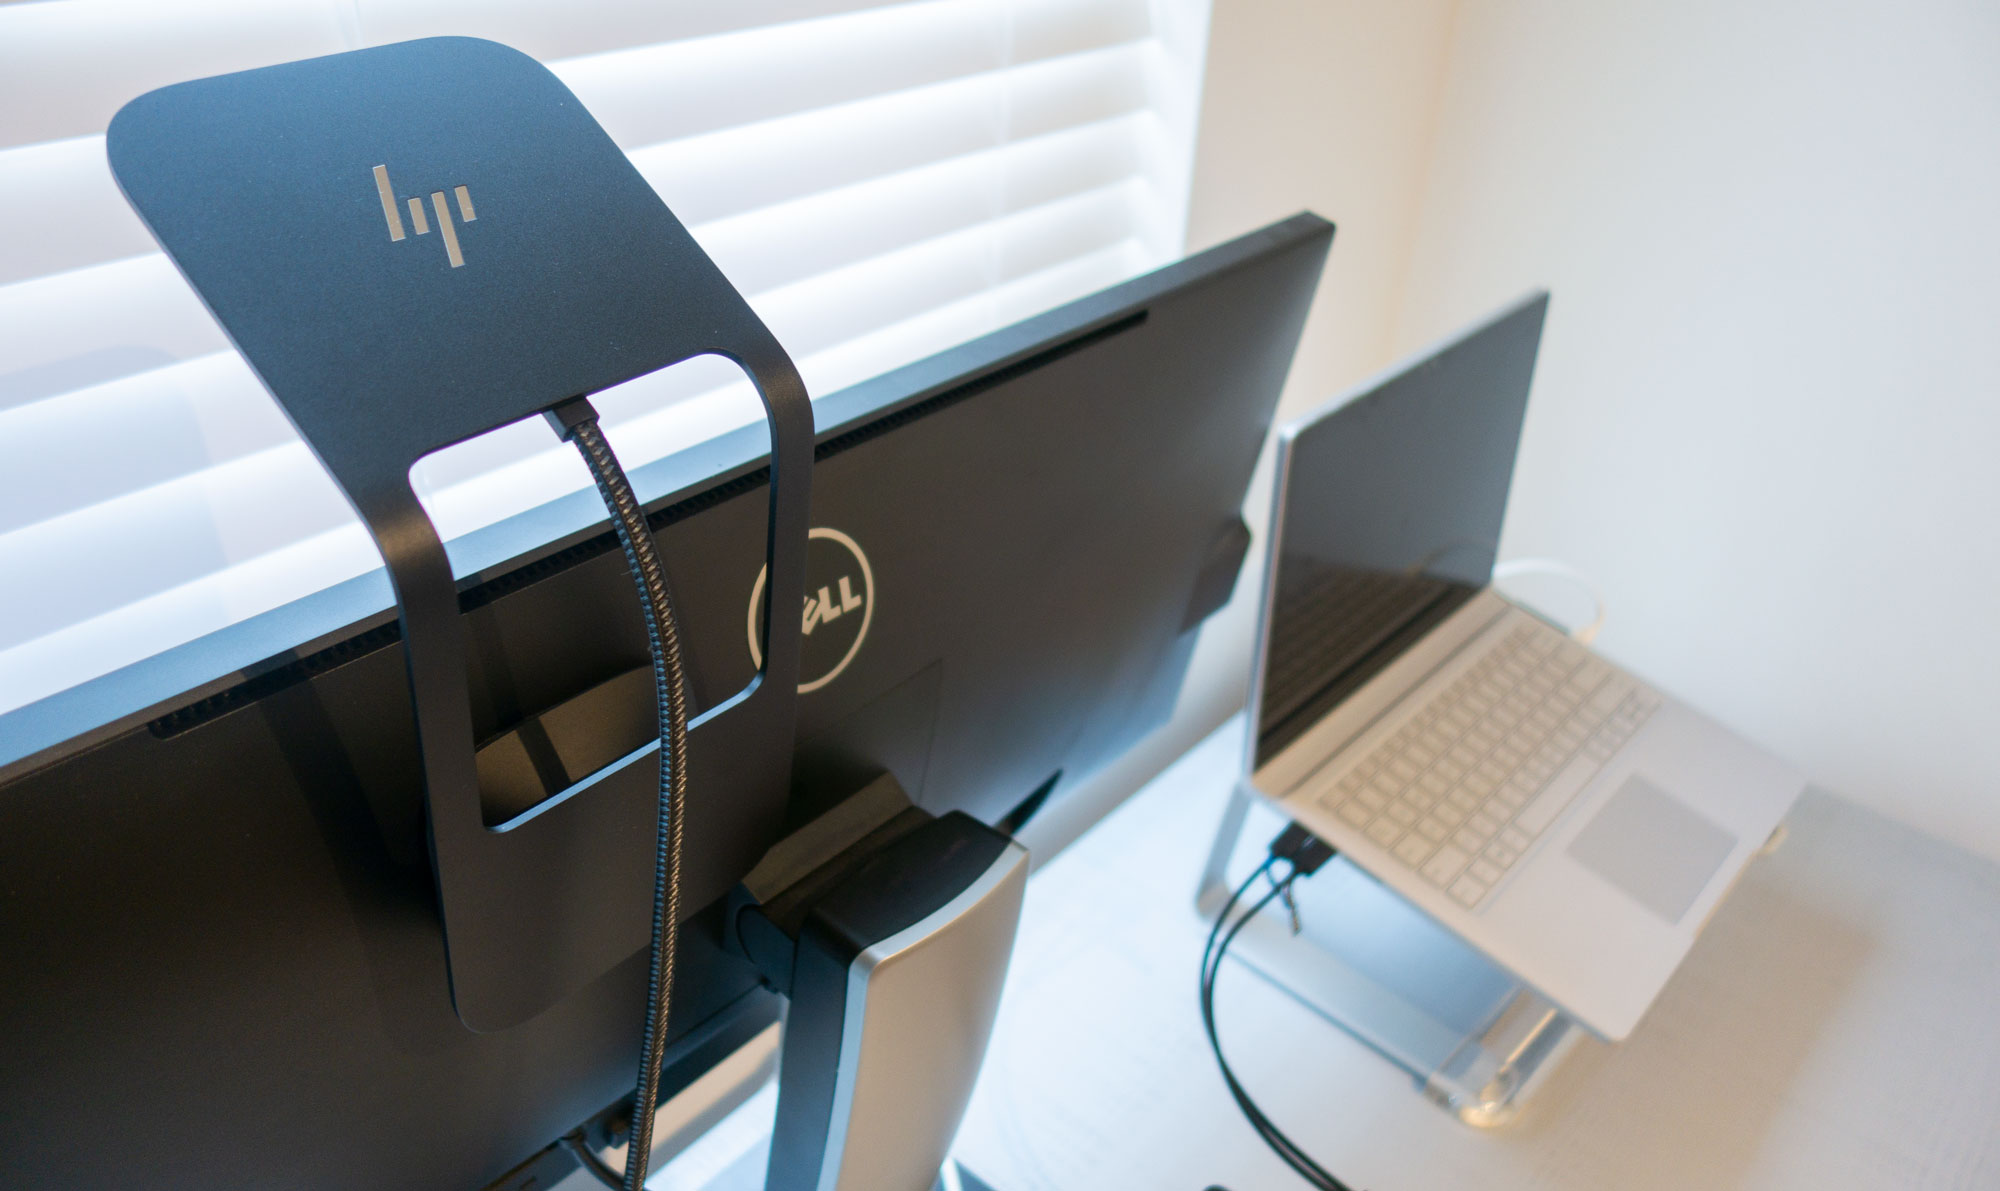
The cable is nicely covered in fabric which again makes the product feel premium. It splits into two USB-A connectors at the end. They’re clearly labeled 2.0 and 3.0 if you have a computer with both types of ports. Somehow HP haven’t been able to combine both streams (I assume the depth sensor and the 14.2 megapixel color camera are separate devices) into a single USB cable. But even so most desktop computers and laptops will have 2 USB-A ports or a single USB-C.
However, what most laptops don’t have is 16 GB of RAM, which according the Quick Specs sheet on the product page is the minimum requirement. Also required is a NVIDIA GeForce or GTX 760 or Quadro M620 or better descreet graphics card with a minimum of 2GB VRAM. You’ll also need at least a 6th gen Intel Core processor (although an i3 is enough). This rules out a lot of consumer and business laptops. With these requirements the target audience of the Z Camera is limited to professionals that do a lot of graphic intensive work and gamers. But it seems that that’s exactly the intended audience, as I will explain later. Luckily, I am such a person and my Surface Book with Performance base has a 6th gen Intel Core i7, 16 gigs of RAM and a GTX 965M graphics card.
Software Setup
HP has created a complete software suite for the Z Camera, similar to that of the Sprout, called WorkTools. It contains the Camera 3D application for 3D scanning but also one for 2D capture and features to use the device as a productivity tools. This means that you can use the high-resolution camera and LED light for other purposes as well which makes the Z Camera a bit more versatile. You can install the software from the included USB drive or download the latest version from the product website.
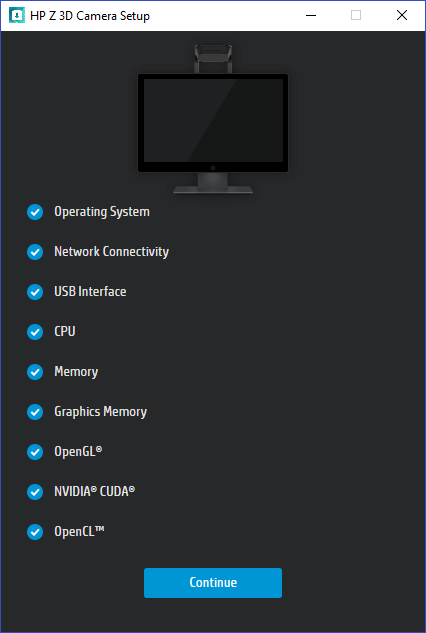
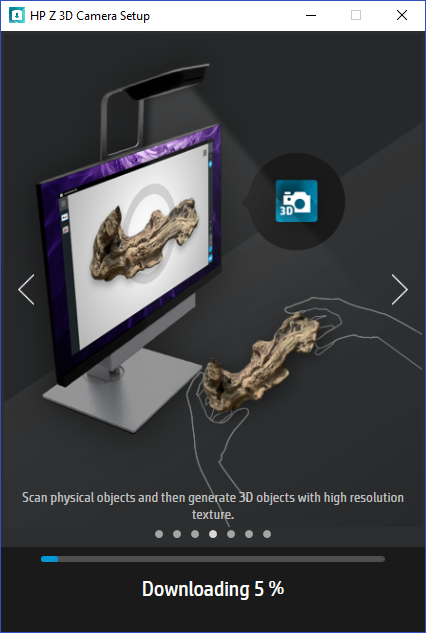
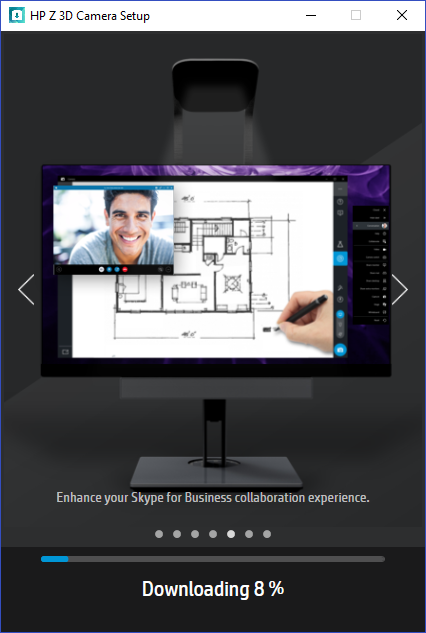
The setup tool will check if your system is compatible. Mine is but, I’m not sure if installation will continue if yours doesn’t. Like the printed instructions, the setup software is extremely well designed. I’ve simply not seen that level of graphic design sophistication in any other 3D scanning software. I’m sure details like this make creative professionals happy, because it makes me happy. If you’re not a creative professional, the installer also illustrates other uses of the Z Camera, like using it as a down-facing webcam in Skype for Business.
3D Scanning
The first time you start the Camera 3D application, you will be greeted with an animated explainer video that’s very nicely produced (I’ve owned an animation studio for over a decade, so I can judge). This video is not just great for people that have purchased a Z Camera but for everyone that want to start 3D scanning regardless of the technology. It not only succeeds in explaining in layman’s terms how 3D scanning and SLAM technology works but also educates the viewer about what is a great “scannable”. It also makes clear that many of your everyday objects are difficult or impossible to scan but that painful knowledge is indeed key to a satisfying user experience.
Of course animated explainer videos always make things seem super simple so let’s check how it works in reality.
It’s good to realize that both for capturing the shape of the object and for capturing the color information, you need be careful with external light sources. The depth camera uses infrared light. This means it can scan the object in complete darkness but direct sunlight will interfere with this. The color capture is done with separate, high resolution camera. This phase needs good, even lighting. Otherwise you will end up with a color texture that isn’t evenly exposed on all sides of the object. The built-in LED light works pretty well for this so it all works best when you simply make your room as dark as possible.
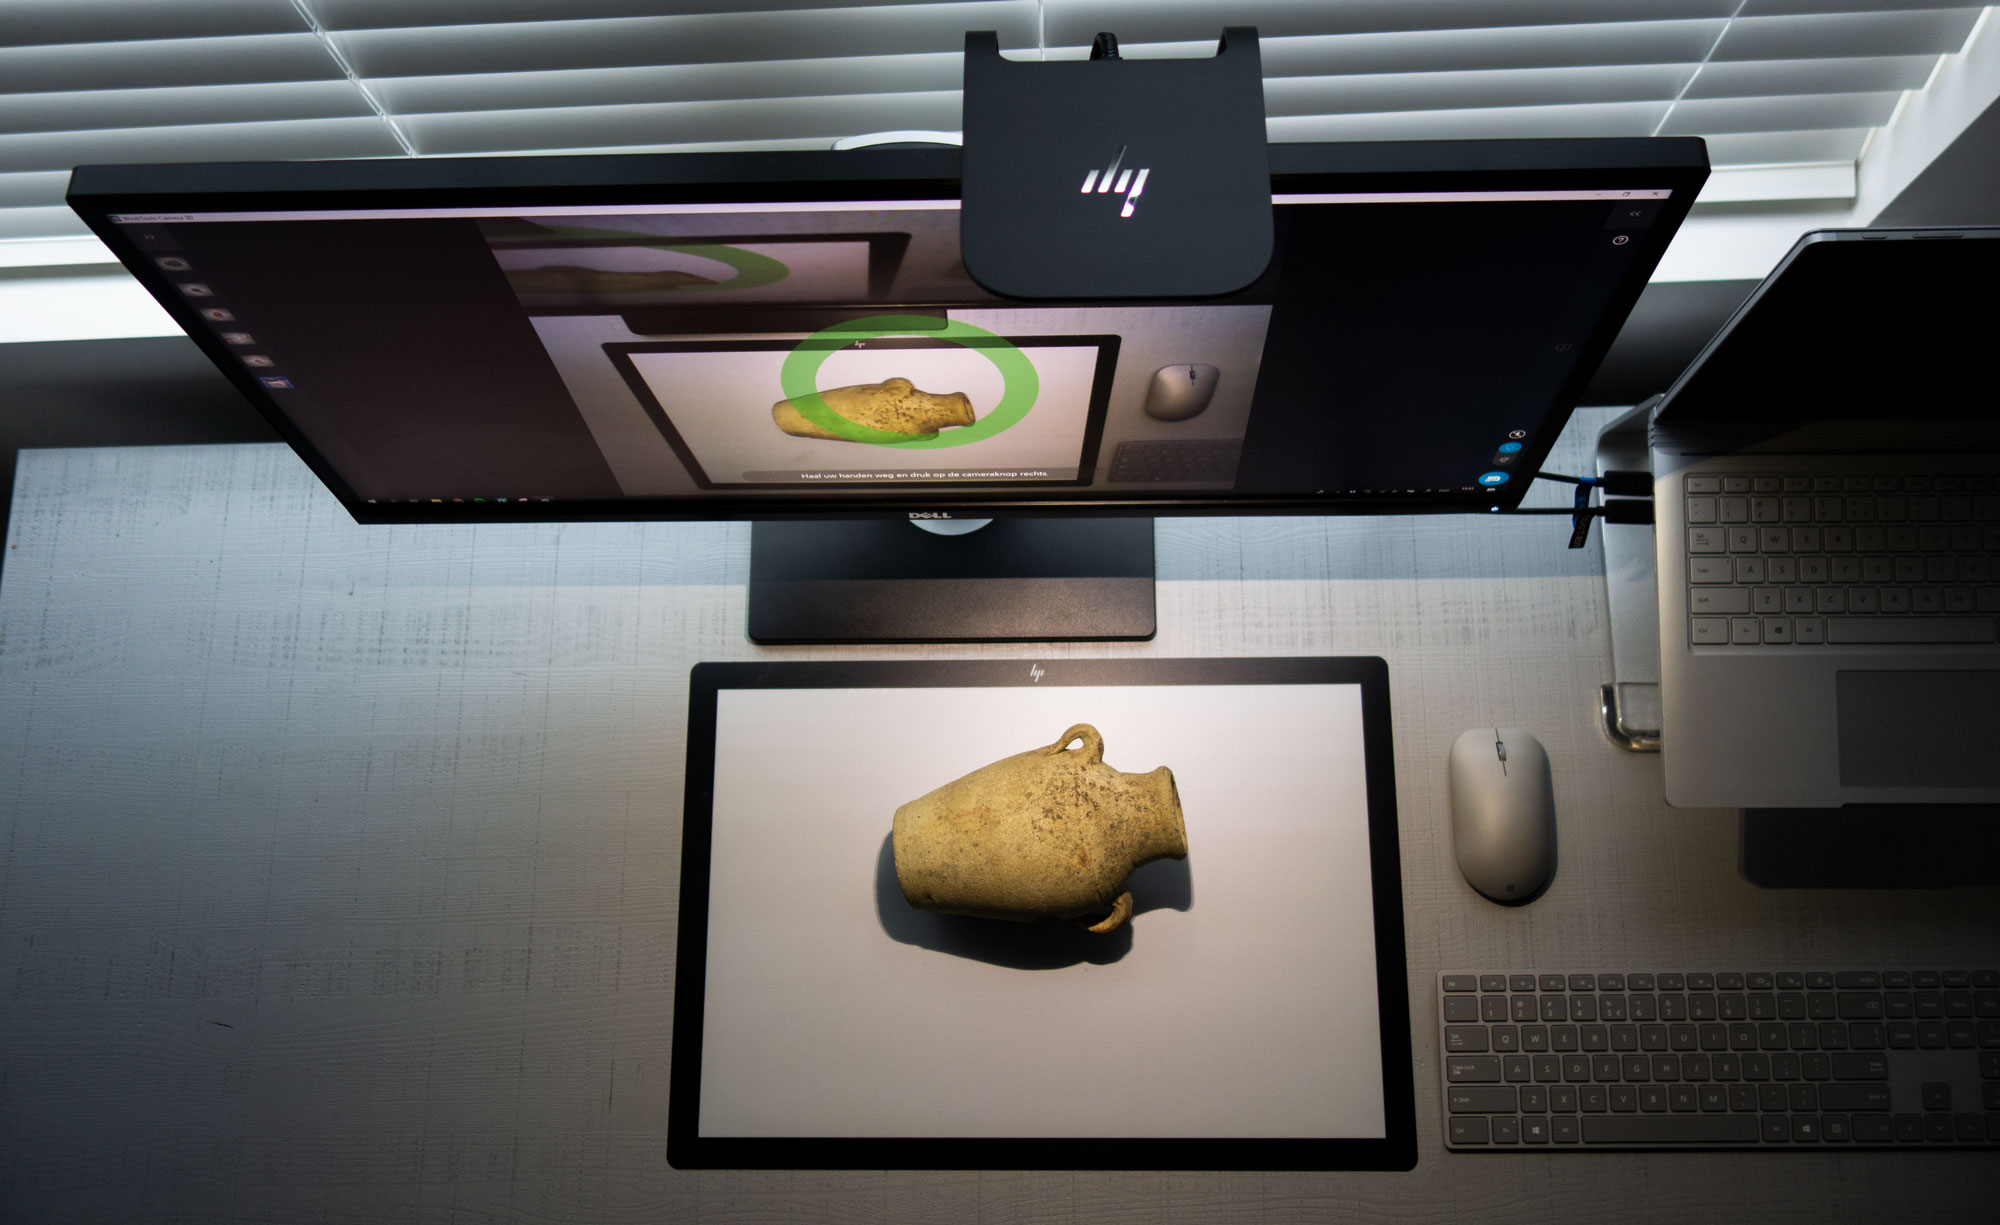
When you have the light set-up you can start the magical experience of lifting the object with your hands and rotating it until you have a complete object.
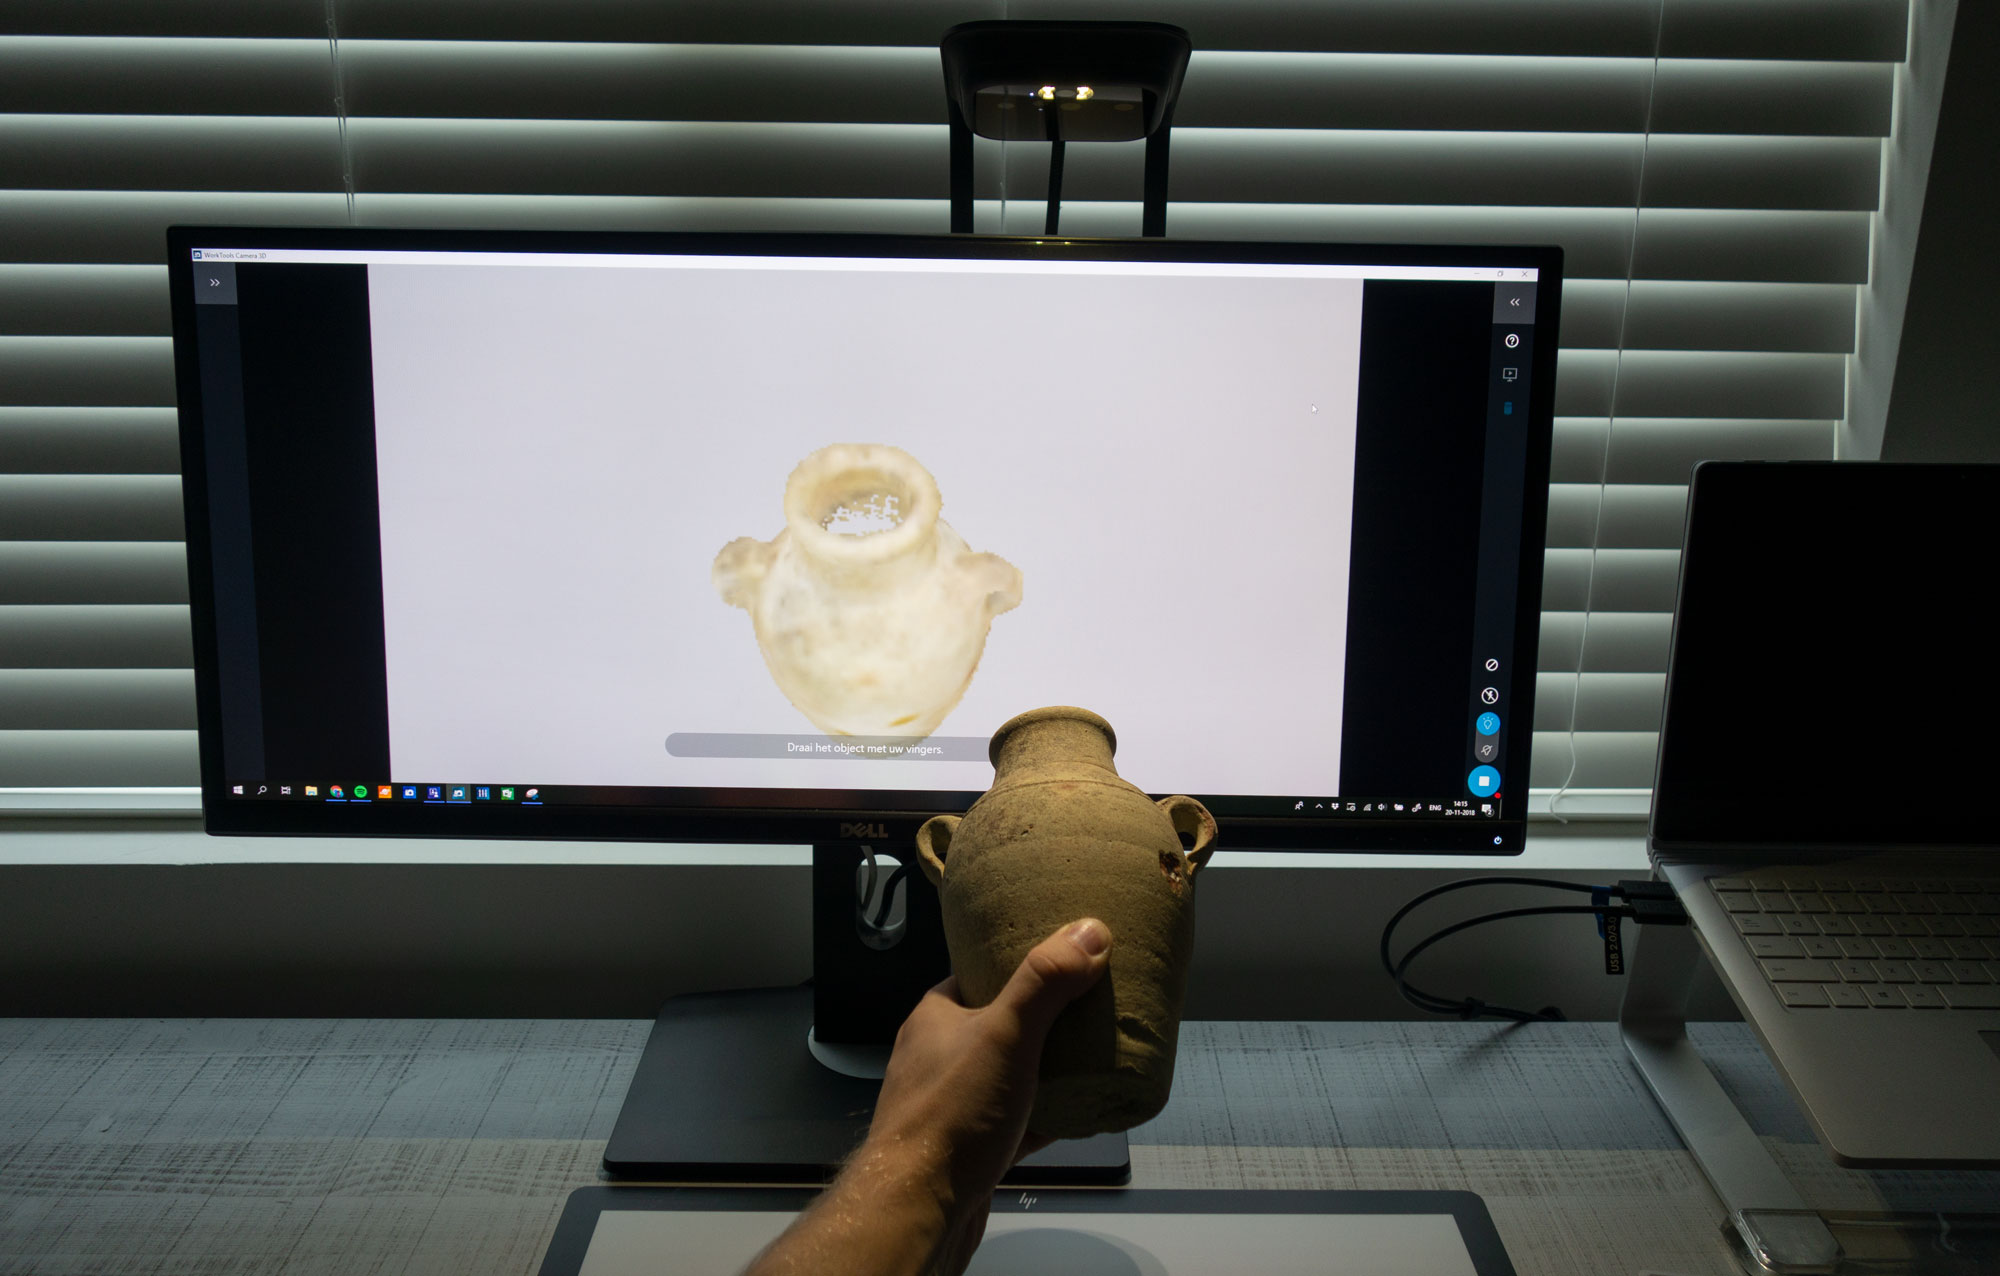
This experience is the same as with the Sprout G2. I made a video of the Camera 3D workflow for that review if you want to see it in action. I must note that while te software still looks the same it feels that the algorithms have been improved a bit since I tested Camera 3D on the Sprout. Overall this 3D scanning workflow is still very intuitive. Combined with the well-designed user interface I believe anyone that can operate a computer can make 3D scans with this device.
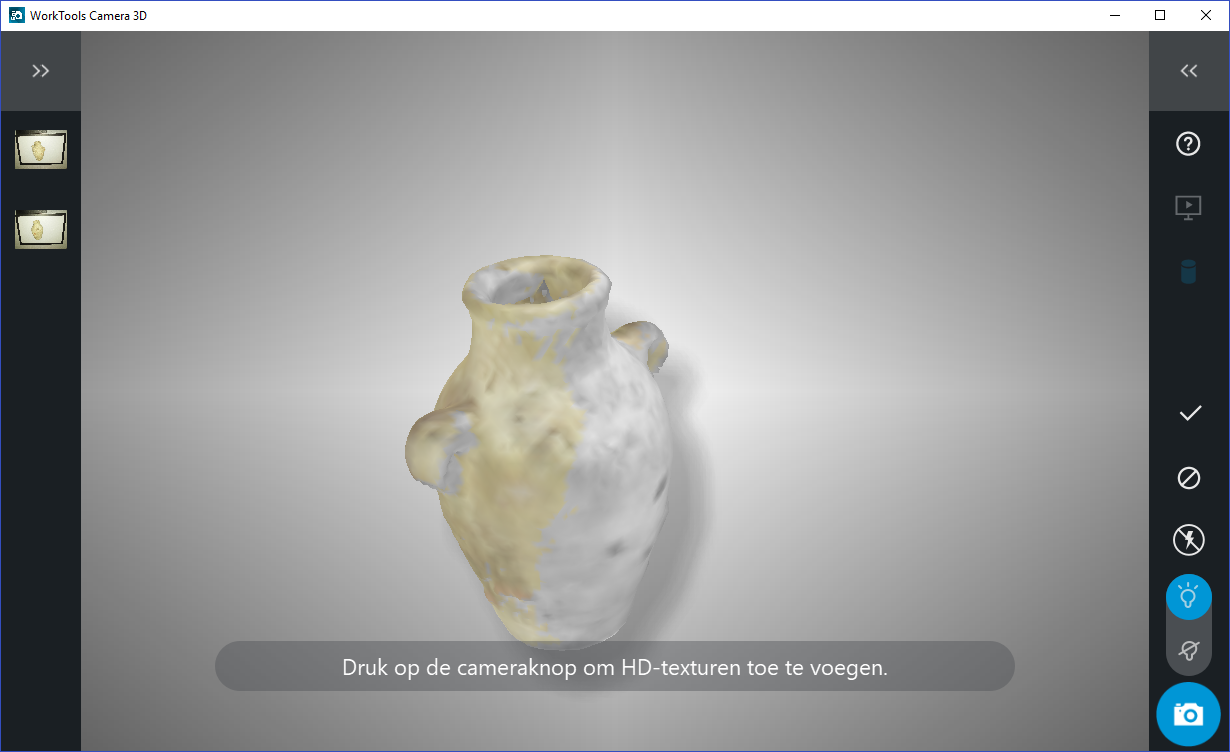
What hasn’t changed is that the algorithms that maps the high-resolution textures (which is a separate phase) onto the 3D object. Although I made sure the complete surface of the model was colored (instead of greyed out) the algorithm decides which part of which photo will be used in the texture. And sometimes it creates low-res texture fills in placed where I was pretty sure I took a high-res shot. This behavior is exaggerated because the texture maps are now also used to generate geometric details.
Processing & PBR materials
What wasn’t available in the software when I tested it with the Sprout G2 was the PBR (Physical Based Rendering) texture generation feature. This technology is based on Substance B2M by Allegoritmic, a software developer known for its texture creation tools Substance Painter and Substance Designer that are very popular in the game development and visual effects industry.
Without going into too much details, in real-time 3D graphics it’s common to use 3D models with a low amount of polygons for memory efficiency. Special texture maps are then used to add fine detail to the models at the moment they are rendered.
Normal maps are used a lot when creating game assets from 3D captured objects. In general, actual details from a high-resolution 3D model are used to generate these maps and project them onto a decimated or retopologized, lower-resolution mesh.
Now here’s the catch with the HP Z Camera: the built-in Orbbec depth sensor is not a high-resolution 3D scanner. It can only capture a limited amount of details. So instead of generating normal maps from geometric data, the Camera 3D software generates them from the high-resolution color data. A slider let’s gives you control over this effect:
This is a trick that’s also used a lot by 3D artists but it only works with certain types of surfaces. The Substance algorithm is admittedly smarter than doing this manually but not smart enough to know which areas of a surface would benefit from this treatment and which don’t. The result is that this effect looks very nice on some objects, but makes (parts of) other objects look very unrealistic.
It also only works when the texture mapping algorithm has indeed mapped high-resolution color data onto the right places. On the old jar example above you can see that the bottom edge is unaffected by the algorithm because no high-resolution texture was mapped onto that area. I’ve embedded the actual result below.
Exporting
The list of export formats of Camera 3D is so extensive that I’ve decided to simply put a screenshot below.
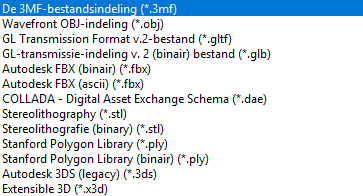
It included industry standards like OBJ and FBX and new formats like 3MF and GLTF/GLB. The only funky new format missing is the USDZ format introduced by Apple for mobile AR purposes. I haven’t seen any other software implement that yet but it could be a nice match for the intended target audience.
It’s good to know that the extra details will only show if you are using an application that supports these special texture maps. The software can’t bake these details into actual geometry. So if you export to STL for 3D printing, you will only have the low-polygon base model.
You can also directly export your scans to the popular 3D model community Sketchfab (which I use to embed the actual 3D scans on this website) with preservation of the PBR texture settings.

Unfortunately there’s no dialog box on the Sketchfab exporter that let’s you give you model a name, description or set the model as private if you have a paid Sketchfab account. The exporter in Camera 3D also doesn’t set a fixed template for lighting. This forces Sketchfab to choose an environment and light settings, which can completely over-expose the texture.
Results
Let’s start with the scan of the old jar — without doubt a perfect “scannable” — which was directly exported from the Camera 3D software to Sketchfab.
Let’s start with the color texture: it’s nice in many places but in other you can clearly see smeared-out pixels. There’s now way to know if and where that will happen beforehand. In the places where the high-res photos have been mapped correctly, you can also see the effect of the generated normal map. To better judge this, select the embed above and press 3 on your keyboard to see just the geometry without the color texture. That is the actual captured geometry from the depth sensor. If you press 3 yet another time, you will see the geometric appearance with the normal map activated. The difference is clear. If you press the 2 key on your keyboard, you can also view the model with just the base color texture applied without the additional maps.
Now, let’s compare that Z Camera scan to one made with 3D Systems Sense 2 scanner. This handheld device is based on the Intel RealSense SR300 depth sensor which has the same depth resolution (VGA @ 30fps) but only a Full HD (~2 megapixel) color camera (compared to 14.2 megapixels on the Z Camera).The software that comes with the Sense 2 also performs texture mapping but doesn’t offer PBR map generation.
To me that looks like a more realistic representation of the actual object. Sure, the texture isn’t delighted and it’s just a simple UV diffuse map without any PBR trickery. But the texture is mapped onto the object more accurately and despite the 2 megapixel color camera the texture sharpness is good enough for a object this size.
I also think it’s interesting to compare the jar scan with that of a structured light scanner. And why not compare it to one made with the second scan mode on HP’s own Sprout Pro G2:
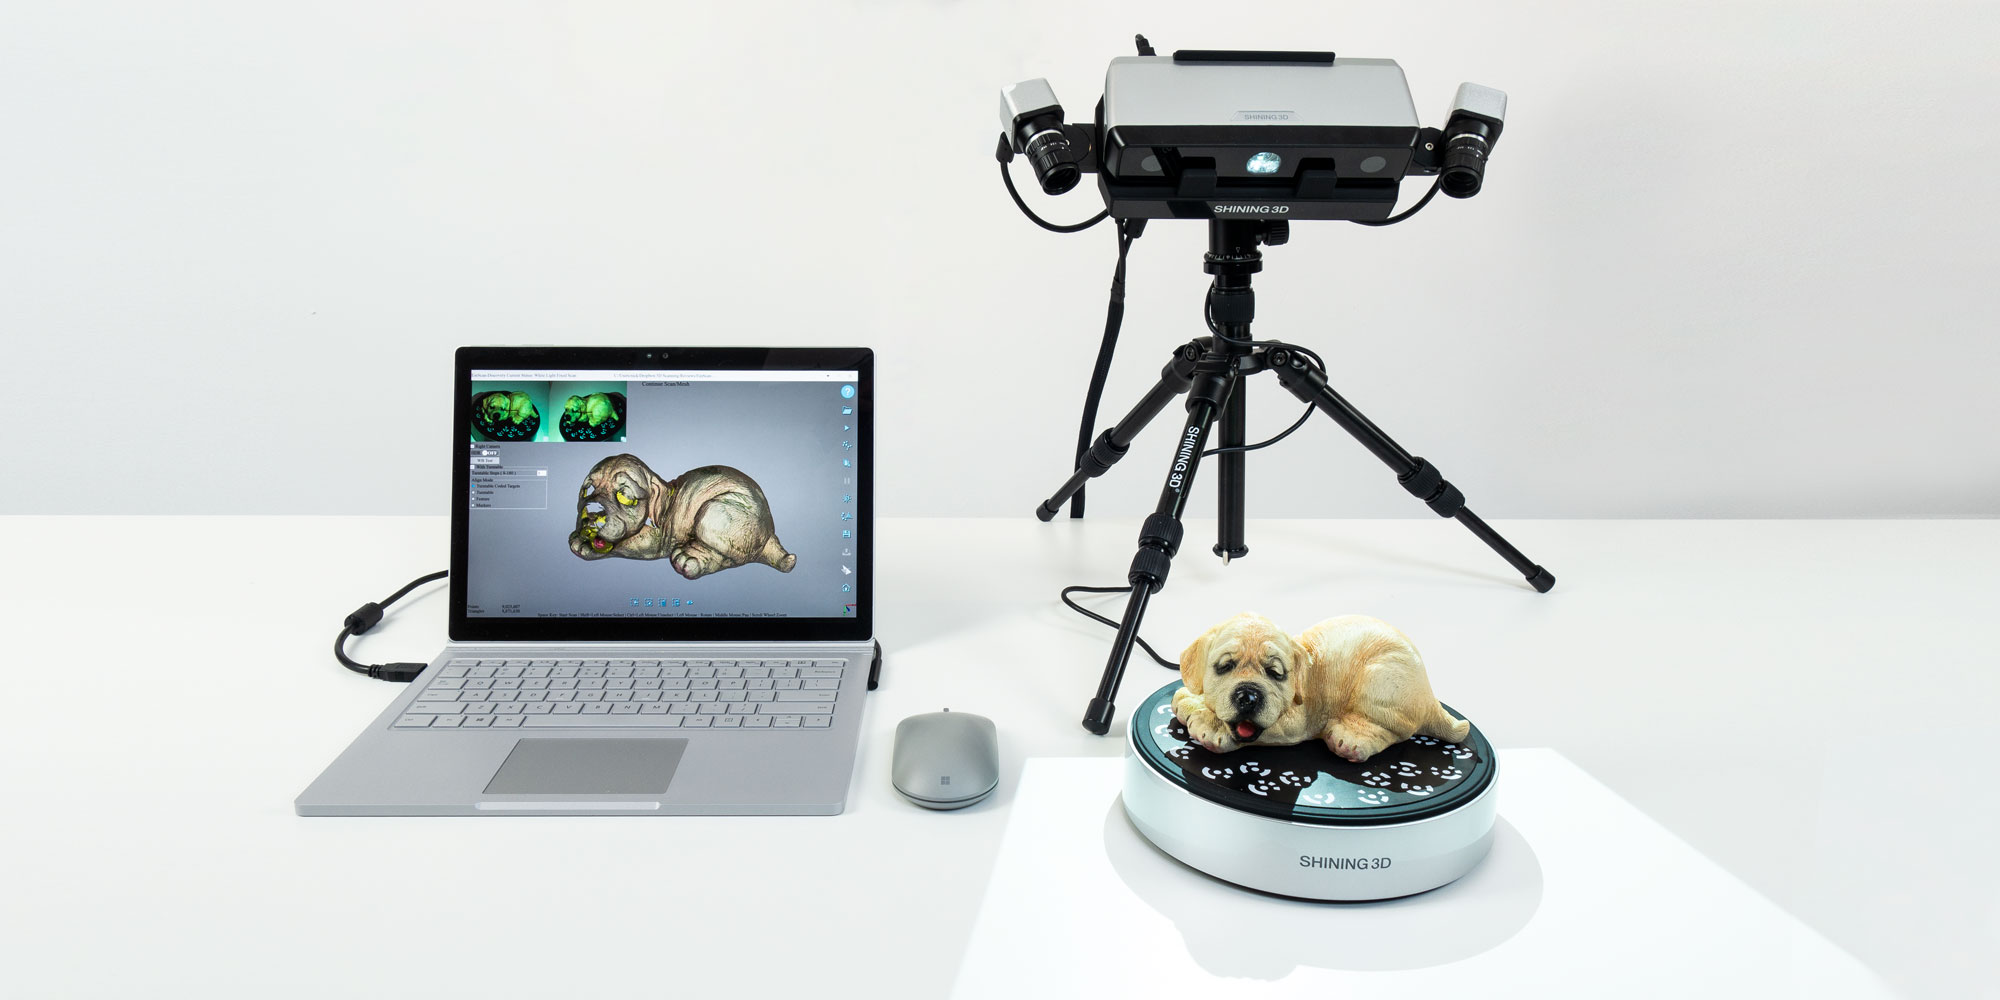
Now that texture is far from optimal and kind of fuzzy but if you look at the geometry you’ll see an extreme amount of details. And that’s actual 3D scanned detail — not generated detail from color data. Of course, getting yourself a Sprout (or HP’s standalone professional structured light 3D scanner) will cost you a lot more money than getting a Z Camera. But there are also more affordable structured light scanners on the market like the $1299 Shining 3D EinScan-SE. You can buy two Z Cameras for that price but although the EinScan-SE only has 1.3 megapixel monochrome camera’s it does include an automatic turntable and it was able to scan my old jar like this:
That texture has its issues with dark areas but it’s also not bad for a camera that technically even can’t capture color. However, if you press 3 on your keyboard you can see that the actual captured geometry is very detailed. The included EinScan software can’t generate normal maps but most 3D artists probably already have software that can do this like zBrush, Blender, 3DS Max or Substance Designer.
Before jumping to conclusions, let’s scan a few more objects. And let’s start with a shoe since it’s the ideal scannable according to the explainer video.
For this object, I took a total of 6 high-resolution photos (left, right, top, front, back and sole) until the preview model was completely in color. But while the sides look good the textures on the top and back of the sneaker somehow didn’t make it to the final texture. And because of this those details are also absent in the PBR maps.
For comparison, here’s the same sneaker scanned with the structured light mode of the Sprout G2. What you see below is the geometric details that where actually captured (I I switched of the color texture on this one). You can do the judging yourself on this one:
Next up I wanted to scan a more technical object in the form of a battery-powered drill:
I was surprised that the sensor could capture the matte black details but in general the shape of the 3D model is kind of “blobby”. This is typical depth sensor behavior which isn’t such a problem on organic objects but can turn technical objects with sharp edges into models that look like they’re made from clay. This example also illustrates the limits of the PBR generation method of Substance PBM: It works great for the large Makita logo on the top of the drill because that’s embossed into the plastic in reality as well. But the text on the battery is actually just a black and white print and the algorithm turns that contrast-richt image into an extremely embossed result.
Finally, it’s good to know that the Z Camera can also scan objects that are a bit larger than the A3-sized desktop mat. I could scan my bust without technical problems. I say technical because it wan’t very practical to rotate a heavy stone sculpture in front of my precious computer screen. I rather put objects like this on a cheap manual turntable an rotate it in front of a tripod-mounted depth sensor (like this). Here’s the result of the bust scan with the HP Z Camera followed by the same object scanned with the 3D Systems Sense 2.
It must be noted that to capture the objects with the Sense 2, I used a light kit with two soft boxes but you can get a two of those for $65. I prefer the looks of the second scan. And even though this is a stone object that’s ideal for the PBR map generation algorithm of HP’s Camera 3D software I don’t like what it has done around the face of this bust.
Finally, I can’t end this review by mentioning Photogrammetry. This technology can turn a sequence of 2D photographs or video footage into a 3D model without having to use a 3D scanner. It isn’t as interactive as 3D scanning and has a steeper learning curve but I’ve done tests where I made a 4K video of the bust above with my smartphone and turned it into a 3D model with the Free Photogrammetry Software. And I got this result:
Verdict
The HP Z Camera is a very well-designed product that screams premium. The industrial design is great, the instructions are both beautiful and educational and the user interface is simple and effective. The 3D scanning workflow itself is also super easy — almost magical. With this product anyone can make 3D scans.
But this product isn’t for everyone. You will need an external computer monitor to use it so if you only have a laptop you are out. And if you do have an external screen, you’ll need a computer with a lot of RAM and a discrete graphics processor to use the Z Camera. So the only people that can use this project are professionals hat work with 3D graphics and gamers.
HP does focus on game designers by adding the Substance brand to its software and enabling the creating of PBR texture maps. But since the extra details are derived only from the color data and not from the geometry, the result is hit and miss. It makes some scans look great while others look very unnatural. Also, the texture mapping algorithm itself can sometimes stretch pixels while I had completed the texture capture phase. The PBR algorithms emphasizes these texture flaws. A 14.2 megapixel camera also isn’t necessary for creating (4K) textures for small to medium objects.
3D scanning with the Z Camera is one of the easiest, most fun and best-designed 3D scanning experiences available. But in the end it’s “just” a depth sensor scan and I doubt that the results of depth sensors in general are good enough for professional 3D artists. A structured light scanner can make scans with a lot more captured detail without any texture tricks and these devices have become more affordable too over the past few years. That makes me wonder what would happen if HP would take that other 3D scanning part of the Sprout — the DLP projector for structured light scanning with the Capture Stage — and turn that into an affordable separate product.
If you find $599 a bit much to take your first step into 3D scanning, the current discounted might make it more attractive to give it a try.


Hi Nick,
Thanks a lot for the thorough review really insightful and easy to understand for a 3D beginner such as myself.
Quick question which device would you recommend for prototyping, meaning a breakdown of the item (part by part) for patent and also the whole item, of course. Furthermore, that can also be translated in the easiest way by the product designer in AutoCAD for production?
Have a great Sunday.