3D scanning with a depth sensor has many advantages. Not only are they very affordable but almost all of them are open in the sense that everyone can create software for operating them. There are many use cases for depth sensors and 3D scanning is actually one of the more niche ones. That’s why there aren’t hundreds of software options available. And the available software usually supports a select amount of sensors.
Competition & Supported Sensors
For example, I’ve reviewed Skanect which is software for PC and Mac that supports Structure Sensor (Skanect was acquired by Structure manufacturer Occipital), ASUS Xtion, PrimeSense (acquired by Apple) Carmine and some Microsoft Kinect (discontinued) models — but not Intel RealSense.
The software I’m reviewing today, RecFusion, does support RealSense sensors — including the new D400 series I just reviewed — and also Orbbec sensors on top of the other ones I just mentioned — but not Structure Sensor (check the footer of this page for the full list).
There’s also software that’s locked to a single sensor type. I’ve reviewed 3D Systems’ Sense for RealSense software a while ago. But while this free-to-download software works with the RealSense F200 and R200 sensors I tested, and also the SR300 dev-kit I have (which is a Creative BlasterX Senz3D) I have had reports from readers that couldn’t get the software to work with that last sensor. Of course it does work with 3D Systems’ own version of the SR300, the Sense 2 scanner (Review).
[well type=””]
Here are some of the affordable sensors supported by RecFusion. The last two also support multi-sensor scanning:
[column lg=”4″ md=”12″ sm=”12″ xs=”12″ ]
[column lg=”4″ md=”12″ sm=”12″ xs=”12″ ]
[column lg=”4″ md=”12″ sm=”12″ xs=”12″ ]
[/well]
Versions & Pricing
RecFusion is only available for Windows (64-bit) and comes in two flavors: one for single-sensor scanning (€99) and a Pro version for multi-sensor scanning (€499). With the latter you can capture from more than one sensor simultaneously and calibrate their positions in a fixed rig. This way you can scan objects and people without moving the sensors. For example, you can mount 3 sensors on a vertical rail and use a turntable for scanning people. Just be sure that the sensor you prefer supports connecting more than one to a single system (the RealSense models before the D400 don’t).
[well type=””]
Multi-Sensor Scanning in RecFusion Pro
Since I don’t have multiple sensors that can be combined, I’m using the standard version of RecFusion for my tests with a single sensor. But here’s a screenshot from the manual so you have an idea of what multi-sensor scanning looks like in RecFusion Pro.
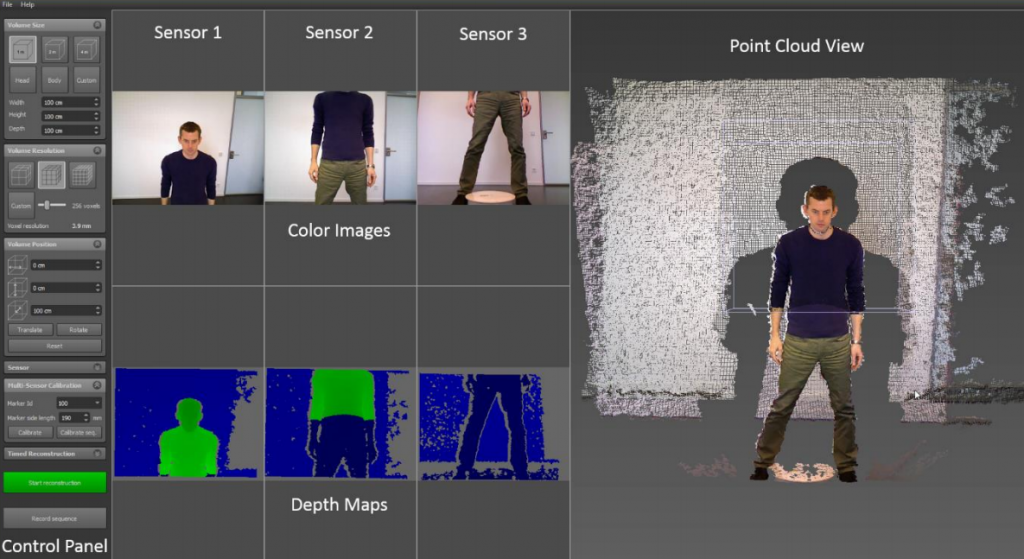
Multiple sensors can be calibrated using the tracker marker print I’m also using below.
[/well]
On top of RecFusion and RecFusion Pro, there’s also a RecFusion SDK (C++) for €599 if you want to build your own single- or multi-sensor 3D scanning solution.
Single-Sensor Scanning with RecFusion
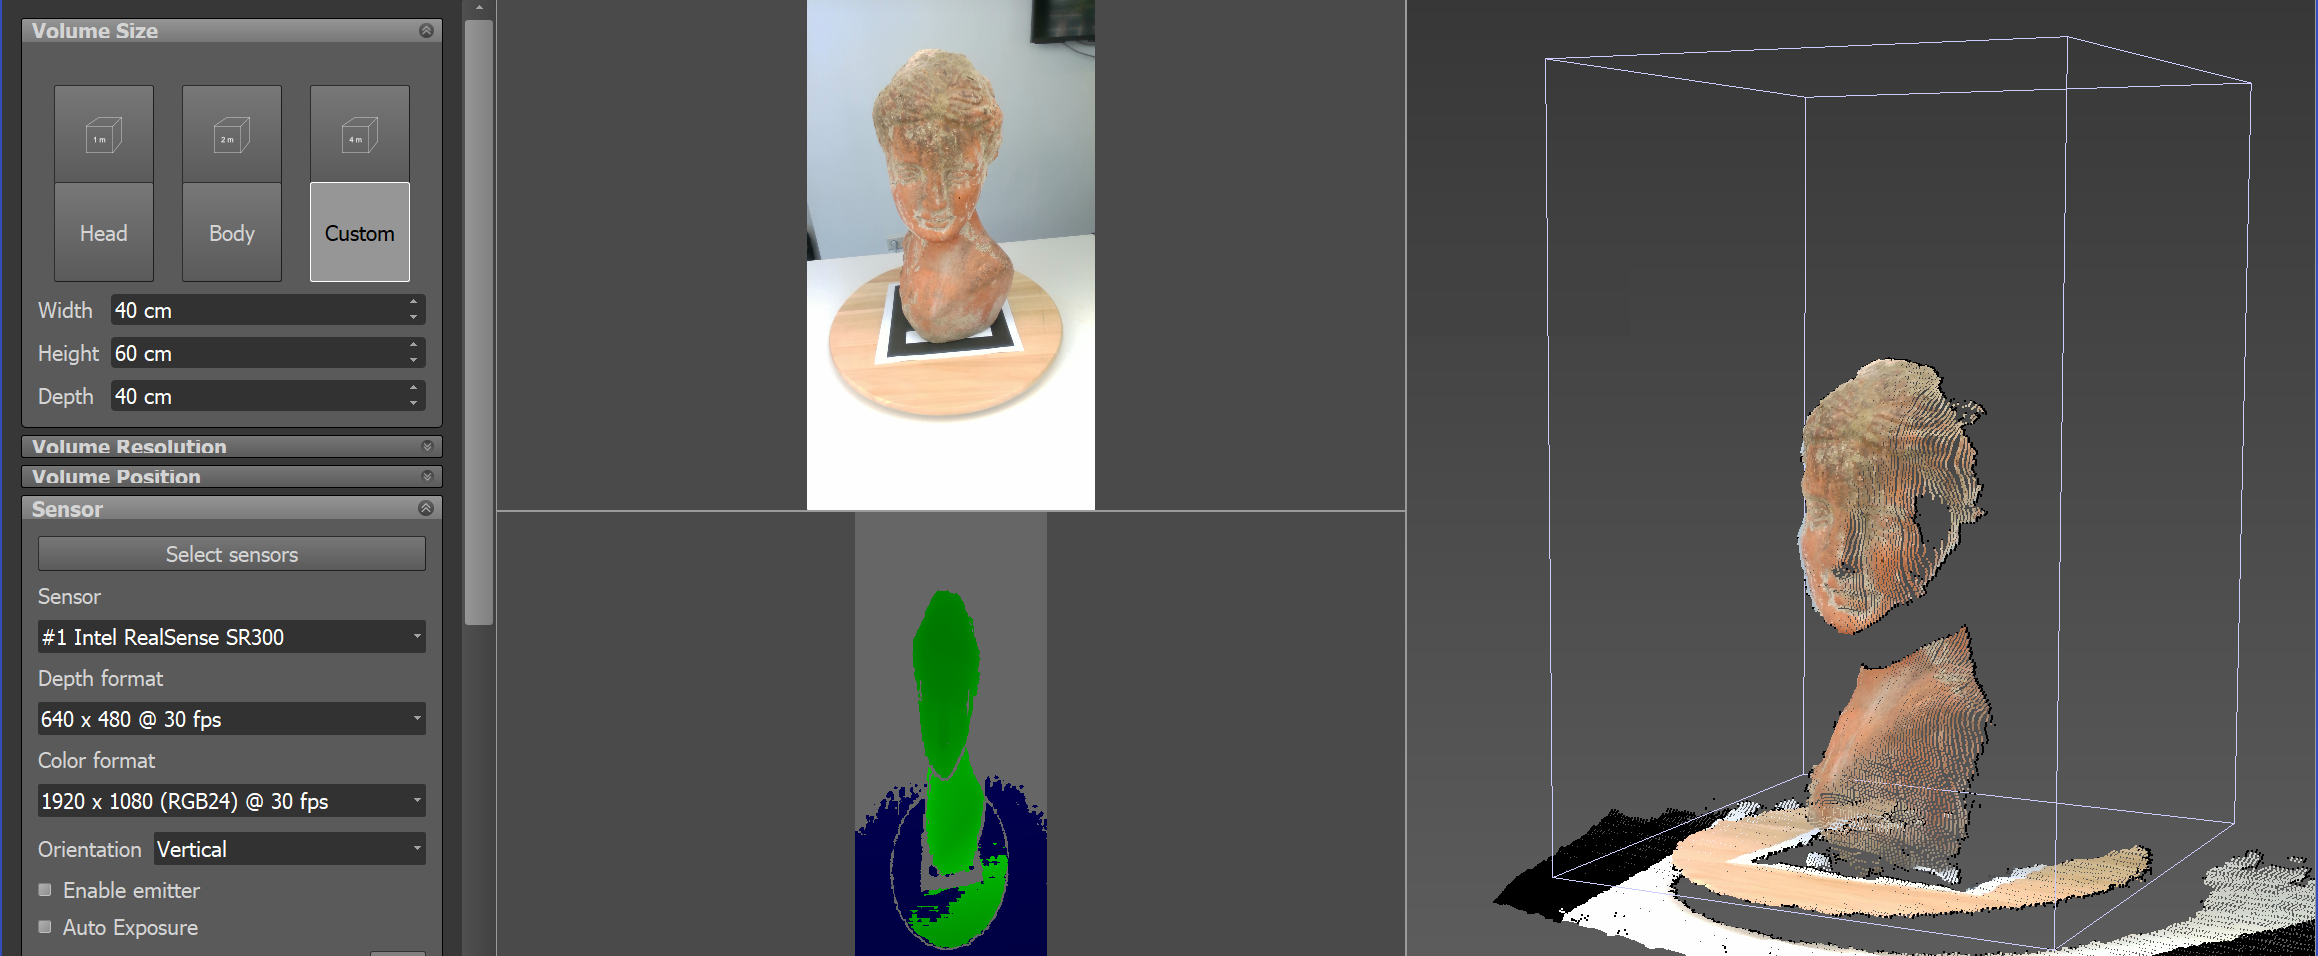
RecFusion’s interface is clean and easy to understand. On the left there’s a panel with all settings. You can save these settings as a so called Workspace, which is handy if you work with different setups for different purposes.
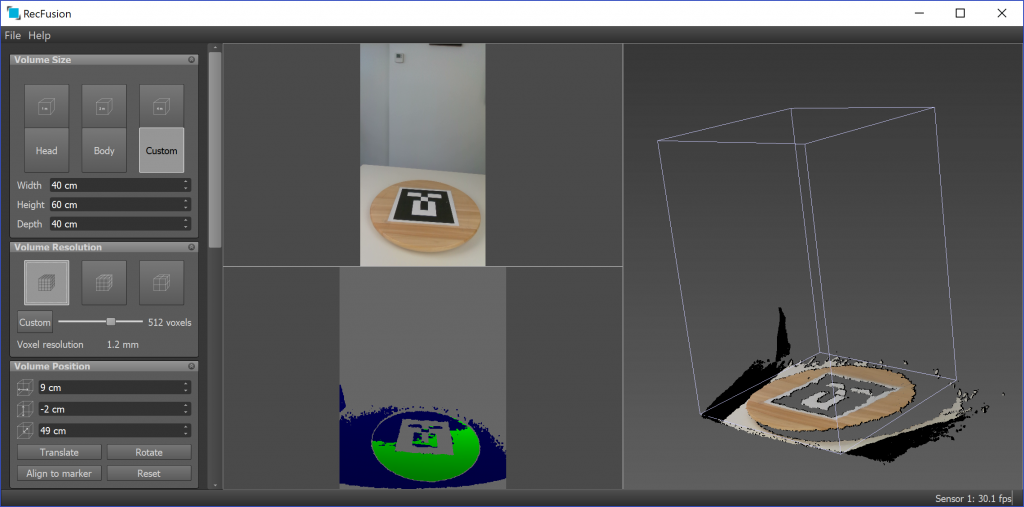
Other than Sense for RealSense, which features automatic object detection, you’ll have to manually set the scan Volumes Size and also its position relative to the sensor. If you’re using the scanner on a fixed position with a turntable, you can use a printable marker for automatic alignment of the volume.
The Volume Resolution is set in voxels. Which is quite unique but easy to understand once you notice the voxel size. It’s noteworthy that for resolutions higher than the 512 preset, you’ll need a dedicated graphics card with more memory than my Surface Book’s 2GB GTX965.
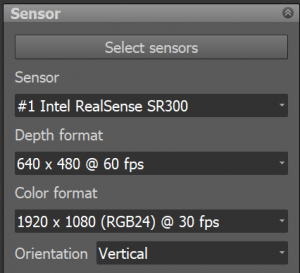
In the sensor panel you can select any combination of color and depth resolution your sensor supports, although not al combinations work. I did notice that I sometimes got combinations to work when switching to a different depth or color resolution and then back to the one I originally wanted. You can also fine-tune the color camera’s exposure, white balance and color settings or set the former two to automatic. Manual exposure is only available on certain sensors, though.
[column lg=”6″ md=”12″ sm=”12″ xs=”12″ ]
[column lg=”6″ md=”12″ sm=”12″ xs=”12″ ]
You can also set the sensor’s orientation to vertical, or even mirror the feed which can be handy if you use it facing towards yourself. Finally, the depth cutoff setting can be helpful for scanning objects with a sensor that has a large scan range.
If you want to use the sensor hand-held, which can be handy with or without a turntable to capture surfaces in hard-to-reach places, RecFusion offers both a start delay with countdown and fixed scan time setting. With this feature you can more easily walk around with a laptop or tablet in one hand and a sensor in the other.
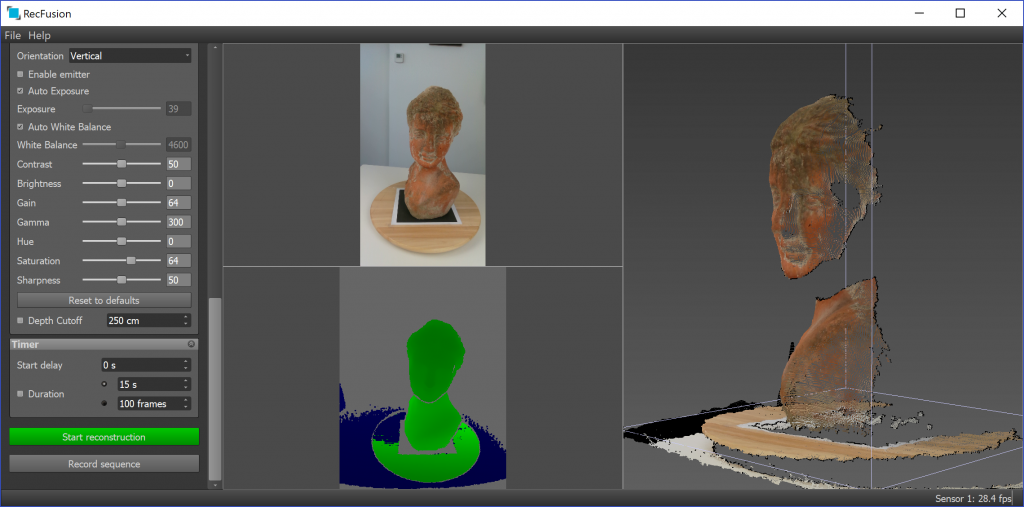
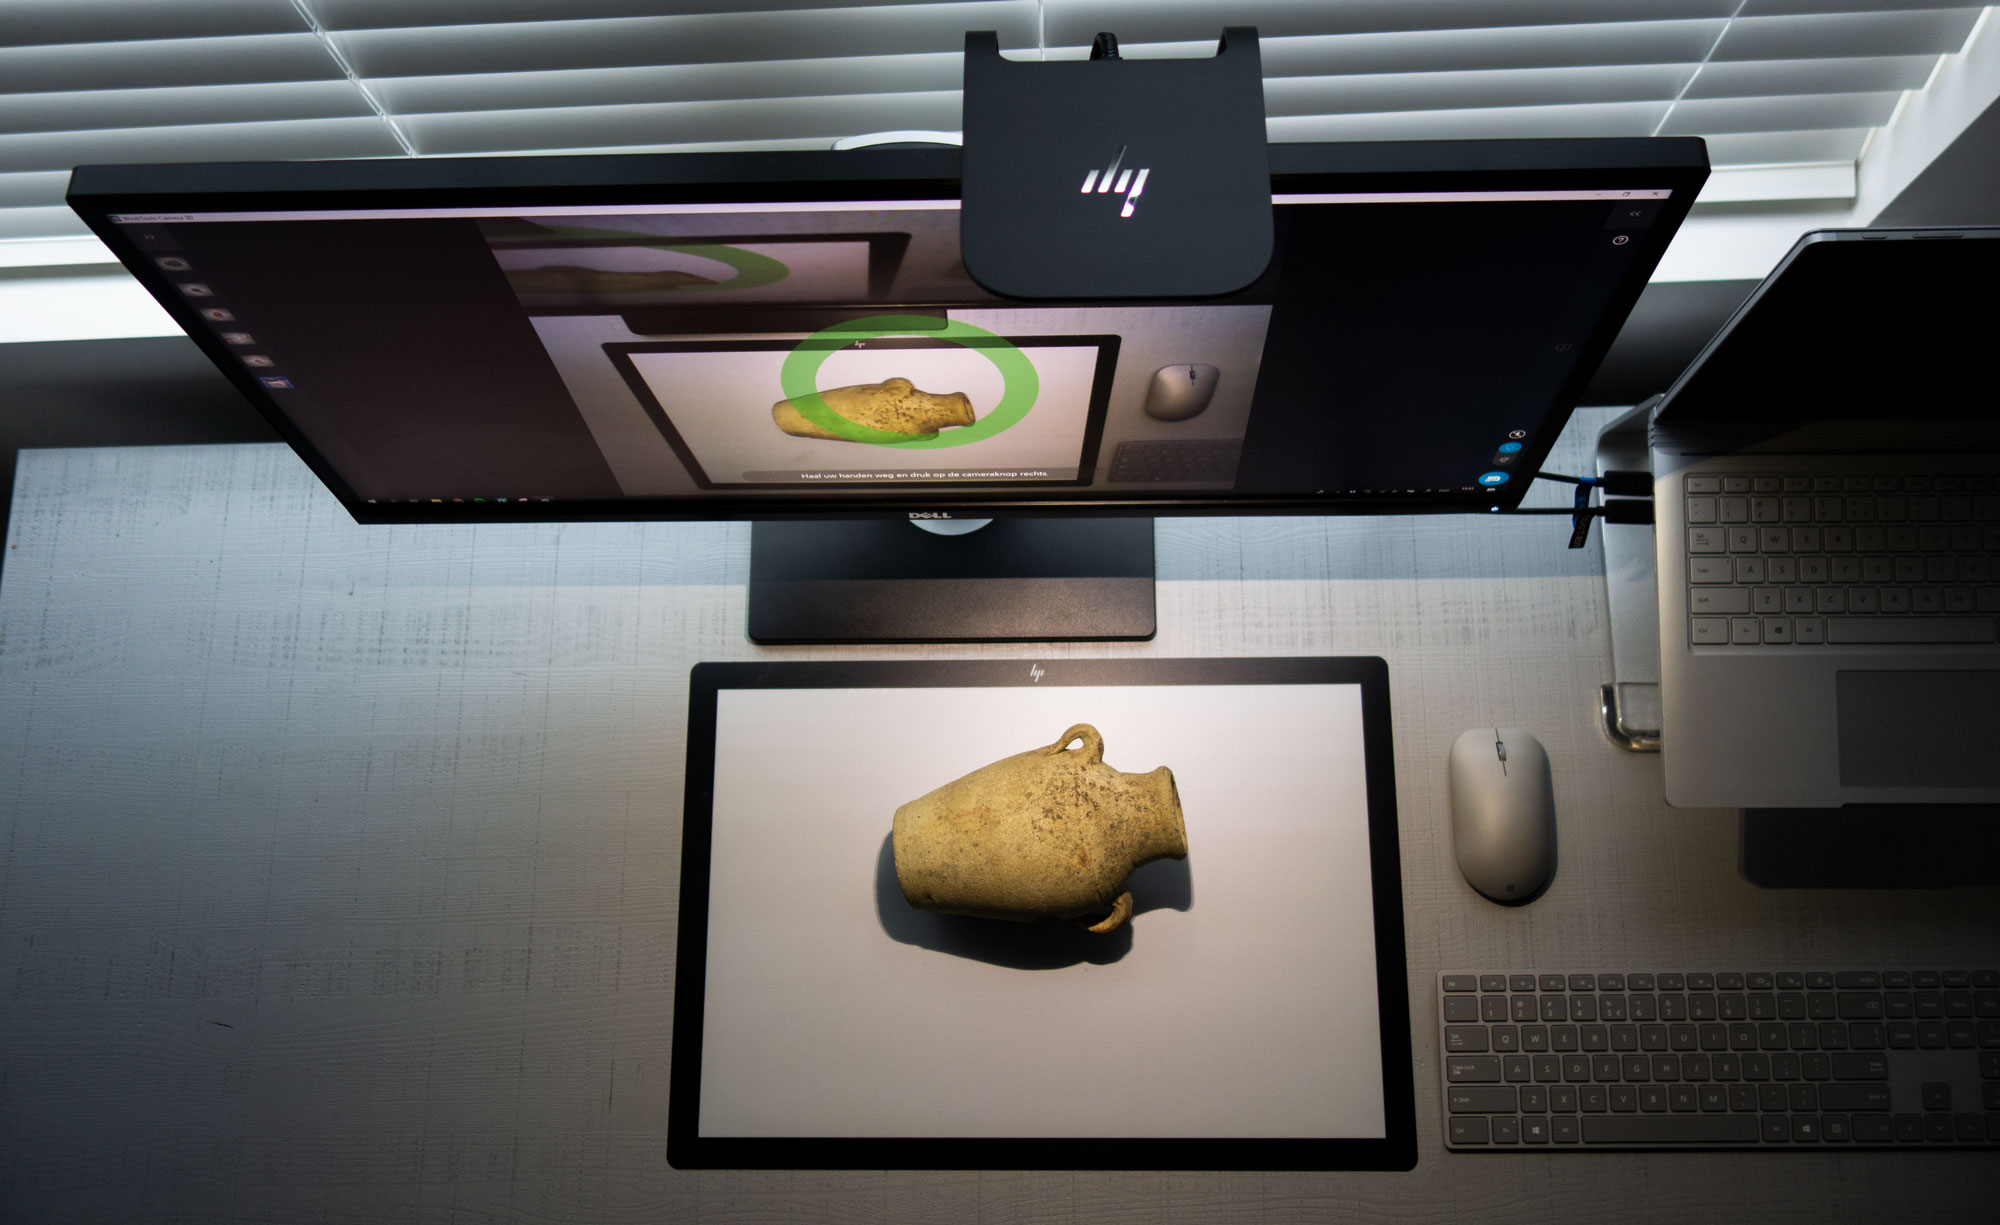
As you can see the 3-way split screen shots the RGB feed, the depth feed and a 3D voxel point cloud of the combined results. All three work in vertical orientation but unfortunately the 3D view loses its orientation setting while scanning. Then it shows a real-time fusion preview in horizontal view. You can switch off the color view while scanning which can make is easier to track your progress.
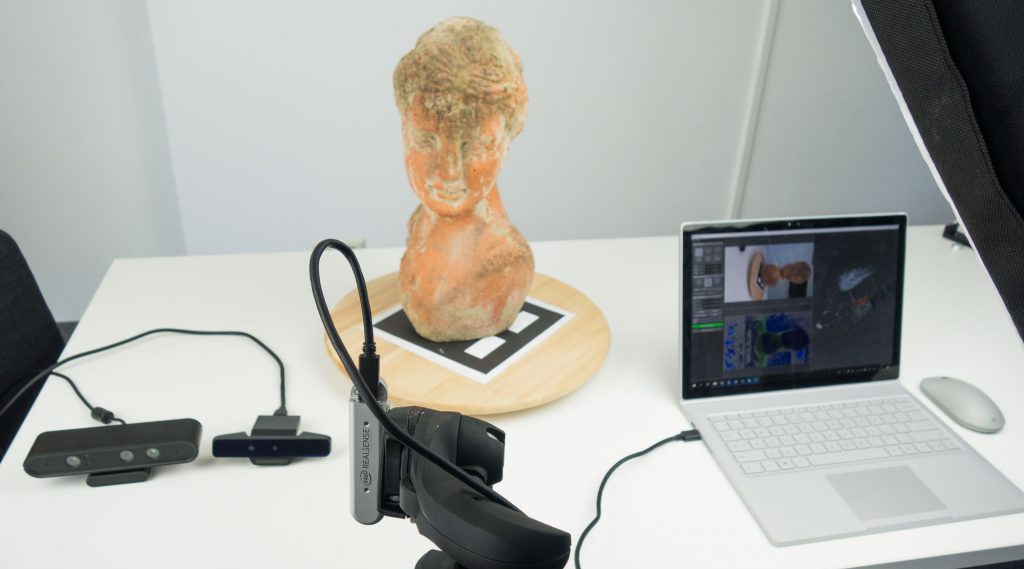
Here’s a screen capture video of the scanning process using a turntable, light kit and the SR300 depth sensor handheld.:
[well type=””]
I’m moving the sensor up and down only to cover the top and chin of the bust but this situation could be made easier with 3 depth sensors (although not of the SR300 type which doesn’t support multi-sensor scanning) and RecFusion Pro.
[/well]
It’s good to know that after you’ve finished scanning and checking the result, you can also continue the capture process to fill in details you might have missed. When doing that, RecFusion will try to recognize the camera angle and continue from there. This worked as expected most of the times I tried it. RecFusion’s tracking is good in general and it also found the correct angle again after tracking was lost in most of my tests.
[well type=””]
Note about Offline Reconstruction on CPU
The video above shows what’s called real-time reconstruction, or real-time fusion. Here the captured data is directly fused into a 3D model. This method relies on the graphics card (GPU) of the computer. That’s why the 2GB VRAM of my Surface Book’s Nvidia GTX965 limits the resolution I can set in RecFusion.
Instead of real-time fusion you can also opt to simply let the software record the image sequences from the depth and color camera. You can then save and open this sequence file in RecFusion for offline, or non-real-time, reconstruction. According to this tutorial page on the application website, there should be an option to perform this offline reconstruction on the computers main processor (CPU) instead of the graphics processor (GPU).
I’ve contacted the developer for tips on this and will update the post accordingly if I can get significantly better results with offline CPU-based reconstruction. The developer has let me know that the page is outdated and that CPU-reconstruction is now longer supported.
[/well]
Editing
After scanning RecFusion takes a moment to optimize the scan’s colors. Unfortunately the native color capture is only done with per-vertex coloring, meaning that the color quality is strictly tied to the geometric volume resolution. This differs from programs that can project separately captured color stills onto the geometry using a technique called UV texture mapping.
You can view the finished scan with or without color applied, or view the wireframe.  Most well known editing features are present in RecFusion, like cropping the model (pictured below) or selecting orphan elements automatically for clean-up.
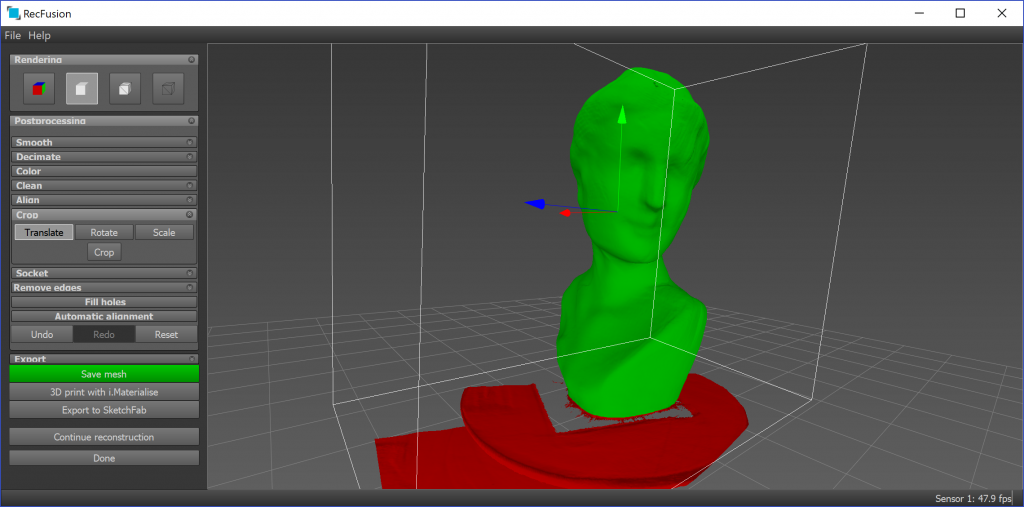
There’s also a decimation feature that works quite well in preserving geometric details. But because of the per-vertex coloring you’ll also use color resolution.
There is an automatic hole filing feature but interestingly that doesn’t offer any features to set the maximum hole size. The feature also didn’t produce a flat fill where I expected it to do so, like the bottom of a freshly cropped area.
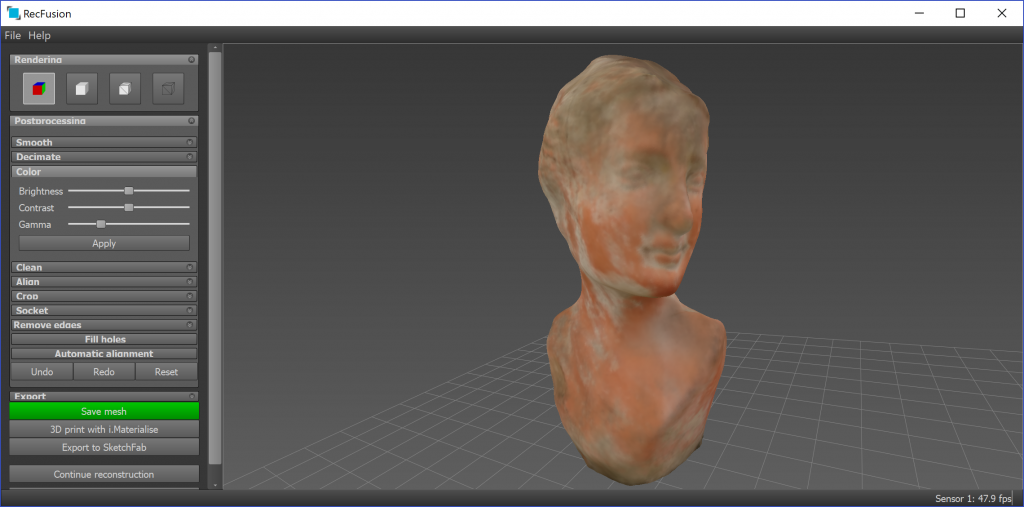
Color editing only covers brightness, contrast and gamma so it’s better to set the correct color setting before scanning as this offers more control.
If you do want to make 3D prints, RecFusion can also generate a pedestal (called socket in the software). But unfortunately there’s no feature to make a model hollow, which is something that would have been nice since that can save a lot of money on material costs when making prints in full color sandstone. There appears to be hollowing feature indeed, but its located in the Export tab, which brings us to…
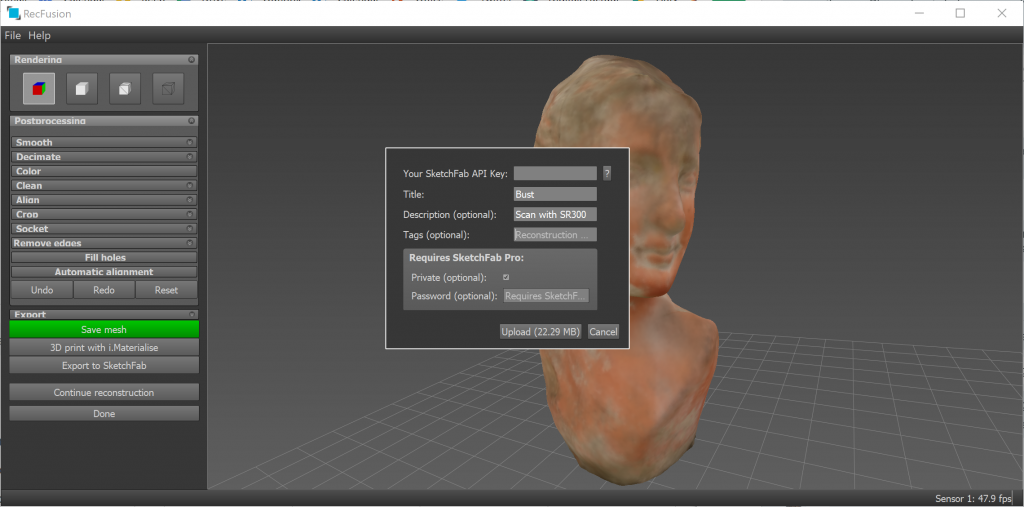
Exporting
You can can’t really save your project and model. Saving your Workspace is strictly for settings. Of course you can export your model to various well-known 3D file formats (STL, OBJ, PLY, VRML) or export it to Sketchfab (for online sharing and viewing in VR/AR) or i.materialize (for 3D printing).
If you want to create a hollow mesh for 3D printing, you can expand the export tab while in the mesh view mode and check “Hollow out inside of model”. The model has the be watertight for this to work.
Results & Comparison
Here are some results from scanning with the RealSense SR300 with RecFusion. Of course, quality depends on the sensor you use. And they’re also computed in real-time on the GPU with the 512 voxel resolution, since I couldn’t find the CPU reconstruction mode.
Here’s the bust from the screenshots, made with a manual turntable and the sensor hand-held:
So as expected I’m not very happy with the texture quality. The per-vertex coloring method has its limits. But if you hit 3 on your keyboard you can switch the Sketchfab viewer to MatCap mode to see just the geometry. There are some imperfections at the loop-point on the left of the back shoulder where the new geometry is supposed to fuse with the starting point of the scan. But that was not an issue I consistently experienced. Overall the geometry quality is a typical depth-sensor scan.
I also made a scan with the sensor fixed on e tripod:
As you can see that geometry is a lot smoother than the hand-held model, so adding some human motion can influence the scan result. Of the geometry that is, since the color information didn’t get any better.
To give you an idea of what UV-texture mapping based on separately recorded and projected RGB frames can do for a scan like this, here’s the same bust scanned with the same sensor and the same light setup but with 3D System’s Sense for RealSense software:
That model was also made with a manual turntable and moving the sensor vertically hand-held (there’s a video in my Sense 2 / SR300 review). As you can see the geometry is similar to the last RecFusion embed but the color quality is a lot more photo-realistic due to the mapped image files.
I found the same difference in appearance when scanning people. Below is the same person scanned with RecFusion and Sense for RealSense respectively:
Truth be told the mapping on the second model is also off, so it looks a bit weird. I never found software for the SR300 that gave me the same results for scanning people as the Structure Sensor / iPad / itSeez3D combo. And with my current test results scans I made with Structure Sensor and Skanect also outperform RecFusion for use-cases that require color.
For comparison, below a result from Skanect and Structure Sensor with the recently introduced hi-quality color mode enabled. The result below is a per-vertex colored model. Skanect can also export a UV-textured model, but that is derived from the per-vertex colors not UV-mapped independent of the geometry.
It’s interesting that the same person can look so different when scanned with different software and sensors. But when it comes to scanning people I still believe that the results from itSeez3D are the most realistic:
Conclusion
RecFusion’s biggest USP is it’s sheer support for depth sensors. As far as I know it’s the only commercial software that supports Intel new RealSense D400 series (please comment if I’m wrong). On top of that, the Pro version let’s you connect multiple sensors to create custom 3D scanning solutions.
Working with the non-Pro single-sensor version does make clear that the software’s overall power lies in turntable scanning with the sensor in a fixed position. Then you can use a marker to automatically align the scanning volume. For handheld scanning, with or without turntable, the necessity to define the scan volumes size and relative position can be a hassle and counteract flexibility and ease-of-use.
[well type=””]
Need Tailored Advice?
Want to know which depth sensor, or depth sensor software, is best for your use-case — or if a depth sensor is the best technology for that in the first place?
[tw-button size=”medium” background=”” color=”” target=”_self” link=”/consulting”]Consider my affordable Consulting Service.[/tw-button]
I consult for individuals and startups as well as large Fortune 50 corporations, so don’t hesitate to send me an email with your 3D scanning challenges.
[/well]
Scanning itself is very robust in RecFusion, with almost no tracking issues and fast pickups when tracking does get lost. The voxel-based approach needs a bit of getting used to but I do like how it makes quality settings understandable. In my tests it did produce smoother meshes with sensors fixed on tripods than moving the sensor hand-held.
Overall, if you’re looking for software with broad (multi-)sensor support and your use-case doesn’t rely heavily on texture quality, RecFusion is a solid program. But if texture quality is important to you, I’d say it’s better to wait until the developer integrates hi-res texture mapping.
[well type=””]
Here are some of the affordable sensors supported by RecFusion. The last two also support multi-sensor scanning. I recently published a Sensor Shootout comparing these 3 sensors — with RecFusion.
[column lg=”4″ md=”12″ sm=”12″ xs=”12″ ]
[column lg=”4″ md=”12″ sm=”12″ xs=”12″ ]
[column lg=”4″ md=”12″ sm=”12″ xs=”12″ ]
[/well]