The last time I took a look at SCANN3D was in the summer of 2016. Back then it was still in development, and free, so I made it part of my original post with Free 3D Scanning apps.
One and a half year later, the application (currently version 3.1) has seen a lot of developments and now offers both a Free and Paid Mode. Time for a dedicated Review post that goes into what it is, how it works and what it produces in terms of 3D scan quality.
SCANN3D is developed by SmartMobileVision and is only available for Android. What sets it apart from apps like TRNIO for iOS (Review) and the discontinued 123D Catch that many people are still asking about is that SCANN3D performs the photogrammetry locally, not in the cloud. This might have sounded a bit optimistic 1.5 years ago but today’s flagship Android handsets are quite fast.
I’m testing the app on a Google Pixel 2 which has 4GB of RAM. The amount of RAM is the main bottleneck for how many photos you can process and at what quality. And talking about quality, there are now 3 presets: Basic, High and Ultra.
Pricing
While earlier versions of SCANN3D where totally free, this is no longer the case. The Basic quality preset is still free to use while High and Ultra require a subscription for €5,99 a month or €40,99 a year (33% discount). More importantly, you’ll need a paid subscription to be able to export models, even with the Basic preset, so the free mode had very little functionality. That said, the pricing won’t break your bank and it allows for unlimited processing. Subscriptions are easily manages through Google Play.
Why process Photogrammetry locally on a Smartphone?
Because more and more smartphones now feature a great camera, there’s little reason not to use them for photogrammetry. My Pixel 2’s camera has a 12.2 MP (images are downsized before processing, though) with f/1.8 aperture and optical image stabilization and takes impressive photos. Local processing means I won’t have to send a big collection of high-res photos to the cloud (like TRNIO does), wait in a processing queue and download my the 3D model. SCANN3D works totally offline. The downside, of course, is that photogrammetry is still very resource intensive so processing takes time and drains the battery quite quickly. My Pixel 2 gets hotter when processing with SCANN3D than any other app.
The main benefit, of course, is that you don’t need a computer. Photogrammetry software like Agisoft PhotoScan (Review), 3DF Zephyr (Review) and RealityCapture (Review) can deliver stunning 3D models from photos but require a powerful PC with dedicated graphics card (GPU) to do so. And in a world where more and more people are using tablets and ultra-portable laptops these specs are getting scarce while everyone’s smartphone is getting faster with each upgrade.
The main thing the developers are working on is optimizing the photogrammetry algorithms to be more efficient, and deliver higher quality. But they have also added new functionality to the capture part. Let’s take a look.
Meanwhile, other companies are building mobile photogrammetry apps as well. Sony recently released 3D Creator with their XZ1 flagship phone and Microsoft is hopefully (it has been quite silent) still working on the 3D capture app they demoed a while a go.
Guided 3D Capture with SCANN3D
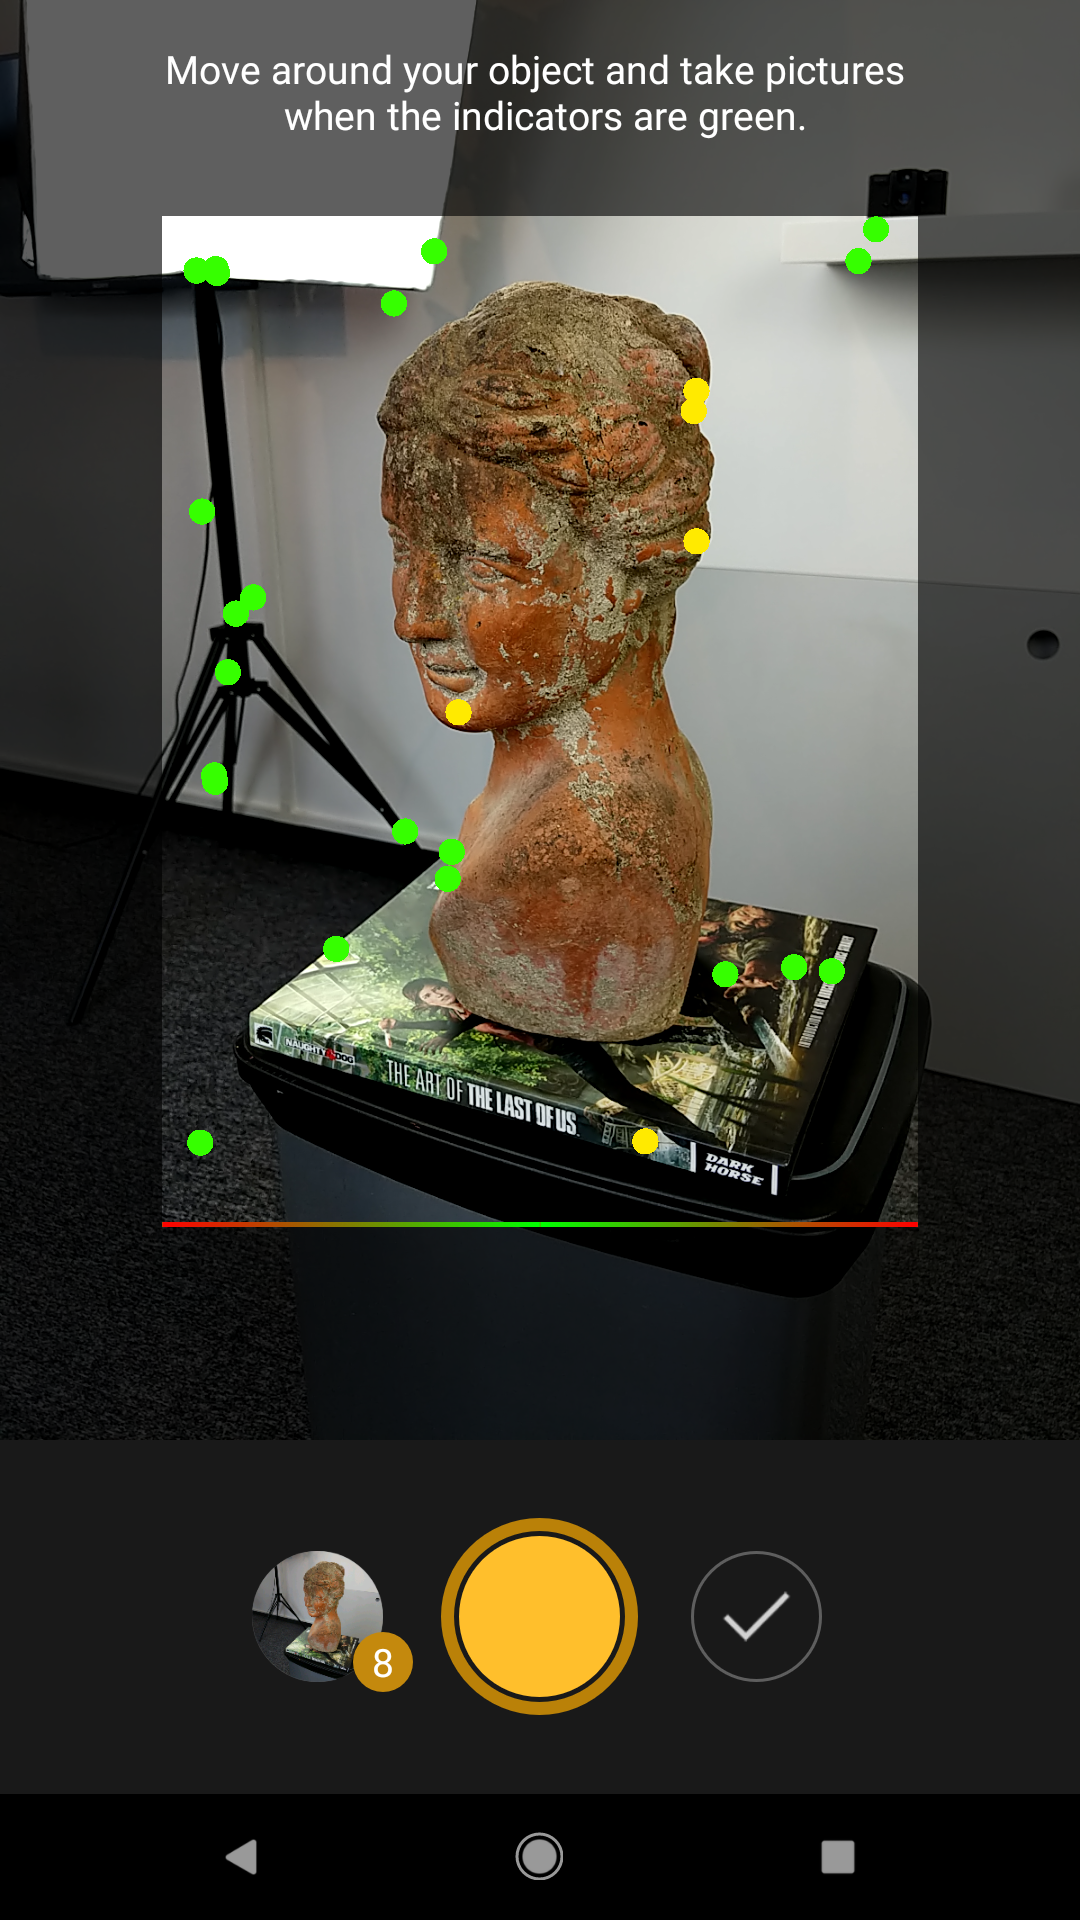
One big advantage professional handheld 3D scanners and depth sensors have over most photogrammetry solutions is that they offer real time guidance during the capture phase. Specifically, they use real time fusion to show what parts of an object have been scanned so users know when all angles are covered. Single-camera photogrammetry usually relies on the experience of the person taking the photos to know when enough photos are taken for the algorithms to produce 360-degrees models. This requires estimating if every photo has enough overlap with others.
The latest version of SCANN 3D partially solves this problem by tracking multiple points in the viewpoints. They first appear red and become green when the camera has been moved enough, but not too much, for a good overlap.
[column lg=”6″ md=”12″ sm=”12″ xs=”12″ ]
[column lg=”6″ md=”12″ sm=”12″ xs=”12″ ]
This works pretty well in some cases and takes a lot of guesswork out of the equation. But in other cases it didn’t work at all as it lost tracking on the first image. Probably because there weren’t enough high-contrast tracking points in the image.
Unfortunately the app doesn’t yet indicate if a complete 360-degrees circle has been completed, something that the discontinued 123D Catch could. It would also be nice if you could set the app to automatically take a picture when the indicators are green. This would make the process faster but I can also imagine this has a higher risk of introducing motion blur when users are impatient. Now it took me about 3 minutes to take the 47 photos I needed (this amount is purely my own judgement, there is no indicator for this).
Interestingly, the app doesn’t lock focus and exposure after taking the first image, something I believe is essential for good photogrammetry. This means that auto-exposure has an impact on the consistency of the images which can make it hard or impossible for the algorithms to detect patterns. Even the default Android photo app has this feature.
While it should be possible to use that app instead and load the photos into SCANN3D, this feature didn’t seem to work in the version I tested. I always got the error below, even with photo sets of more than 50 images.

Processing
You can perform processing right after capturing but also start a new capture and process everything later. Projects are nicely organized in image sets which can also be renamed for extra convenience. It makes sense to process pictures with the basic setting first to see if the image set is good enough to be solved. If so, you can process it at High. Processing at Ultra quality is limited to high end smartphones with enough RAM, especially with photo sets with more than 50 images.
The bust example in this review was made by shooting 47 photos with SCANN3D. On my freshly rebooted Pixel 2 (Snapdragon 835 Octa-core CPU, 4GB of RAM) processing took 4 minutes in Basic quality, 10 minutes in High quality and 30 minutes in Ultra quality. Also noteworthy is that that last processing task drained the (brand-new 2700 mAh) battery by 8%.
Not all tests I did could be processed at Ultra quality. Sometimes the app would say it failed and other times the app simply crashed, also with project that have less than 50 photos. A freshly-rebooted smartphone with only the SCANN3D app running (maximum free RAM) sometimes solved this but not always.
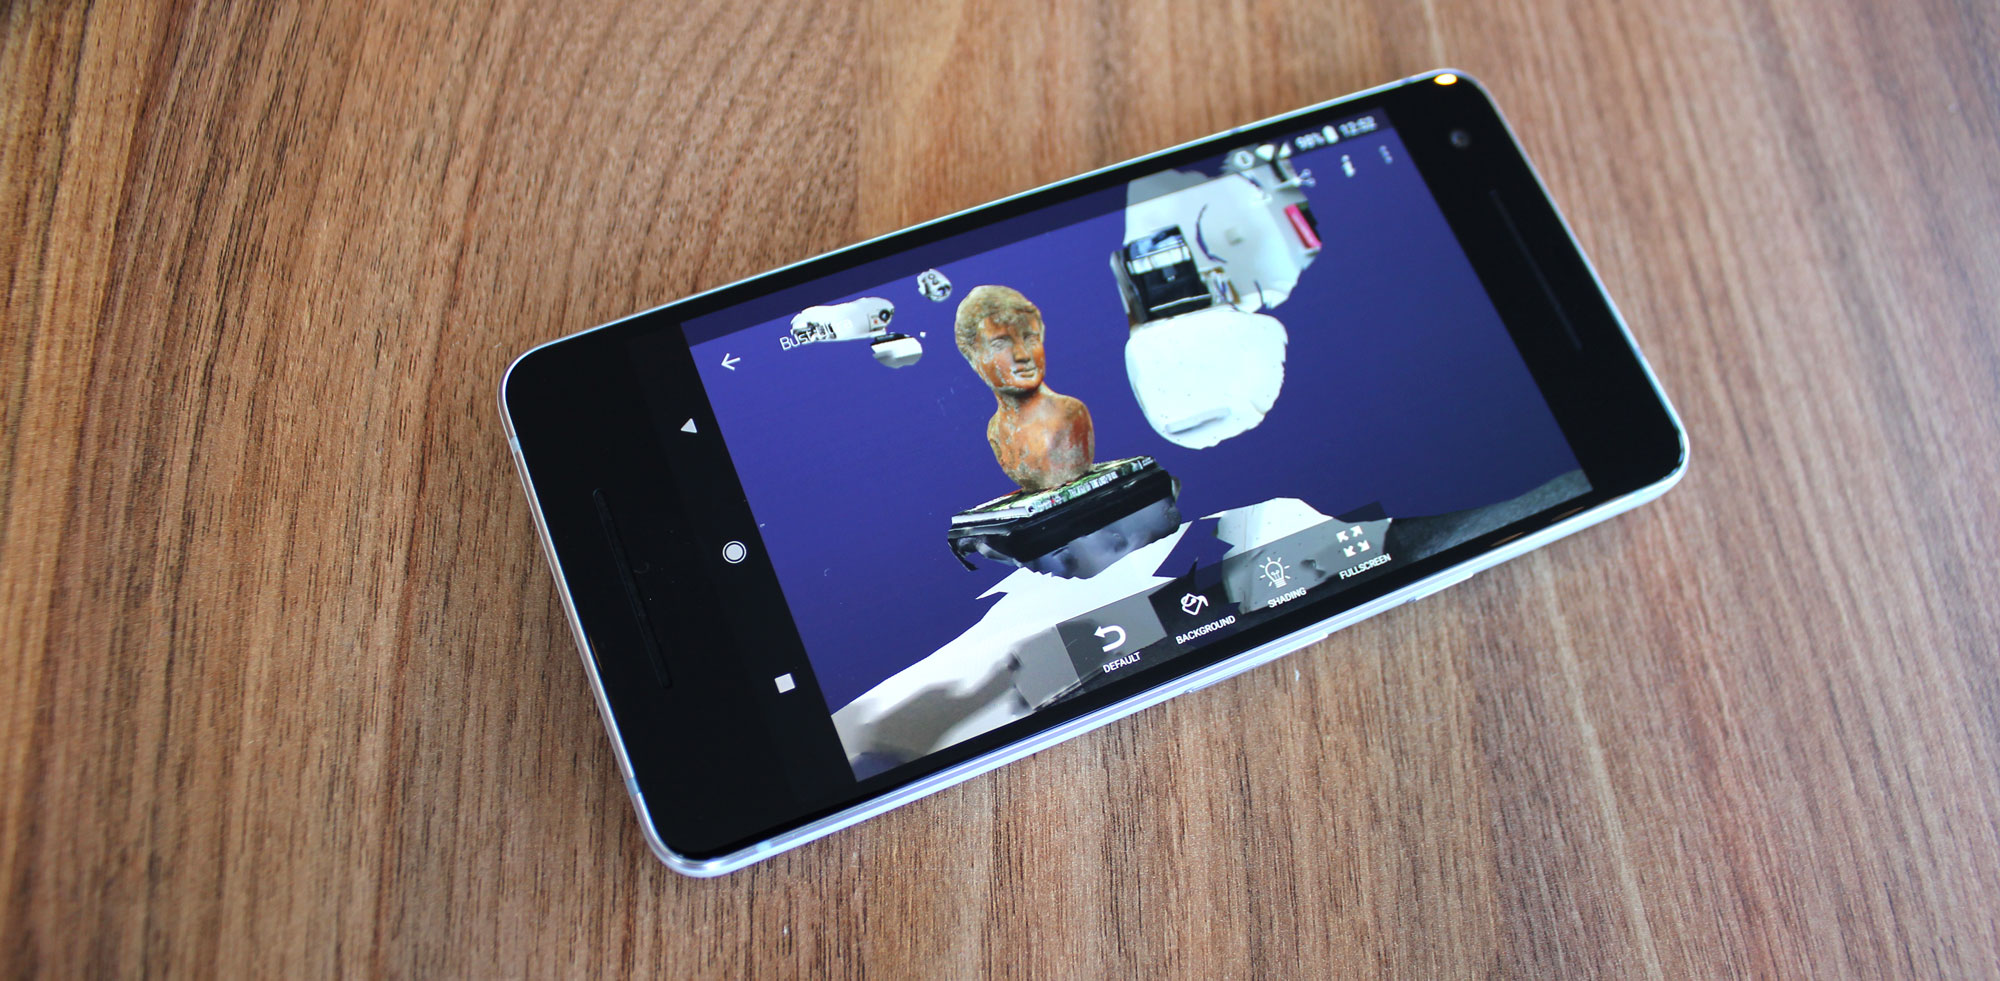
After processing, the result can be viewed in the new “modern viewer” which looks and works pretty fast. You can change the background color for better contrast with your object and also toggle the artificial lighting.
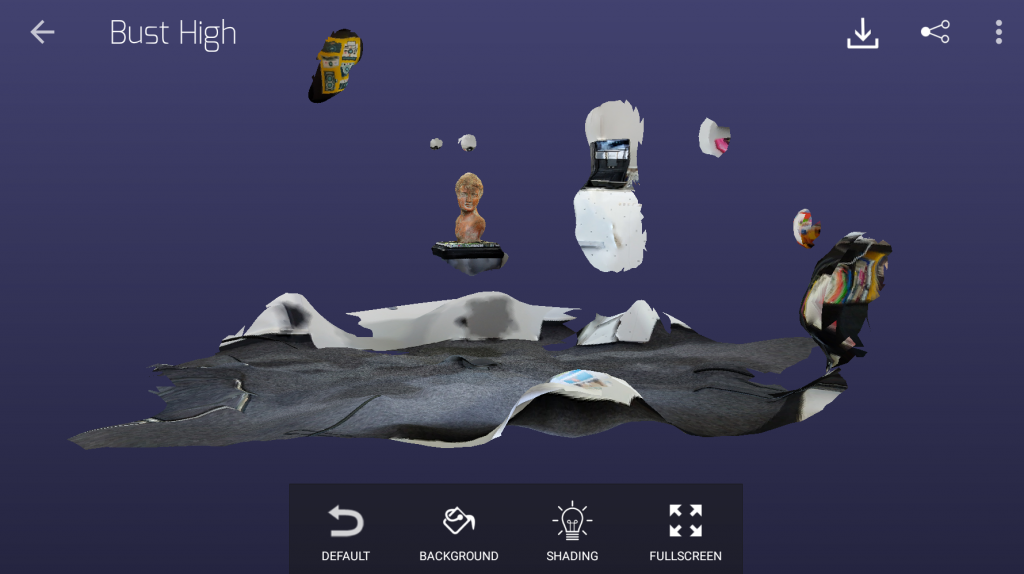
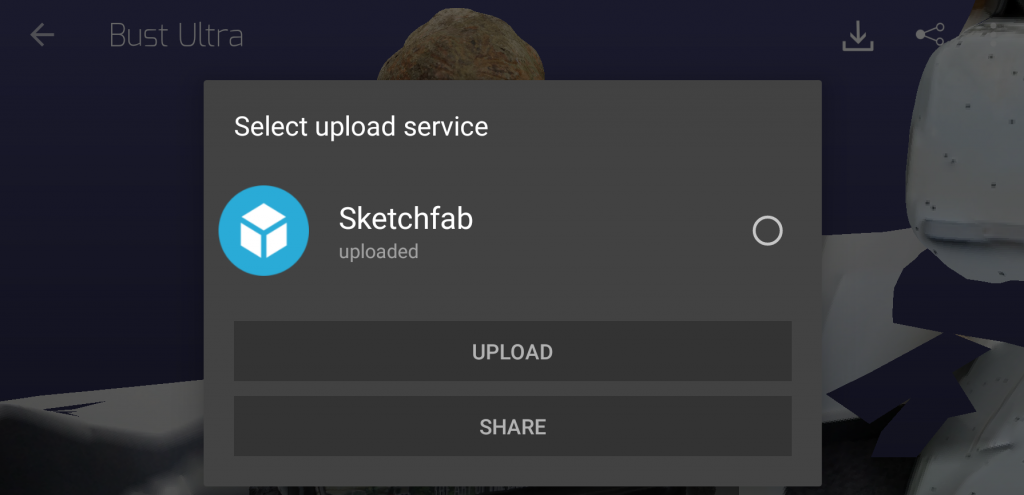
As you can see above, SCANN3D doesn’t offer automatic or manual cropping so beside the bust parts of my office are also in the scan. This is very inconvenient since it forces you to edit the results in external software. This also defeats the purpose of the built-in Sketchfab exporter, which would otherwise have been a very nice feature to keep the whole workflow mobile from capture to sharing online and viewing in VR or AR.
The lack of auto-cropping also means that the texture map contains a lot of useless data. Luckily the High and Ultra settings generate an 8K UV texture map but I’d rather have a 4K map of just the object.
You can export the 3D model as a mesh in .STL, .PLY or .OBJ formats directly from the app. It saves it to a dedicated SCANN3D folder on the local storage of your phone. This way you can either send it to yourself through email or upload it to your favorite cloud storage, like Dropbox. Just remember that on newer versions of Android, you have to turn on “view local storage” from the 3-dot menu in the left corner of the file browser. Then the Local Store will appear in the drawer on the left, letting you browse to the correct folder. This is all rather cumbersome so it would be nice to see native Android sharing (to Dropbox, Google Drive, etc) from the app in future versions.
Results
Firstly I wanted to compare the quality of the tests I did more than a year ago with the 2.x version (top) with the new 3.x (version). The first was captured and processed on a Nexus 5X smartphone and the last was captured and processed on a Pixel 2. Both were processed at the highest quality setting that was available at the time of testing, begin “Very High” for the 2.x version and “Ultra” for the 3.x version. The studio conditions and amount of photos where identical.
Besides the fact that the 2.x result has been cropped better automatically, the results are identical to me. The 3.x result did render the armpits slightly better, though. Textures are sharp but the geometry isn’t very detailed. Neither successfully solved the space between Teddy’s legs.
To compare the different quality settings of the current 3.x version, I exported the results as OBJs, cleaned them up in an external program and put them next to each other (from left to right: Basic, High, Ultra):
If you look at the textured results you can already see that the face on the Basic result is a bit deformed. And while the texture quality is good on all three models you can switch to MatCap mode by pressing the 3 key on your keyboard to reveal the underlying geometry. Here you see that the Basic model (4275 polygons) has no nose at all, the High quality model (9929 polygons) starts to resemble the bust but has quite rough triangular polygons and the Ultra version (43,335 polygons) actually looks like the real model.
[well type=””]
Mobile Photogrammetry vs Depth Sensor 3D Scan
In terms of geometric details, the Ultra version is comparable to the result you get from an affordable depth sensor like the Structure Sensor (Review). The result below is made with that sensor on an iPad mini 2 using the Free 3D Scanner app from Occipital which allows unlimited scans. This app also uses local processing. Scanning took about a minute and processing was almost-instant (geometric fusion is real-time but colorizing took 20 seconds). And that’s all on an ancient iPad.
As you can see the free Structure Sensor app offers limited texture quality. If you want better textures you can use the paid-for itSeez3D iPad app (Review):
The result above is very comparable to the SCANN3D result but the Android photogrammetry app still offers higher texture quality and better UV mapping. If that’s an real advantage would really depend on your purpose but for creating digital assets I personally like my textures to be as good as possible without stretched parts.
[/well]
[well type=””]
Mobile vs. PC-based Photogrammetry
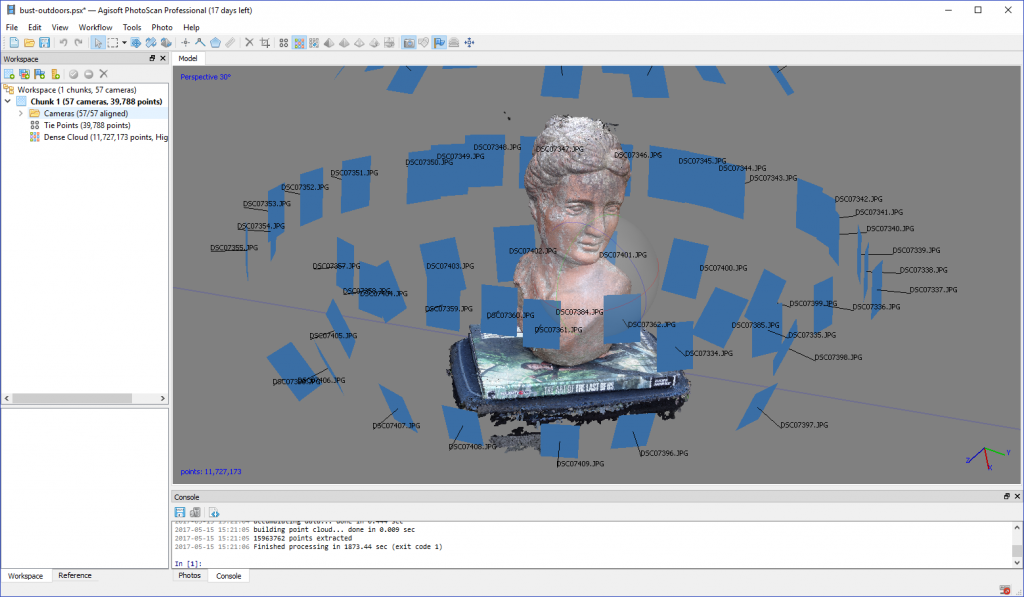
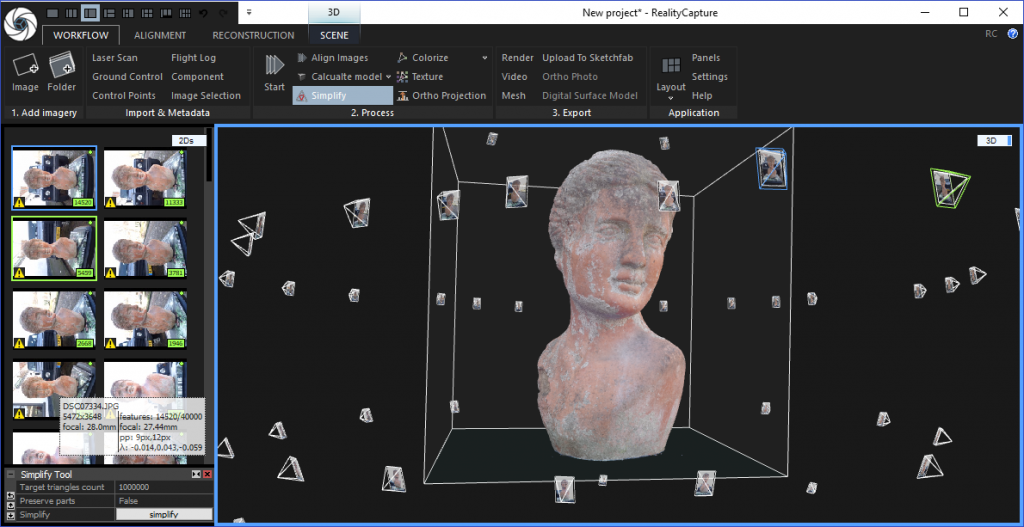
If you do have a Windows PC with a decent processor and graphics card, it’s good to know that you can download a Free version of 3DF Zephyr that can also process a maximum of 50 photos. On top of that it can also process a 40-second video which as just enough to capture this bust. Here’s the result from processing a 4K video from my Pixel 2. I’ve written a step-by-step Tutorial about this process.
As you can see in MatCap mode using a computer can still extract more 3D data from a smartphone-based source, in this case a 4K video. And if you start loading high-res photos into PC software like that the difference becomes quite significant:
Of course I fully realize that I’m comparing apples with oranges here! I’m only including this stuff because I know many readers are curious about the differences between the many kinds of hardware and software that can be used for 3D Reality Capture.
[/well]
Enough with the panel interruptions! Let’s continue the review! Here are more results from SCANN3D, all captured within the app. I was hoping to process them all in Ultra quality but it crashed on some image sets so I had to revert to High. All examples below where exported directly from the app to Sketchfab without external editing or cropping.
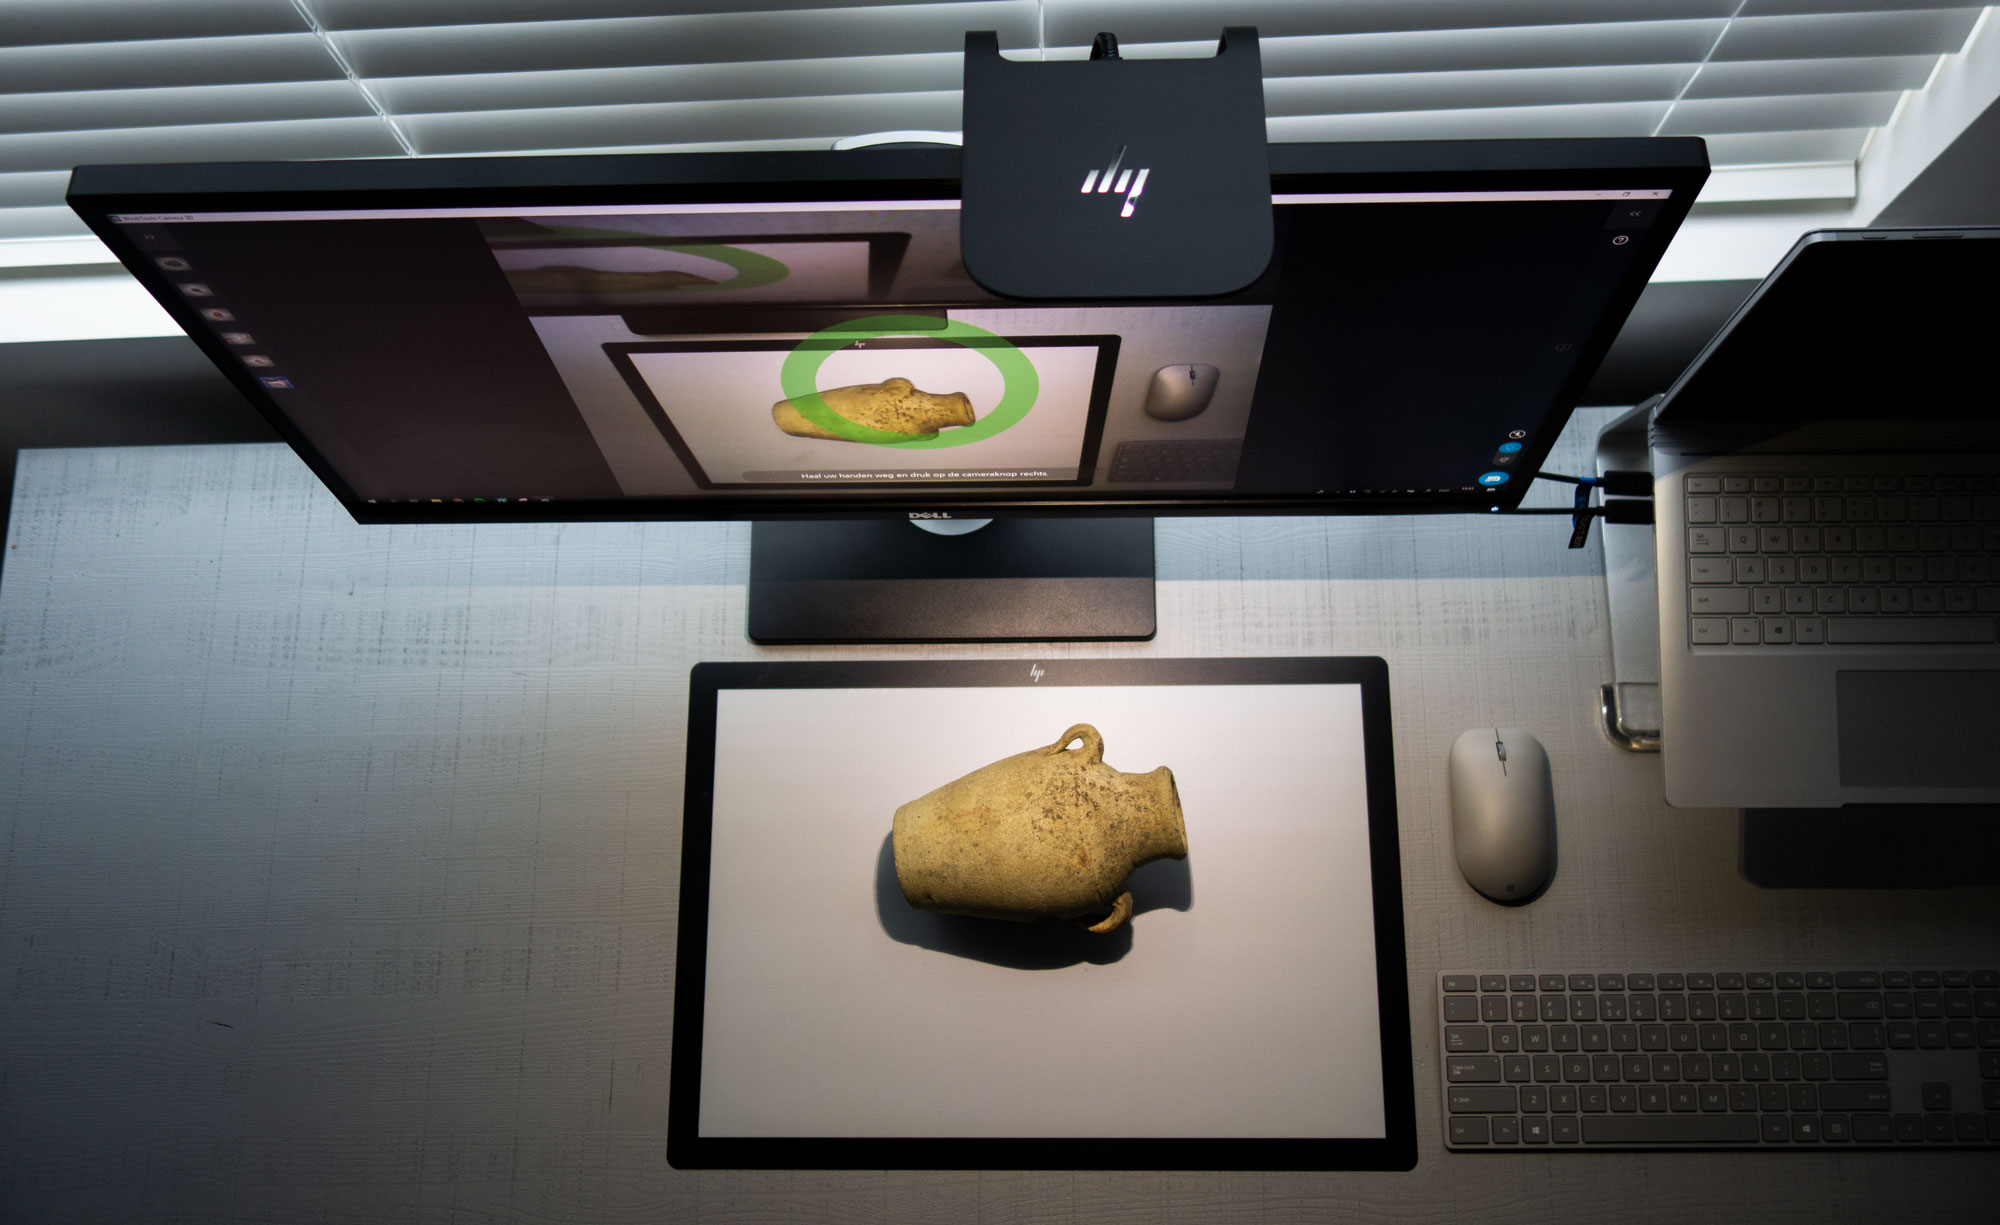
Since this is a mobile app, I wanted to go outdoors to shoot some objects in the wild. The first was a small wooden pole with a sign in the grass. It was small enough to capture in 31 photos and could be processed at Ultra quality.
I probably should have taken more pictures from the back of the pole since it didn’t get solved completely. The sign shows that the texture mapping isn’t perfect but I’m really impressed by the texture on the wooden parts. You can zoom in very far and still see details in the wood and moss. None of those details are present in the geometry but the overall shape of the pole is good.
Of course, you don’t have to make full 360-degrees captures. I passed a fruit stand on the street and took a few photos with SCANN3D in a simple sideways manner and the result (Ultra) quality is pretty interesting:
That’s just from 25 photos so more would definitely give more details but the result above could already be a nice background game asset or something. Again I’m impressed that you can zoom in on the chalk board to see all the photographic detail in the letters.
Another scan on the street. This time a typically Dutch mail box:
Somehow SCANN3D wan’t able to detect the grey legs of the mail box even though I though the brick wall would give enough contrast and tracking information. But I guess they are just too uniformly colored — a general problem with Photogrammery.
Finally (because I know readers are going to ask if I don’t try it) I decided to capture my business partner Patrick. Capturing people with single-camera photogrammetry is always hard because even subtile motion can mess up the algorithms. So counter this, I discovered that that SCANN3D gave the best results in the Basic quality mode. This mode probably analyses less pixels in each image and is thus more resilient for motion. High and Ultra got confused by this 31-image photo set and the results are too shocking too publish.
It’s unfortunate that the higher settings didn’t work because the Basic result is quite promising. Only there isn’t enough geometric detail in the face to make this model usable. But now we know what an inflatable version of Patrick would look like…
For capturing people with a single camera, continuous shooting works a lot better than making separate photos because the scanning time is a lot faster. That’s why I only had acceptable results when I used video as an input for photogrammetry.
As a final comparison, below is a “semi-mobile” photogrammetry result from a 4K video. It was shot on a smartphone but processed with 3DF Zephyr on a PC. Check my Tutorial for that if you’re interested in that workflow.
I’m hoping purely-mobile photogrammetry will deliver results like that soon! It might even be an idea for apps like SCANN3D to allow video as a source for faster capturing!
Verdict
With free mobile 3D scanning apps being extinct it’s only understandable that SCANN3D is now also subscription-based. There’s a free version with Basic quality but without export functionality that isn’t very useful. But for less than a Netflix-subscription you do get unlimited scanning in High and Ultra quality without the hassle of cloud-processing queues and data transfers. Naturally, local photogrammetry has its limitations but it’s clear that the developers of SCANN3D are working hard to optimize their Android-based algorithms to push the limits of both efficiency and quality.
As it stands now you can use SCANN3D to get depth sensor-like geometry with very good textures if you have a recent high-end Android Smartphone (e.g. Pixel 2, Galaxy S8 and similar handsets) and keep the amount of photos you take at a minimum. You’re still pushing these phones to their limits so expect some pocket-warming sensations, battery-draining — and crashes. Even with 45 photos, taken with the app, SCANN3D was unable to complete processing on some sets in Ultra quality.
That said, High quality did always work and produces “high-res-texture-over-low-res-geometry” results that are usable for some purposes. This means that mobile photogrammetry is now becoming realistic and processing times are not too crazy compared to PC-based solutions which is an exciting evolution.
But I’d really want to process everything in Ultra quality but that’s not stable and predictable enough for professional purposes on my new Pixel 2 with 4GB of RAM. For this, you’ll probably need a phone with 8GB of RAM but there aren’t that many and they’re not mainstream phones. A Samsung Galaxy Note 8 might be an in-between solution because it has 6GB of RAM.
User Experience-wise SCANN3D has made progress by adding tracking-based indicators that guide the capture process. But this only works when there are enough high-contrast trackable points in the image. SCANN3D also can’t tell you if you’ve made a complete 360 and doesn’t feature essential things like auto-focus and auto-exposure locking, automatic or manual cropping or direct export to Dropbox.
All things combined it’s clear that SCANN3D has made a lot of progress with their algorithms for version 3.x but needs quite a few more features to become a compelling app for non-experienced users. But it isn’t a real problem if implementing these features would take a year because local mobile photogrammetry clearly needs more powerful hardware than the current generation of high-end smartphones.
If you want to keep receiving updates about mobile photogrammetry solutions, be sure to follow me on your favorite social network or subscribe to my monthly newsletter below.
[tw-social icon=”facebook” url=”http://facebook.com/3dscanexpert” title=””][/tw-social] [tw-social icon=”twitter” url=”http://twitter.com/3dscanexpert” title=””][/tw-social] [tw-social icon=”instagram” url=”http://instagram.com/3dscanexpert” title=””][/tw-social] [tw-social icon=”linkedin” url=”https://www.linkedin.com/company/3d-scan-expert” title=””][/tw-social]
[well type=””]
PC-Based Photogrammetry Software Reviews
[column lg=”4″ md=”12″ sm=”12″ xs=”12″ ]
3DF Zephyr Review
Windows-only. Perpetual & Free version
[tw-button size=”medium” background=”” color=”” target=”_self” link=”https://www.3dmag.com/reviews/3df-zephyr-photogrammetry-software-review/”]View Post[/tw-button]
[column lg=”4″ md=”12″ sm=”12″ xs=”12″ ]
Agisoft PhotoScan Review
Windows, Mac, Linux. Perpetual license.
[tw-button size=”medium” background=”” color=”” target=”_self” link=”https://www.3dmag.com/reviews/agisoft-photoscan-photogrammetry-3d-scanning-review/”]View Post[/tw-button]
[column lg=”4″ md=”12″ sm=”12″ xs=”12″ ]
RealityCapture Review
Windows-only. Subscription license.
[tw-button size=”medium” background=”” color=”” target=”_self” link=”https://www.3dmag.com/reviews/3-free-3d-scanning-apps/“]View Post[/tw-button]
[/well]


I just sent this as an email, the n saw your request to send it as a post – sorry!
Dear 3D Expert,
Dear 3D Expert,
I have just found your site and will spend many hours studying it!
I have one quick question – most scanners are geared up to scan objects. Are there any scanners, ideally Android apps, which can scan the interior of a room – its walls and ceiling, doors, windows and features?
I am studying the inner passages and spiral stairs of a medieval church, and such a feature would be of great use.
Best wishes,
Lawrence Greenall
Waltham Abbey Historical Society
Essex, UK
Got your email and replied to it 🙂
can you take measurements within the scanned image?
Hi Sir. As Lawrence Greenall I would like to know if there are any scanners, ideally Android apps, which can scan the interior of a room – its walls and ceiling, doors, windows and features?
Dear Nick, I just try to get usable results with scann3D. I took 51 photos and the processed result of a model is pretty good. I processed it in basic and in high resolution. All the models I got were surprisingly good. But looking for a printable .stl result, it‘s only trash. What do I wrong or what can help to get good .stl files? I appreciate your kind response, because I have now since some weeks only bad results with different programs on PC and now at least the meshed photos at scann3d were very good.
Best regards and thanks in advance, Harald
Very nice app. Since i don t have a powerful phone , for example like: Asus Rog…I use my pc with bluestacks to emulate SCANN3D in it. I have a powerful pc so i export from the emulator to windows 10. From there i can edit in any 3d software in obj. Even with a powerful pc I can not produce the ultra settings. The app crashes. The other thing is that you need to make at least 80 pictures with close shots for the details and at least 20 wide shots for the overall object. The best time too shoot is on cloudy days outdoor.
hi Nick,
if there isn’t the model of smartphone in the list for focal length value how i can calculate it?
i have samsung s9
it not working as good as i expect after taking somany picture also the model is not perfect. i think it need more to develop. i subscribed it and now want to cancel it please inform how i can do it.
[…] Procesar objetos 3D a través de PC da un mejor resultado. Aquí hay un buen tutorial sobre cómo usar Scann3D y procesa tu modelo 3D en tu […]
Good morning,
This app is great for a single camera photogrammetry. Since it has this green tracking for alignment. It s a nice feature. The app itself produce good alignments. I have a samsung a51. I don t if it s with this phone, but it uses the camera with 5mpx with a resolution of 2k. If you are familiar with photogrammetry this is a pretty low resolution. So one of the things I tried is to take the pictures from the app, and move them to a pc. I tried to align them in reality capture. The results were bad because of the 2k rez. I would like too hear from you guys. At which rez your phone makes pictures?
[…] von 3D-Objekten über den PC ergibt ein besseres Ergebnis. Hier ist ein gutes Tutorial auf wie man Scann3D verwendet und bearbeiten Sie Ihr 3D-Modell auf Ihrem […]
[…] 3B nesneyi PC üzerinden işlemek daha iyi sonuç verir. İşte iyi bir öğretici Scann3D nasıl kullanılır ve 3D modelinizi PC’nizde […]
[…] tượng 3D thông qua PC cho kết quả tốt hơn. Đây là một hướng dẫn tốt về cách sử dụng Scann3D và xử lý mô hình 3D của bạn trên […]
[…] Het verwerken van 3D-objecten via pc geeft een beter resultaat. Hier is een goede tutorial over hoe Scann3D te gebruiken en verwerk uw 3D-model op uw […]
[…] Behandling af 3D-objekt gennem pc giver et bedre resultat. Her er en god tutorial om hvordan man bruger Scann3D og behandle din 3D-model på din […]
[…] Zpracování 3D objektu pomocí PC poskytuje lepší výsledek. Tady je dobrý návod jak používat Scann3D a zpracujte svůj 3D model na vašem […]
[…] 通過 PC 處理 3D 對象可獲得更好的結果。 這是一個很好的教程 如何使用 Scann3D 並在您的 PC 上處理您的 3D […]
[…] von 3D-Objekten über den PC ergibt ein besseres Ergebnis. Hier ist ein gutes Tutorial auf wie man Scann3D verwendet und bearbeiten Sie Ihr 3D-Modell auf Ihrem […]
[…] Memproses objek 3D melalui PC memberikan hasil yang lebih baik. Ini tutorial yang bagus tentang cara menggunakan Scan3D dan proses model 3D Anda di PC […]