If you’ve read my previous 3D Scanner Review of the 3D Systems Sense you know that I was impressed by the ease-of-use and geometric details for a device priced below €450. But the quality of the color information — or textures — the Sense captures are completely underwhelming. This has been fixed with the Sense 2 I reviewed later)
In this Review I’m testing the Structure Sensor made by a Occipital. This device was also available as the 3D Systems iSense but that rebranded version has been discontinued*.
I got my Structure Sensor from the Dutch 3D Printing and 3D Scanning Store MakerPoint.
Pricing
If you live in the US, a Structure Sensor will cost $379 with an iPad Air 2 bracket on Amazon. You can also buy them directly from Occipital for that price and have a choice of various iPad brackets and accessories such as a wide angle lens and a pro charger cable that can charge the Structure Sensor and iPad at the same time!
If you live in the EU and don’t want the hassle of international shipping and added customs costs and taxes you can best get the Structure Sensor with fitting bracket from Makerpoint for €499.
It’s compatible with all iPads newer than the 4th Gen iPad and iPad mini 2 (previously known as “iPad Mini with Retina Display”) — including recently added support for the iPad Pro 9.7″ & 12.9″.
I’ve tested it with the least powerful compatible device, the iPad mini 2, which has a 5 megapixel camera with an aperture of f/2.4. Since this camera is used to capture color details, it’s safe to say that using a newer iPad will result in better texture quality. This iPad Pro 9.7″, for example, has a 12 megapixel camera with a faster f/2.2 lens. That being said, I think that testing with an iPad mini 2 is a great benchmark and this iPad is still being sold for €265, bringing the total minimal costs of the Sensor + Bracket + iPad to €765 — which is still a lot less than many other 3D Scanners. (All prices I mention are in Euros and include 21% Dutch VAT).
I’ve tested the Structure Sensor with 3 different applications, which I’ll cover in 3 different parts of this Review:
- Occipital’s own iPad apps
- The third-party itSeez3D iPad app I reviewed and
- Occipital’s Skanect software for Mac and Windows (Review finally coming Q1 2017)
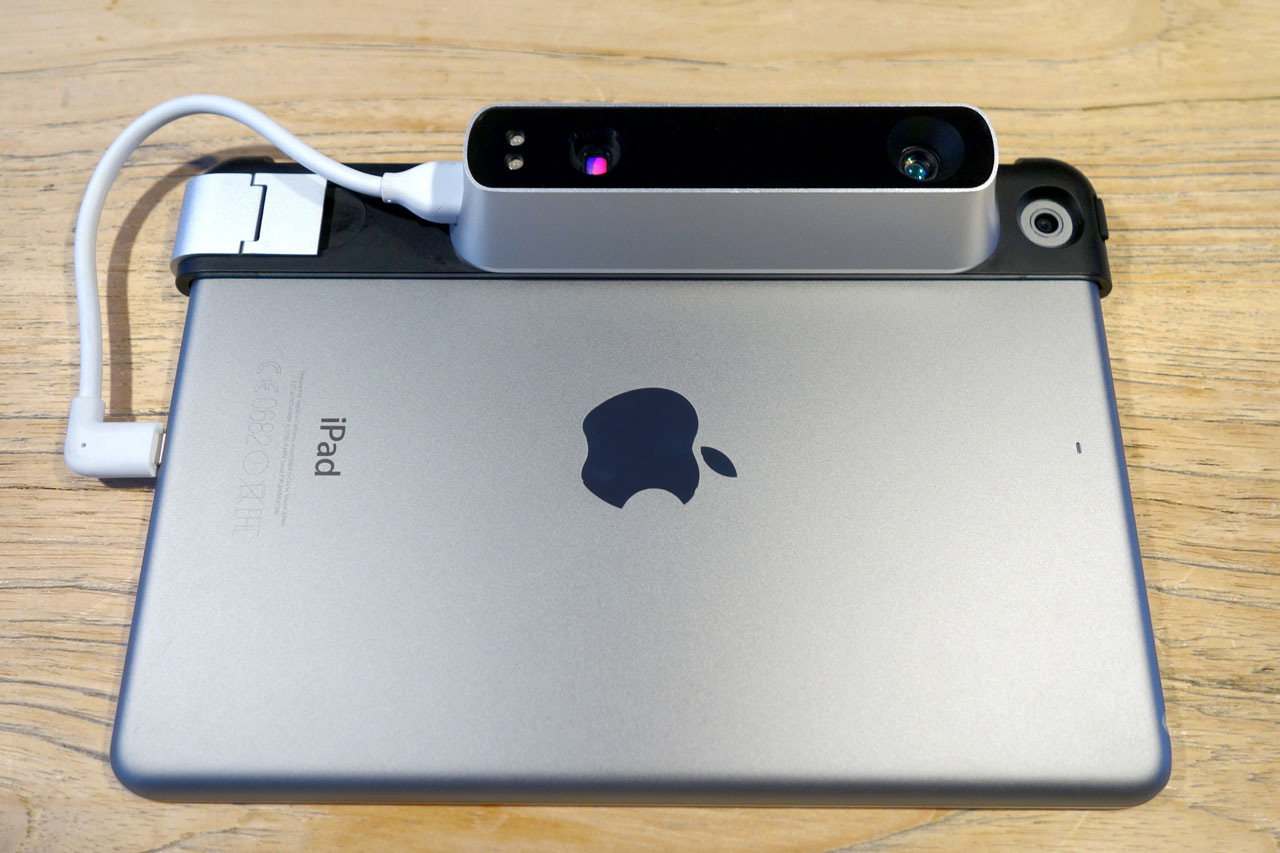
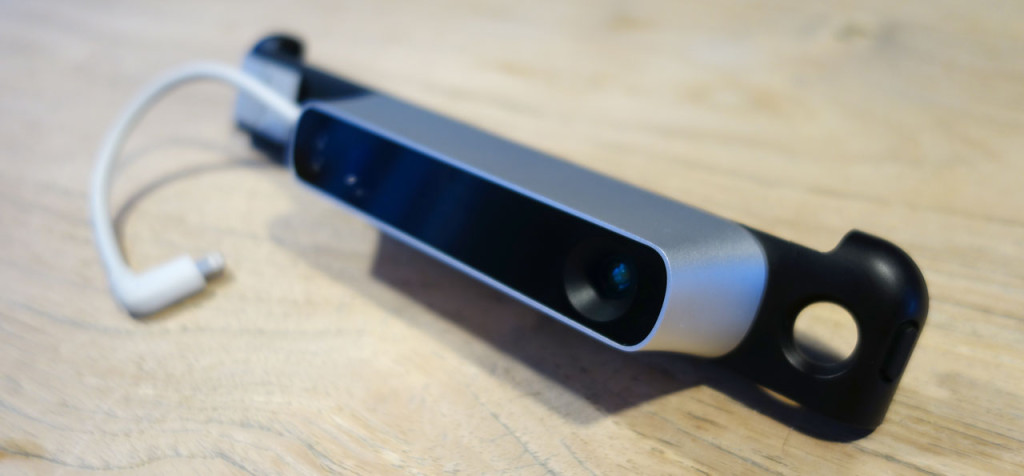
Setting up the Hardware
Attaching the Bracket
Firstly, you need to attach the Structure Sensor to the bracket—both are available with silver or blue aluminum—for your device. The sensor includes 4 screws and a screwdriver. The bracket can be an official one but you can also order 3D Printed versions through Shapeways or download one from Thingiverse and 3D Print it yourself. The Structure Sensor is a very “open” and customizable system this way. Occipital has even placed CAD drawings on its developer website so you can design your own bracket. Developers that want to experiment with the sensor beyond using it with an iPad, can also buy a €50 USB Hacker Cable to attach the sensor directly to any chosen device.
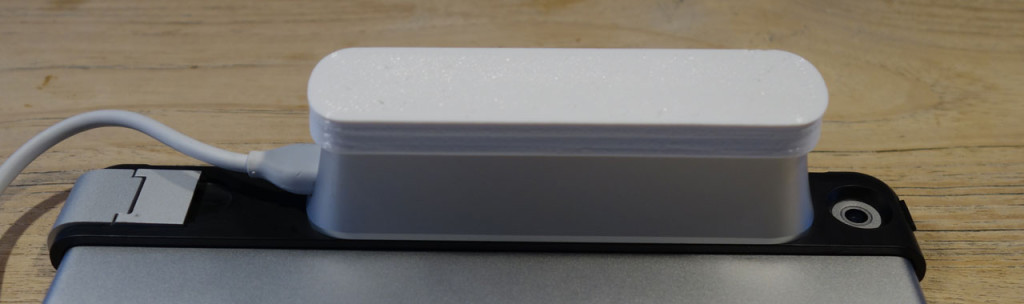
3D Printing a Lens Cap
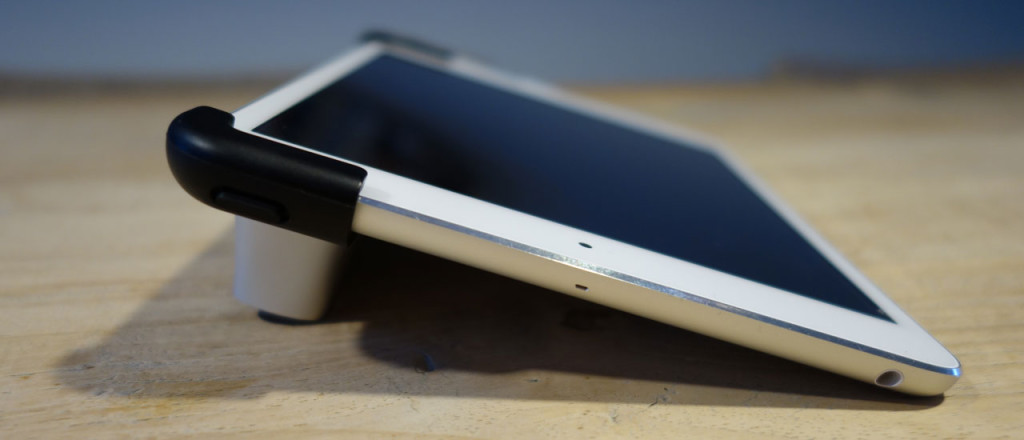
The brackets are designed to be easily removed from the iPad. This is nice, because like me you’ll probably have a case or sleeve of some kind to protect your iPad during transport. Unfortunately, the Structure Sensor doesn’t come with any kind of carrying pouch. And while the bracket with the sensor attached is sturdy enough to transport in one of the side pockets of my laptop bag, I don’t want any scratches on the glass. A lens cap isn’t included so I downloaded this Structure Sensor Lens Cap from Thingiverse and 3D printed one myself. If you don’t have a 3D Printer yourself, you’ll probably live near a Hub that can help you out.
Calibrating the Sensor
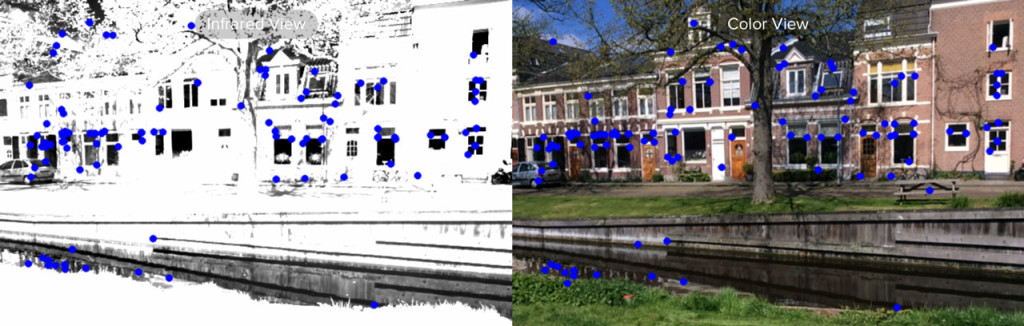
Before using the Structure Sensor for the first time, it has to be calibrated. This is mainly because the iPad’s native rear-facing RGB camera is used to capture the color information and the location of the camera varies on different iPad models. Because of this the offset between the iPad camera and infrared camera on the Structure Sensor has to be compensated.
There’s a dedicated Calibrator app that makes the process very easy: just go outside on a bright day and point the sensor towards something with a lot of detail. The app will track some details automatically to do the biggest part of the calibration and let’s you fine tune it afterwards if necessary.
3D Scanning with the Occipital Scanner App
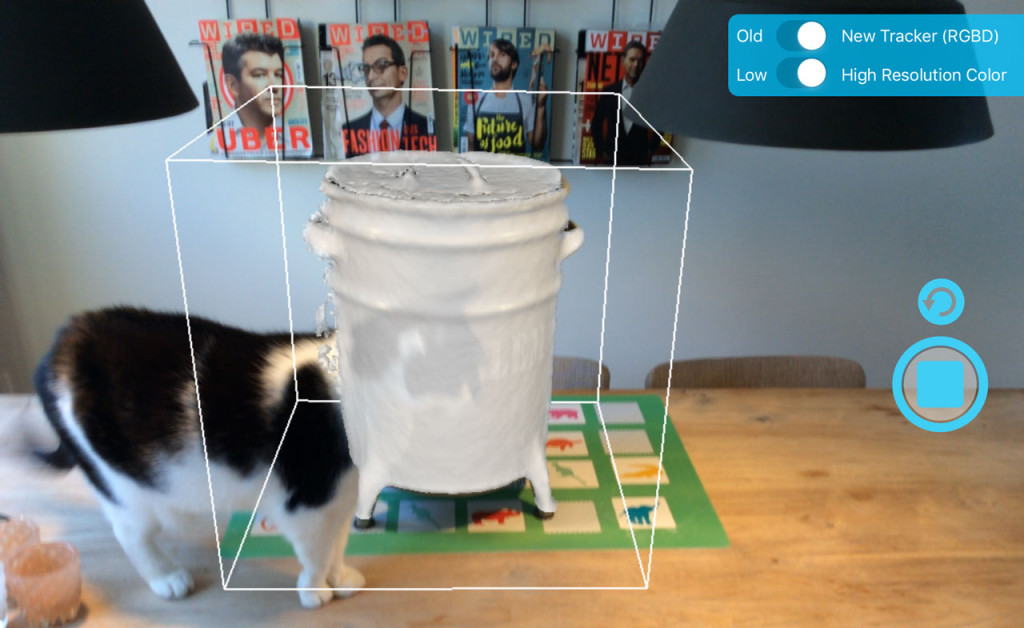
The native Scanner app is pretty straight forward. Simply point it at the person or object you want to capture and use a two-finger gesture to scale the indicator box so it matches the size of the subject, which will also be highlighted.
There are only two options:
- Scan using the “Old Tracker” that only uses shape information or use the “New Tracker” that also uses color information to keep track of the object you’re scanning. I see no reason to use the old tracker, because scanning without color information make it hard or impossible to scan uniform objects without many geometric details.
- “Low Resolution” or “High Resolution” Color. From my tests, the difference between the two is that the former outputs a 2K (2048 x 2049 pixels — or 4.2 megapixels) texture map and the latter a 4K (4096 x 4096 pixels — 16.8 megapixels) version.
The high resolution version does take a bit longer to render, or calculate. This is done on the iPad itself and my iPad mini 2 is one of the slowest compatible iPads. The exact time depends on the size and complexity of the subject. During this time you can’t make a new scan.
Scanning with a turntable
You can make 3D scans either by freely moving around an object or by using a turntable. Below is a video of the scanning process with the help of a €6 IKEA SNUDDA Turntable and a €4 tablet stand from Xenos. It’s played back at 4 times the original speed (hence the high-pitched 3D printer sound in the background).
As you can see I put Teddy on top of a book (the marvelous The Art of The Last of Us, to be precise). This makes it easier for the RGB tracker to correctly track the object while rotating. The app particularly had a hard time tracking the side view of the bear without the book. Apart from the natural light from the windows in the studio, I only used a 55 Watts light with a small softbox (visible on the right in the video).
When the rendering is done, you can preview the scan and export it though email as a .OBJ 3D model with separate texture map in .JPG format. Unfortunately there’s no way to save your scans on the iPad, so you need to have an internet connection to email the scan before making a new one. The .OBJ gets emailed as a .ZIP containing the model and texture files. The .ZIP can be uploaded directly to Sketchfab:
I was surprised by the scan quality. Especially taken into account that it took no time to “render” the geometry and only a minute to render the textures on a relatively slow iPad mini. The color quality sits somewhere between the blurry textures of the 3D Systems Cubify Sense (click for reference scan of the same model) and the sharper result of Photogrammetry with the free Autodesk 123D Catch app. I would say a scan like this is usable for many non-industrial purposes and you’d probably get better textures from a higher-end iPad. By scanning like this from a fixed angle I wan’t able to capture under Teddy’s arms.
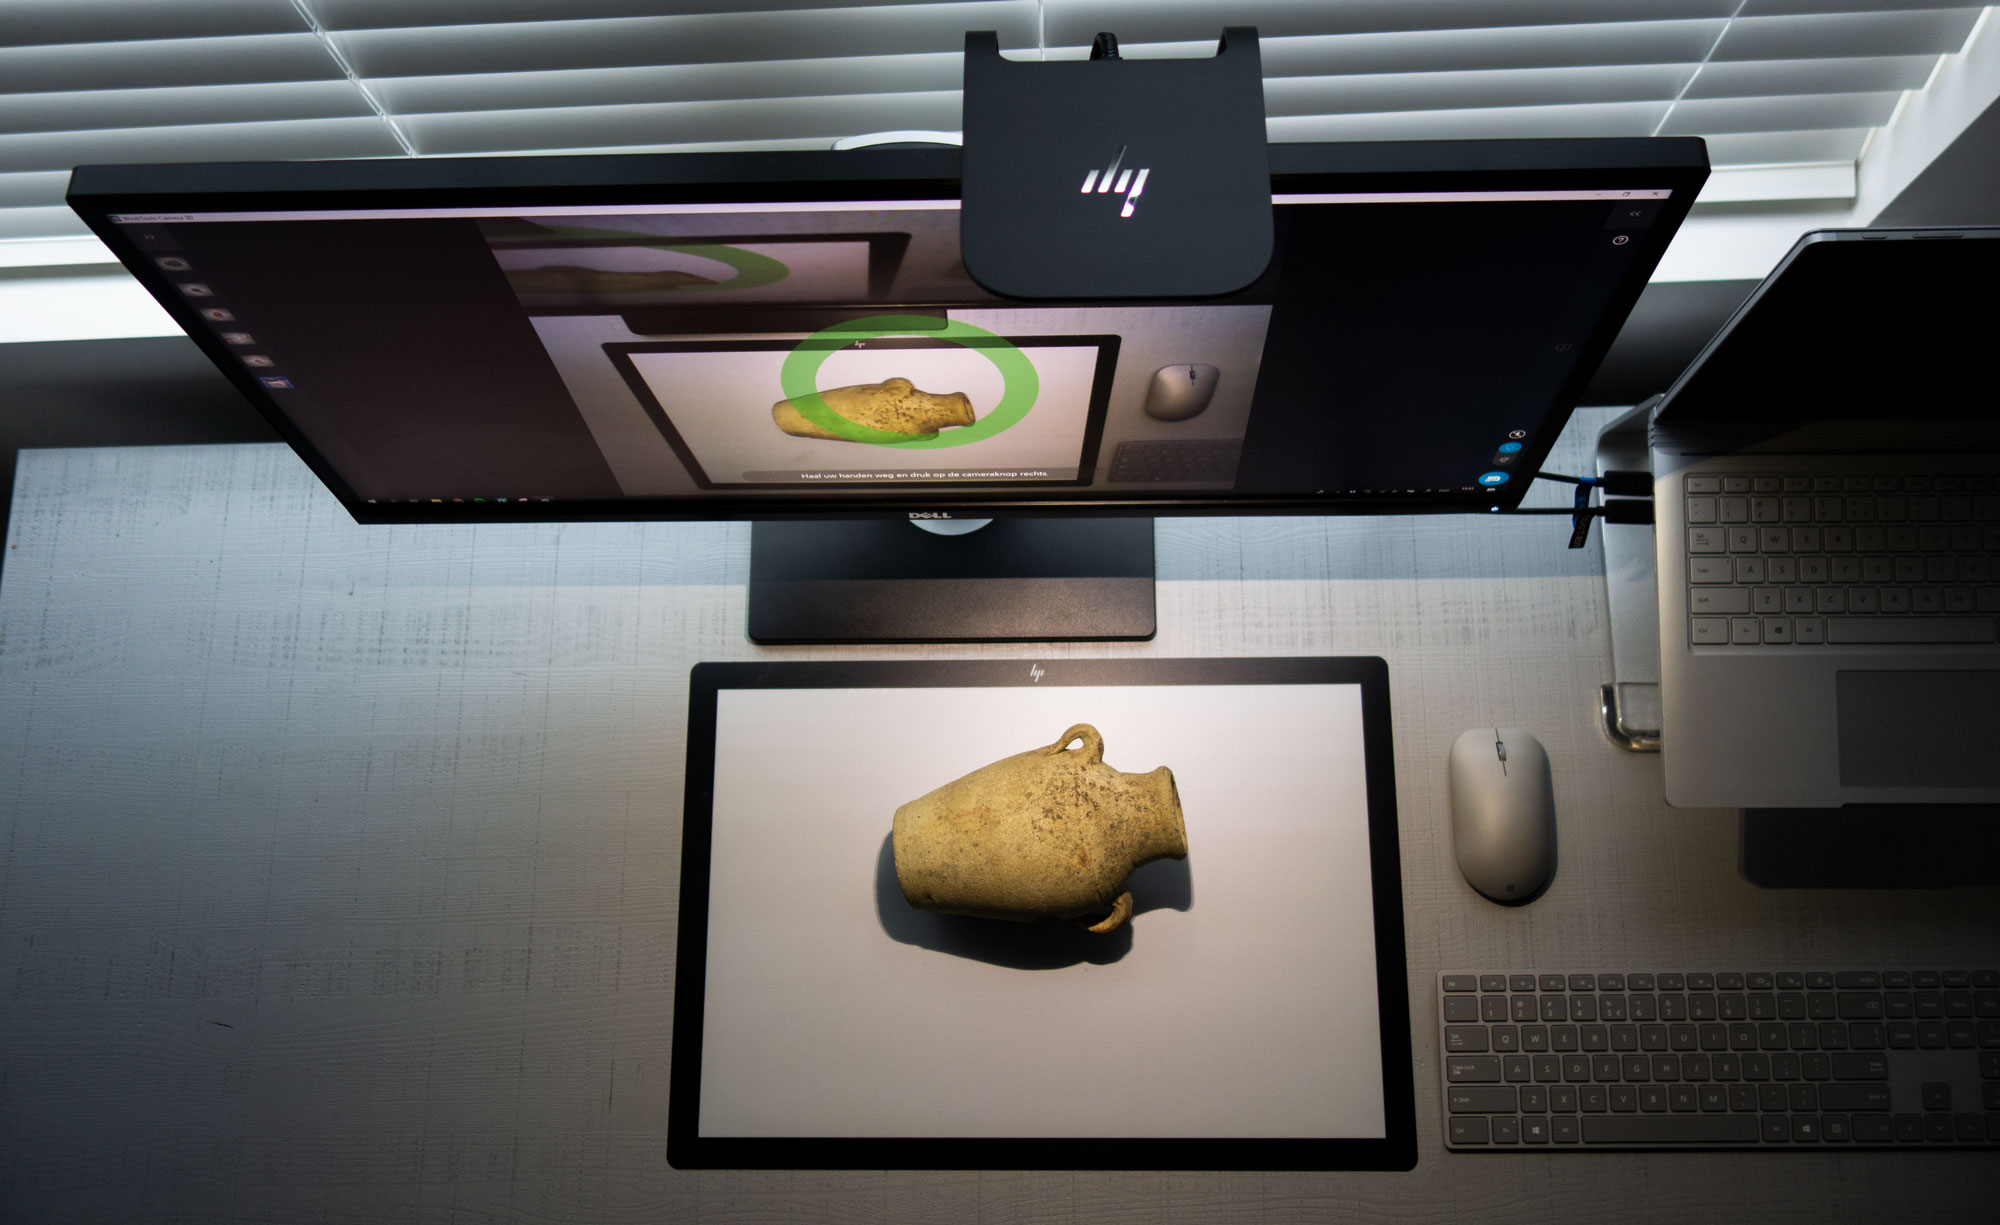
Free Scanning
For the next example I chose a bigger and less fluffy object: a small oil drum which has been modified into a basket (in Bali through Fair Trade store Jansje). I placed it on yet another of my daughter’s cheerful—and perfectly trackable—placemats on our dining table and walked around it freely, stopping every once in a while when asked to by the app. At those stops it takes a photo for the textures. I was surprised how smooth this experience is and how well the software tracked the object—it never lost it! And this is with the last bit of afternoon daylight and two dimmed ceiling lamps, so far from perfect lighting conditions.
The (new) tracker didn’t even mind that my (even newer) cat walked through the session! Of course I was glad no texture snapshot was taken at that moment.
Below is the result of the scanning session above. As you can see it didn’t completely capture the handle on the lid but the handles on the sides are fine. The texture okay, but not as sharp as I’d hoped. The stitching of the textures quite good, though.
Scanning People
Since I asked my business partner Patrick to model for the Cubify Sense 3D Scanner Review, I asked him to wear the very same shirt to the office for a perfect comparison. As you can see he was very happy.
https://www.instagram.com/p/BE_JhTHA4xJ/?taken-by=nicklievendag3d
As you can see below, the result is a lot better than that of the Sense. The resolution is a bit low—both in terms of geometry and texture—but it required no rendering after scanning for the mesh and only a minute for the texture information. To me it kind of looks like a video game character. It also makes Patrick look 10 years younger…
Update June 27th 2016
Occipital just released a new version of their Scanner app which uses their wel 0.6 SDK. The update promises higher quality meshes—a 60% resolution improvement on each of the 3 axis, actually—partially due to their acquisition of Lynx Laboratories.
Naturally, I wanted to test if this is true!
As you might have seen on my Instagram, my first test was this 40 cm tall owl statue 3D printed with the Big Builder I reviewed a while ago:
At this size, the polycount was 50.000 vs. 44.000 with the old app based on the 0.5.5. SDK. A 15% improvement, but not really visible. So I scanned my loyal test subject and business partner Patrick:
At this size the upgrade in resolution is very apparent: 24,169 vs. 56,427 faces with the new app—230% more polygons! Even without the numbers, there’s clearly more detail in Patrick’s face (he likes the old mapper better) and T-shirt.
It’s impressive that this kind of improvement can be achieved with just a software update. And remember it’s all rendered locally on an iPad—in realtime—no cloud processing. And according to the Developer Program Manager of Occipital, this is just the beginning:
Excellent to hear and thanks for the kind words. @mrm_design @structure @NickLievendag Next rev of the SDK will be even better. — Mark Piszczor (@mpiszczo) June 27, 2016
It’s worth mentioning that since this update to SDK 0.6 there’s no longer support for the 3D Systems iSense I mentioned in the into. So the new Scanner app only works with an actual Structure Sensor bought from Occipital or one of its resellers.
Scanning Outdoors
The Structured Light technology that the Structure Sensor uses to capture depth is great for 3D scanning indoors. Trying to capture objects outside the comfort of my studio I quickly ran into the limitations. As you can see in the calibration image in the beginning of this post, the infrared camera has a hard time capturing details in bright sunlight, let alone see the projected laser pattern.
So I did some experiments on a cloudy day—of which there are enough in The Netherlands. Below is a typically Dutch litter bin.
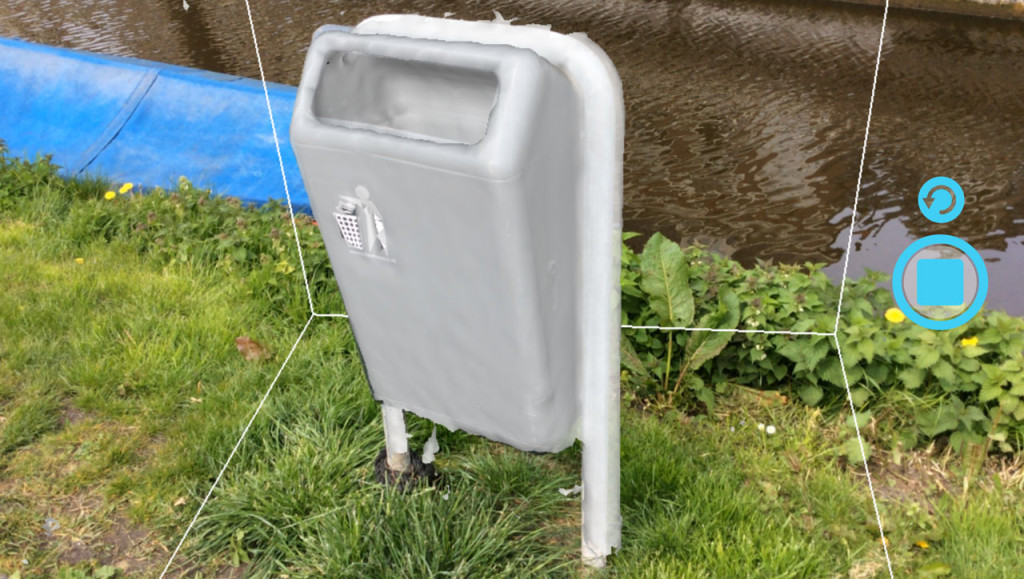
Again I was surprised by the smooth tracking: even without a flat floor surface the litter bin was tracked smoothly. It was a bit hard to capture the back without falling into the canal, but I managed quite well because it apparently doesn’t matter if the object goes out of frame for a moment, because its surroundings are tracked as well.
Below is the result of the scan. It’s far from perfect, but I find it especially interesting that there’s a hole where the icon is printed. Apparently the dark green of the bin absorbs enough sunlight for the infrared sensor to detect the laser pattern, but the white icon is simply too bright. There are also a lot of particles flying around which I’m pretty sure weren’t present in reality.
Below is another outdoors scan of a Dutch mail box when there was a bit more sunlight. The shadow side of the object and the wall are captured decently, but the side that’s facing the sun was totally invisible to the Structure Sensor. The result is rather interesting, but not usable of course.
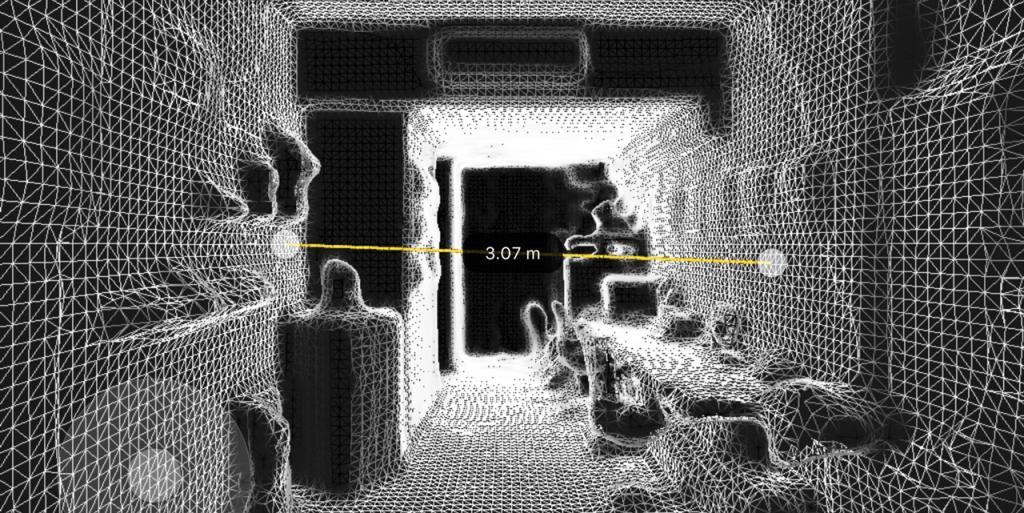
3D Scanning interiors with the Room Scanner App
The last app I’ll cover in this part of the review is Occipitals Room Scanner App. It’s completely foolproof: use the slider to visually indicate the size of the room you’re about to scan, hit scan and move around until every surface is covered by green polygons. Unfortunately, the app forces you to stay more or less in one place, so you can’t walk around a room freely to scan around corners.
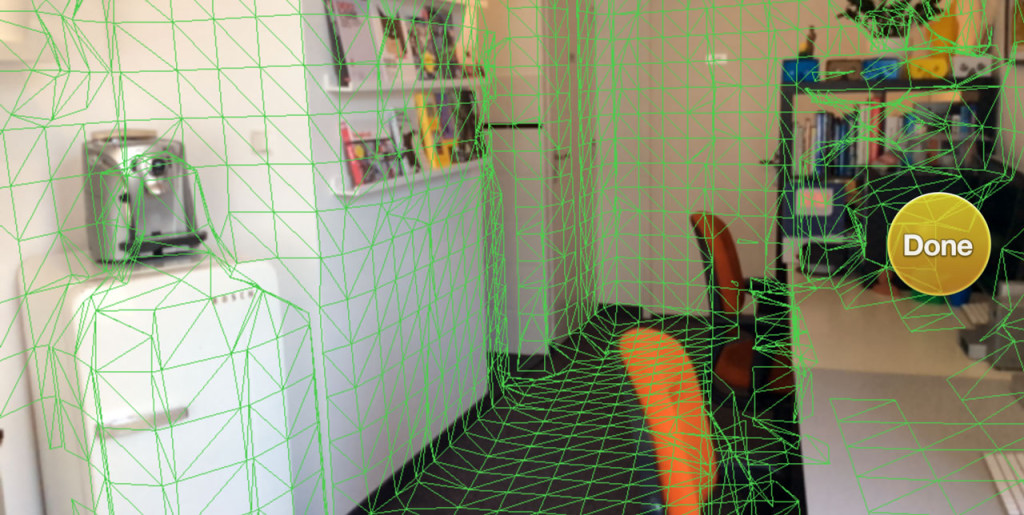
Its usefulness greatly depends on the purpose. As you can see below, the output quality is too low—both in terms of geometry and texture—to use for any purpose that needs to be esthetically pleasing (you can look around in the interactive Sketchfab embed below by changing the navigation from Orbit to First Person with the icons in the bottom-right corner)
However, I can think of a few purposes for which the Room Scanner app is useful. For instance, game level designers can use it as a dimensionally accurate reference to create an interior for a video game. It’s also very handy to take quick measurements, because making a scan only takes a minute and the app has a built in measuring feature.
Wrapping up Part 1
It’s good to realize that Occipital’s Scanner apps are samples to demonstrate new features that are announced every few months. For example, in March 2015 SDK 0.4 was introduced, which offered the New Tracker I wrote about earlier, as well as the ability to output UV-textured meshes. Earlier versions apparently used per-vertex coloring that delivered the same low-quality color information that disappointed my in my 3D Systems Sense Review.
So… the Structure Sensor has an SDK that allows third party developers create their own apps for all kinds of purposes. For example, it can be used to create Virtual Reality & Augmented Reality experiences. However, for this Review I’m merely using it as a iPad-based 3D Scanner and for that purpose there’s only one third party app—itSeez3D—which uses cloud processing for more detailed scans.


Thanks for sharing your thoughts on this! It’s good to get a look at equipment like this and find the best ones for what you need.
I have an isense.. is there any way to change the firmware to make it a ‘structure’ ?
I don’t know. Maybe you can ask in the Structure Forum: http://forums.structure.io
Hİ DEAR NİCK
I HAVE A STRUCTURE SENSOR AND PROJET 660 PRO
I DONT KNOW HOW GOİNG TO STRUCTURE SCANNİNG TO COLORJET 660 3D PRİNTER
CAN U HELP ME ABOUT THİS INTERMEDIATE STEP PROGRAMS LİKE MESHMİXER. MESHLAB VS.
NOT HAVE A GOOD TEXTURE FROM THE PROJET 660 PRO PRİNTİNGS
Is this good to use for an entry level scanning for body parts like hands, fingers and legs?
Depends on the purpose.
The Structure Sensor can be used for medical body measurements. For instance, with the TechMed3D app: http://www.techmed3d.com/structure-sensor).
I think it’s reasonably accurate for legs and feet. Hands are probably too small and fingers are certainly too small.
beside sketchfab, how can I watch my scanned opjects or put it online for viewing. IS it possible or not to get it on my youtube account for exemple or elsewhere.? because is seems there not much way or options to visualise results of scans. And this is deeply unacceptable to me. Looks like a freaky lost of time and money at this point after my first’s tests
It’s good to understand there are two ways of sharing a 3D capture:
– in interactive, realtime-rendered 3D or
– as a pre-rendered 3D image or video
Sketchfab (http://sketchfab.com) is a service for interactive visualization of 3D models. Users can rotate the 3D object freely, zoom in, etc. Alternatively, you can also take a look at Autodesk’s Project Play (https://play.autodesk.com). You can also embed interactive 3D models in Office documents and PDFs with the latests versions. It’s good to know that both Twitter and Facebook natively support Sketchfab links, so you can interactively view models within the Timeline/Feed.
YouTube is a video service. There’s no level of 3D interaction there. You can upload animated videos of a 3D model to YouTube, however. One thing commonly done is create a “turntable animation” of a 3D Scan. The same is true for every social network that supports video, like Instagram.
Ironically, if you do upload your 3D scan to Sketchfab, you can use this tool to automatically generate a turntable animation. Just be sure to set the resolution to 1920 x 1080 and the format to WebM (this is a video format). You can also export it as an animated GIF for easy embedding online.
Here’s a GIF of a Structure Sensor scan made with the tool above:
Hope this was helpful!
Great article. Interestingly enough i am still having issues with my iSense and the Occipital apps. Calibration app and Canvas app don’t work. Calibration app says iSense is currently blocked and Canvas app says connect structure sensor. Firmware still on 1.0.2 and cannot update to 2.0 like the Structure Sensor. Seems like 3D Systems has discontinued selling the iSense on their website. Seems like the support has dried up too.
Hi Andrew,
Do you have the latest Occipital apps? Because iSense support was disabled but should have been re-enabled at some point.
It’s true by the way that the iSense can’t be updated to Firmware 2.0.
More info in the update box in this post: https://3dmag.com/reviews/80-percent-discount-isense-structure-sensor-ipad-3d-scanner/
Should still work though…
Andrew, I asked around for you at Occipital.
If the Calibrator app gives an error message, you can send an e-mail to Structure Sensor Support at support@structure.io with your invoice and the serial number of your iSense. They will enable your specific iSense if it was acquired through legitimate means.
Please report back here if it works. That might be helpful information for other people! Thanks in advance.
Hi Nick,
Thanks for asking around….here is what 3D Systems said about the iSense I purchased on Amazon at that reduced price….
Thank you for your proof of purchase, unfortunately it seems you have bought a device that was sold as part of a stock liquidation when we discontinued its sale. The seller would have bought them from us in bulk at a very low price per unit and is now selling them on. Unfortunately the Structure Calibration App is only available for iSense devices that were purchased through 3DSystems or one of our authorized resellers at full price. Liquidated devices are not able to be enabled for access to the Occipital/Structure calibration app due to a restriction placed on them by Occipital. We apologize for any inconvenience this may cause.
I found this on the Occiptial website….https://structure.io/support/i-have-isense-and-i-cant-use-calibrator-app-what-can-i-do-enable
How was I supposed to know that Amazon was not authorised to sell the iSense scanner? Looks like I am screwed…
Contacted Occipital…told me I must buy a Structure Sensor….This is really bad….not sure why they can’t support it!!!
That’s sucks indeed because it’s hard for consumers to know if they’re not buying something official. I’d recommend to return it to the seller because it’s useless this way.
I purchased the iSense from Amazon but not from a third party supplier but Amazon Export itself.
I am definitely returning it. Occipital got back to me and said because they can’t update the firmware the iSense scanners will not benefit from future enhancements. And that applies to ALL iSense owners, old and new. I fail to see how they can’t update the firmware. Can you believe it!!!
Hi Andrew,
The fact that your iSense is apparently not “legit” seems strange indeed, but it’s unrelated to the iSense not being able to be updated to the latest firmware.
The Structure Sensor is slightly different internally and the Firmware 2.0 update leverages that.
It looks like the Structure Sensor has been out for a while now. Have there been any revisions to the hardware since it was released a few years ago? Looking at possibly picking up a second hand one…
No hardware changes, but the firmware of the Structure Sensor is evolving. They recently released version 2.0 which increases accuracy for room scanning and more. That’s essentially also the big difference with the iSense, which will no longer receive firmware updates.
I don’t think the Structure Sensor needs to be updated. For it’s intended purpose — which is largely VR & AR and just partially 3D capture — the depth accuracy will be sufficient for a while.
It’s good to realize that for 3D scanning, the iPad you choose can make a big difference. Either in texture quality because of a better iPad camera, or in user experience due to more RAM memory.
If you have the money: get an iPad Pro 9.7″, if not go for the iPad Air 2. Don’t go for the iPad mini 2 I’m using in this review, because it’s getting a bit outdated in terms of specs.
Smaller objects seem to unaddressed. I am having a hard time finding the capabilities of scanning in detail objects smaller than a foot tall.
I would like to know if my Grandfathers watch fob could be scanned in enough detail that it could be reproduced exactly as it was or is, in any material that a 3D printer can handle?
Most of the objects selected to show the capabilities of the device seem a little cartoonish , and I must wonder if it is due to the size being larger than a foot or more.
Would like to see how much detail and texture can be captured on smaller objects.
Objects that small are actually below the range of the Structure Sensor. That one works best from objects of 30-40 cm and up and is most comfortable in the human bust size range.
For smaller objects, you can look at desktop scanners. If you want to stay on budget you should take a look at my EinScan-S review (https://3dmag.com/reviews/shining3d-einscan-s-3d-scanner-review/). I’m personally also curious about the Eora3D (https://3dmag.com/reviews/eora3d-pixelio-bevel-smartphone-3d-scanners#eora3d) but that one isn’t out yet. Hoping to test it soon.
Also important: scanning shiny and/or transparent surfaces with any 3D scanner is hard or impossible. Accurately capturing a watch fob is impossible as far as I know. Especially if you also need the texture information, since that prevents you from making the model matte with temporary spray paint for better geometry capture.
Thank you for your responce, it makes perfect sense that the surface needs to be matt and in time I am confident that technology will overcome the hurdles in time.
I wonder how long it will take sicience to be able to recreate something so detailed as a Wedgewood pendant or if a flat image with all this type of detail could be recreated back into a 3D piece of art and sized to fit specifications then printed in layered tones with modern textiles. Cameo’s once were done by hand from portraits along with head stones.
Several attempts to save the images of aincent artifacts and relics using 3D imagry tech has already saved ancient forms and figures that have been distroyed by War in hopes of recreating them in the future in stone as they once were. How far this technoligy will play a role in saving our history is yet to be seen. I am sure the limitations are only restricted to our sence of wonder and patronage! It will take time a lot of skill and support to take it further and how far is grows is up to those who are working and exporing this new and amazing new art form.
Maybe museums will someday display 3D holograms of what could not be restored. Reprinting is only one use with restrictions and limits of the materials of the times. Captureing as much detail as possible within the object and saving it with potiential that has yet to be imagined for sure!
Thanks for the information and I will investigate the links you provided in the hopes of learning how to use 3D image capture.
Hi Nick,
Thanks for the great review.
I am looking at using this package to help survey large retail sites (i.e. Supermarket) we plan to refurbish, which involves generating a 3D model in Sketchup or AutoCAD.
Most of the reviews seem to be focused on either high resolution small items or low res larger areas (like rooms).
Do you know how suitable (or not?) this package would be to say survey a reasonably large supermarket (both internal and external) including all the fixtures inside the shop, i.e. shelves, product on the shelves, ceiling heights / bulkheads, checkouts, fridge detail etc?
I guess I’m wondering if this may be pushing the limits of the hardware’s capability i.e. ram & storage? Are there any really big examples of how big a model it can do? Has a supermarket ever been scanned as far as you know, and if so what were the restults?
It would be great to know if there is a more suitable package available than this offering (which looks good, but perhaps isn’t suited to big jobs?).
I look forward to hearing back from you.
Joe
I am also interested in seeing the answer to Joes query, as I am contemplating the same business opportunity.
A living room of about 300 sq ft seem to be the limit for each scan. I guess you can merge them together in software. The iSense no longer works with the “Canvas” app and so you should contact occipital or simply just try. $500 doesn’t seem like a huge investment to try this Øien, you could always resell it to minimize your losses
Hi,
I want to start a 3d printing business and to start with, want to sell 3d portraits. Does the structure sensor 3d solve the purpose and is it worth buying in 2017? Also can you advice on what kind of 3d printer needs to be bought for this purpose?
Regards,
Karthik
I wish to scan sentient creatures such as dogs, cats and mayhaps even humans. I plan on using the scans to 3D print their husks using mycelium fungi and once they are fully formed into a semi-intelligent lattice; the plan is to then strike them with lightning in order to bring them to full life.
This is all obviously not in order to create an army of fungal slaves.
What program or scanning unit do you suggest is best for not making fungal slave armies? Also I wish to scan motorcycle fairings which are typically 2′ in height with specific curves, I wonder if there is an affordable way to scan such things without going broke.. ?
*The non-army has nothing to do with the fairings. They will not be riding motorcycles when they are not unleashed on the world.
Thanks !
Hi,
I own a structure sensor that I use to scan room interiors. Although it is a great 3D scanner for this usage, I am looking for a better 3D scanner to capture wall measurements.
I would then use these measurements to pretrim a wall using a CNC machine.
What 3D scanner would you recommend?
The Leica BLK3D would be amazing but is not available yet, with not info on a release date.
Thanks for the help
Eric
Hi Nick,
For an artproject I am looking for a scanner which can scan handheld and works best on medium sized objects (from a mailbox to a person). We want to combine it with a self made program which imports the 3D scan and brings it together with previous scans as part of an animation.
Would you recommend the structure sensor over the iSense for this purpose as it may be easier to combine with a self-made app?
Kind regards!
Hello there, I read both your reviews on the 3d systems sense 2 and Structure sensor. From what I can gather, it seems like the Structure might be just a little bit better in terms of scan quality and has the advantage of being truly portable. But if you could only buy one, which would you choose? My intention is to scan engine compartments for the purpose of producing exhaust components. I do not need super fine detail, rather a decent representation of available space /- 1/8 inch.
I used this scanner for a couple of years with my IPad I found it pretty good in quality for that price. The recent upgrade to the new version that is called Mark2 didn’t convince me of any added value despite a significative jump in price. Appparently the company manufacturing them (Occipital) has now decided to kill the first version of their scanners. They have explained that they will no longer be usable in the future, you have to buy a new scanner. It’s the first time ever that I’ve experienced such a brutal attitude, how dare a company explain to their customers that they have to buy a new product from them and throw away their actual one……until they do the same with a version 3! I will definitely look for more respectable companies.