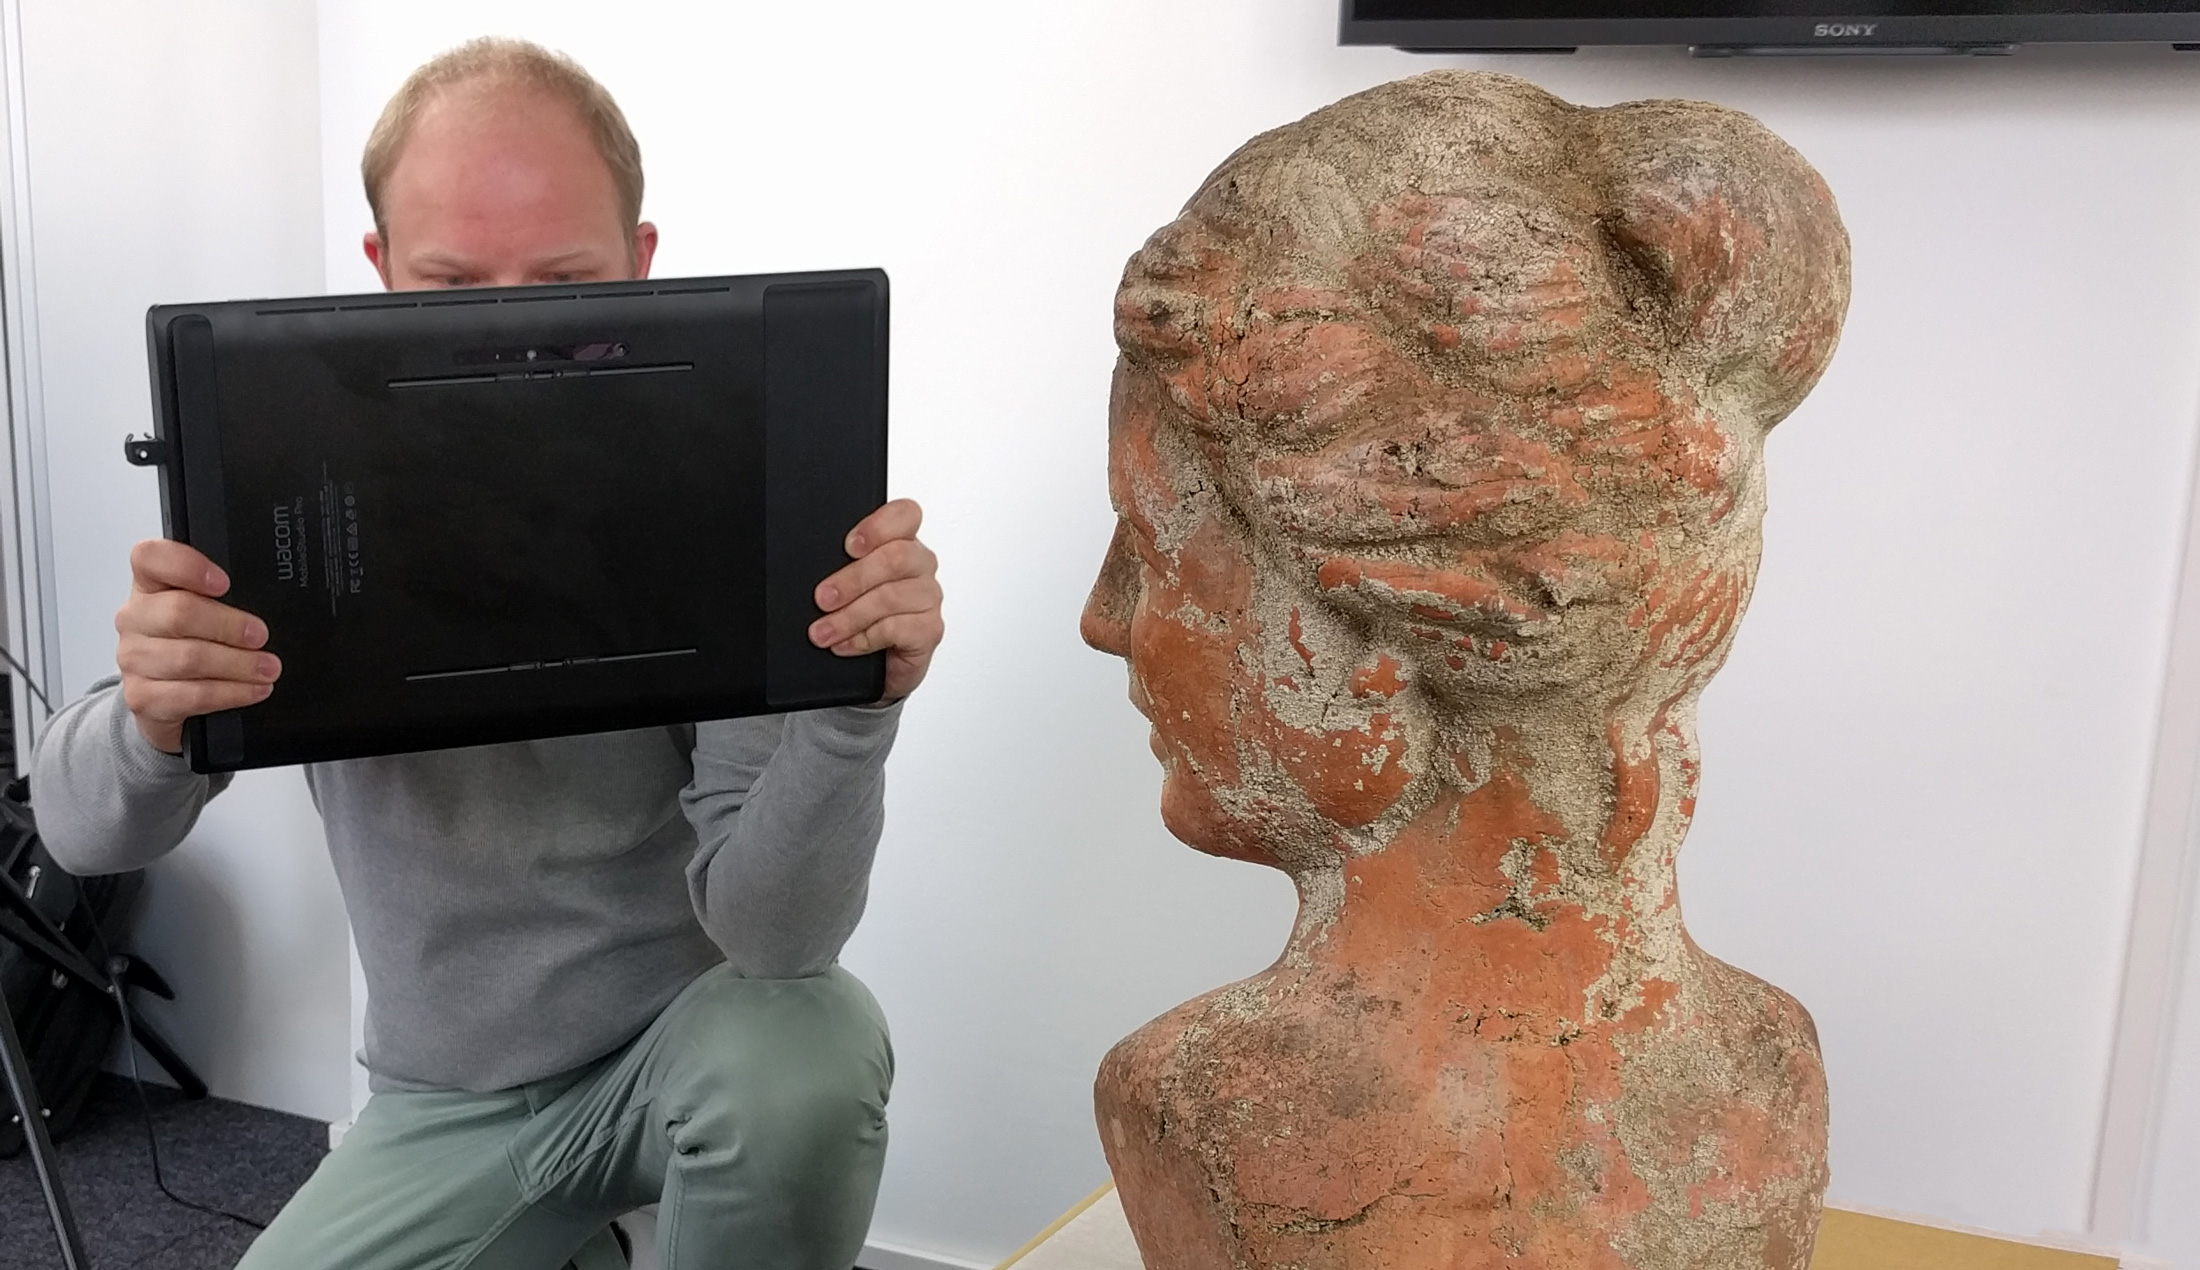
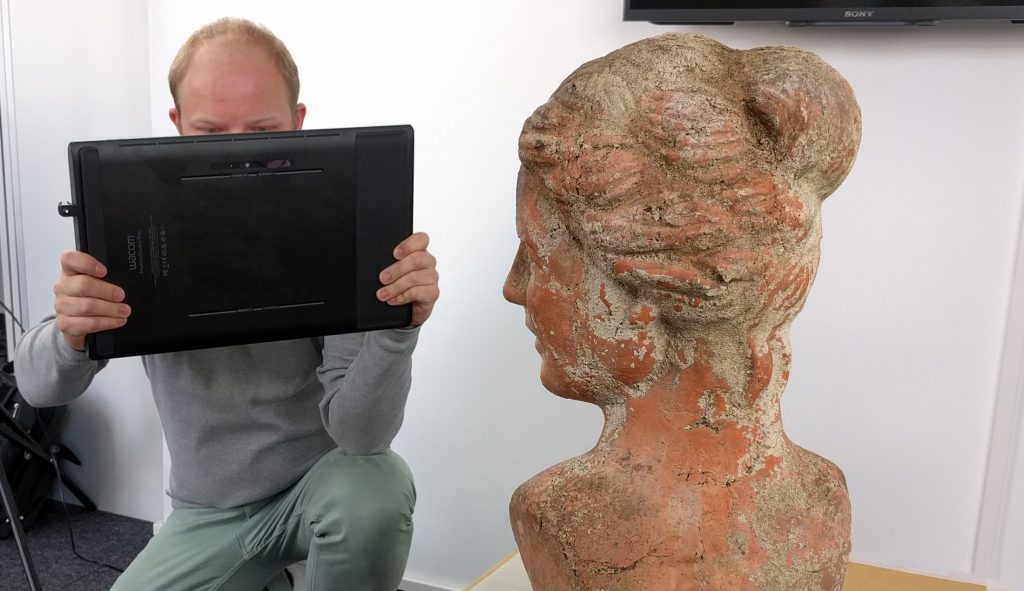
A while ago I wrote a Preview post about the Wacom MobileStudio Pro after attending the tablet’s launch event in Amsterdam. Now I’m writing my hands-on Review, after testing the highest-end version of the device for a few weeks.
Just to be clear: this is not a general Wacom MobileStudio Pro Review — there are enough of those. Instead, in this post I’m giving my opinion about the Intel RealSense R200 3D Camera that’s integrated in the 512GB versions of both the 13″ and the 16″ inch tablet and how I experienced 3D scanning with that depth sensor and various kinds of software.
The Wacom MobileStudio Pro (for 3D Artists)
Maybe you’re aware that my background is in creative design and production, mainly 3D animation and visual effects. I’ve been a Wacom Intuos user for over 15 years. At the studio we also have a Cintique 13HD that my co-founder, art director (and 3D scan test subject) Patrick uses. He also owns the 27″ Cintique.
Wacom also used to make a device called the Cintique Companion, that featured built-in computer hardware aside from being a connectable pen-display. It came as a Windows and Android version. The MobileStudio Pro is the next generation of that. It comes with Windows 10 only, but can still be connected to an external PC or Mac through an optional link box.
Wacom tablets — with or without built-in screens — are the go-to products for both 2D illustrators and 3D sculptors. And where the Cintique Companions were a bit under-powered for the latter, the new MobileStudio Pro (I’ll call it MSP for now) have been better equipped for artists living in the third dimension.
Whereas more-portable 13″ version only has an Intel Iris 550 graphics chip — that still has an okay CineBench average score of 52.6 (31%) — the 16″ versions come with either a Nvidia Quadro M800M on the 256Gb model or an M1000M on the 512GB model (which I’m testing). The latter has a CineBench average score of 95.9 (57%). So if you’re using 3D software that benefits from hardware acceleration (and most do), the 16″ version is probably better suited for your work.
Short General Review
The first thing you’ll notice with the 16″ version is its size — and weight. The former is pretty nice when it comes to the marvelous, matte 4K display which is both breathtaking to look at and a mostly pleasure to work on with both the new Pro Pen 2 and touch. Exceptions to this are using software that isn’t optimized for high-res displays which can have way too small buttons.
Countering that, the overall size (418 x 262 x 19 mm / 16.5 x 10.3 x 0.75 inch) and weight (2200 g / 4.85 lbs — 20% more than a 15″ MacBook Pro) of the device did make me wonder how Mobile this Studio really is. It certainly didn’t fit in in my regular 15″ Samsonite laptop bag and I had to really squeeze it into my rather large Crumpler “Very Busy Man” bag. You really need a big backpack for this tablet and since there’s no sleeve or case included you’ll need to think about that before damaging the display in a bag.
The MSP works great and the 16 inch would be a nice screen size for a pen-display in our studio. But then we can simply but the new $1499 Cintiq Pro 16″ — which has the same screen but not the internal computer and express keys — and attach it to one of the Macs or PCs we already have.
Size and weight issues aside, it’s a nicely designed device. For this price (see below) I kind of expected either a kickstand or a sleeve to be included — or at least a USB-to-USB-C-adapter to connect anything. The power adapter is also USB-C by the way, and rather portable.
Pricing
A quick comparison:
- The 13-inch MobileStudio Pro with i7 processor, 512GB of SSD storage and the 3D Camera is $2499
- The 16-inch MobileStudio Pro with i7 processor, 512GB of SSD storage, Quadro M1000M, and the 3D Camera is $2999
- The 16-inch MobileStudio Pro with i5 processor, 256GB of SSD storage, Quardo M800M without the 3D Camera is $2399
First, let’s be honest: nobody will spend $600 extra on the higest-end version just for the 3D camera. The faster i7 processor and double the amount of storage is probably worth that for most professionals. I don’t know how much faster the Quadro M1000M is compared to the M800M, but it probably simply is.
So you basically get the 3D Camera for free then. But is it a nice — and useful — gift to get? Let’s find out!
3D Camera
On top of adding the Quadro cards, Wacom has also added a 3D Camera to the 512GB models of both sizes. This sensor comes from Intel and is the RealSense R200 variant. That’s the only RealSense I haven’t tested yet so it’s nice to add it to my previous reviews of the RealSense F200 and RealSense SR300.
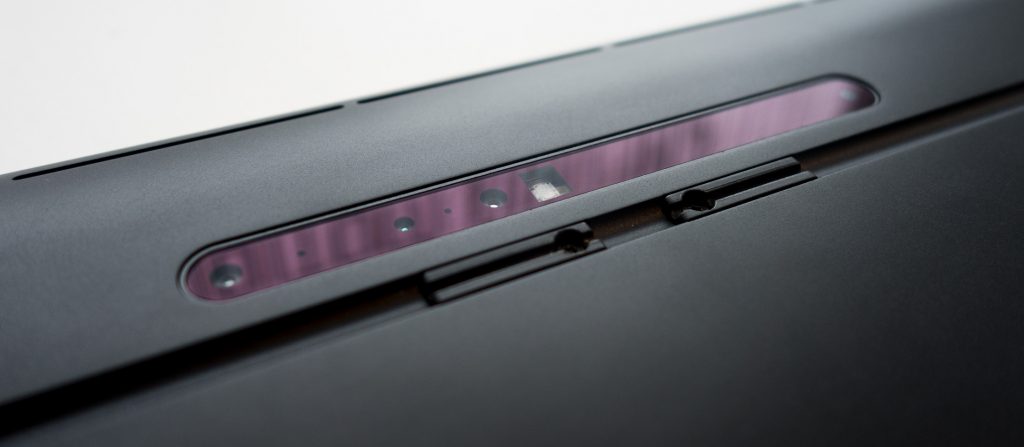
The R200 was introduced in 2015 and intended to be built into Windows tablets as a “rear-facing camera”. That makes it a bit older than the SR300 that was introduced in 2016 and has proven to be quite a capable sensor 3D scanning in my tests, especially objects.
While the SR300 uses combination of an RGB camera for color textures and a single infrared camera for depth sensing, the R200 uses two IR-cameras. There’s also a difference in scanning range: The SR300 can scan subjects between a distance of 0.15m – 1.5m while the R200 has a range between 0.5m and 5m. In theory, that makes the SR300 better suitable for short-range object scanning so it’s unclear to me why Wacom didn’t embed that newer sensor in the MobileStudio Pro.
Included Software
Wacom has always offered free software bundles as part of its marketing strategy. For 3D artists, it comes with the MoSketch 3D character animation software. And for 3D scanning, the Mobile Studio Pro is bundles with Artec Studio 11 Ultimate — a software suite I tested extensively while reviewing the Artec Eva professional handheld 3D scanner.
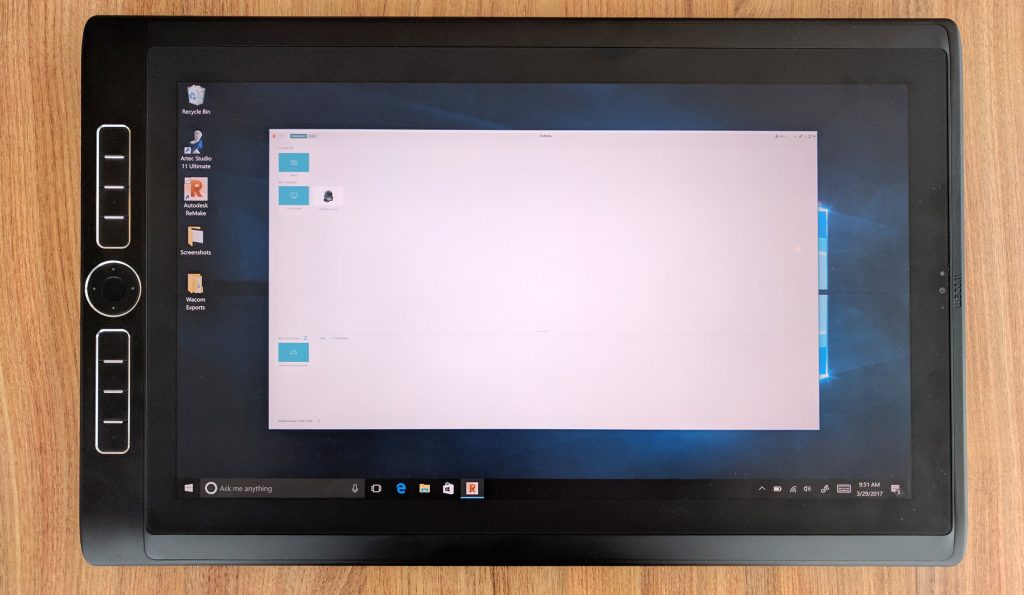
They made a nice introduction animation, specifically for 3D scanning the Wacom MobileStudio Pro:
I have tested a lot of 3D scanning software (including many that aren’t yet reviewed on this site) and can say that Artec Studio 11 is one of the best and most complete software packages on the market. It works great with their own scanners and for that you can use Professional version of the software. The Ultimate version mainly offers the support for third-party depth sensors like the Intel RealSense.
But there’s a bit of a catch in the deal with Wacom, since you’re only getting a one-year subscription to the software when you buy the software. And the next year will cost you €800 (probably around the same in dollars).
In my opinion, that’s a bit overkill for single depth-sensor 3D scanning. And I say single, because one of the cool features of Artec Studio 11 Ultimate is that you can use it to capture with multiple 3D sensors as well. I’ve read projects where someone connected 8 ASUS Xtion Pro sensors (that won’t work with RealSenses, by the way!) to the software to make a single-sweep person scanner.
Aside from the price, I think the Artec Studio software might be a bit overkill for sensor-based scanning in general — especially for first-time users. The software is very streamlined for a professional suite but the animation over-simplifies the workflow a bit. It’s also not tablet-optimized, making the interface hard to use with touch. And I while the animation promotes publishing to Sketchfab — a fast-growing 3D showcasing website that just surpassed 100 million users — I could only do that to Artec’s own 3D sharing website directly from the software. All embeds in this post are .OBJ exports which I uploaded manually.
Other Software
But you don’t have to use the Artec software with this sensor. There are a few (free) alternative software packages that support the RealSense R200 as well.
I also tested the MSP with 3D Systems’ free Sense for RealSense software which I tested earlier with the Sense 2 (RealSense SR300) scanner and the XYZ (RealSense F200) scanner.
I’ve you’ve ready my Stucture Sensor Review, you know I’m a big fan of the itSeez3D 3D scanning software for iPad that makes better-quality scans than the standard app. The developer also offers a Windows version of the app, specifically for the RealSense R200. Unfortunately that app only supports scanning people, not objects. Although I found a sneaky work-around to still do a comparison test.
I wanted to also test the ReconstructMe app, but that crashed after selecting the sensor in the settings menu.
Results
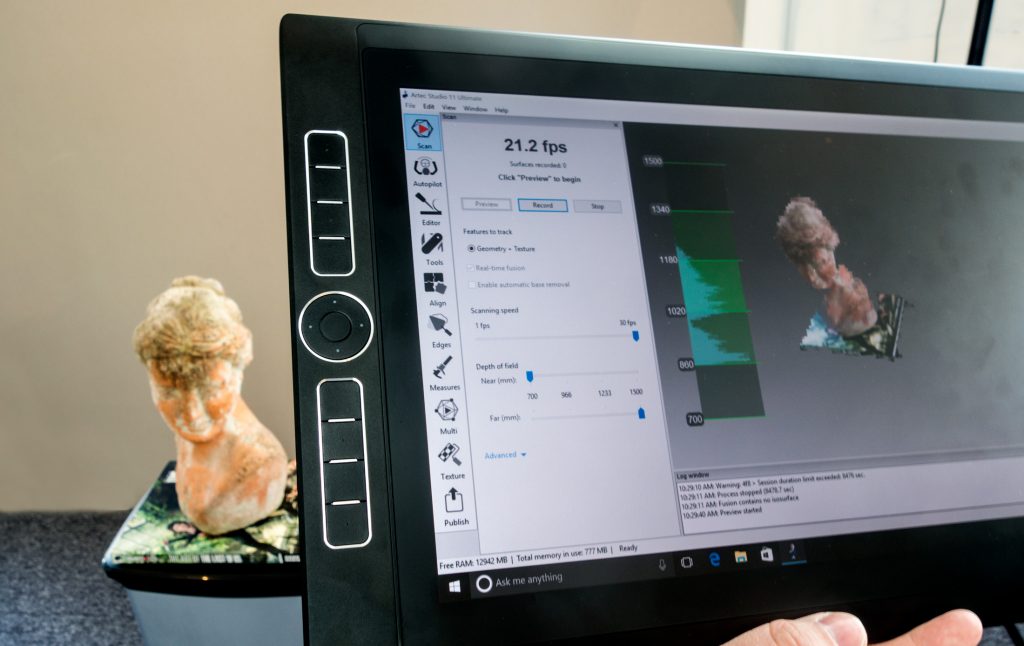
I’ll start with some test scans of the very same 40 cm tall stone bust with various software. It must be noted that the small 200 Watts softbox light kit wasn’t sufficient for this sensor. I had to install my large 2500 Watts studio kit (you can check which light kits I’m using here) to get somewhat decent scans. The main problem here is the RGB camera on the RealSense R200, which isn’t very light-sensitive and is very prone to noise. This greatly impacts the texture quality. And as with most infrared depth sensors, the R200 can’t be used outdoors. Even on cloudy day the natural infrared light from the sun will interfere with the sensor.
Artec Studio 11 Ultimate
The Artec software offers two ways of generating a 3D model: post-processing the raw scan data and using Real Time Fusion (RTF). I tried both ways (from the same scan session) to see the difference. It’s noteworthy that while RTF gives an instant 3D mesh after scanning, that still needs to be textured afterwards. The texturing of the RTF model below took quite a while on the i7 processor: over 20 minutes. In comparison: computing the model from scratch from the raw scan data took just a bit more: 30 minutes.
It’s noteworthy that I always make more test scans than I include in my review. I’m mainly showing the bust here for comparison. I had no problem scanning anything else with Artec Studio 11 Ultimate, but not all scans could be processed with Autopilot:
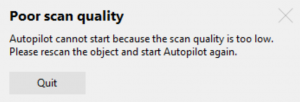
An error like that say’s something about the quality of the RealSense R200.
Anyway, the bust worked in both processing modes. Here’s the textured RTF model:
And here’s the result from running the raw scan data through Autopilot:
While non-realtime fusion can bring out more details on Artec Eva scans, the results are more or less the same with the R200 depth sensor. Both the amount of geometric detail (set the Sketchfab embed’s rendering mode to MatCap to see this) and the texture quality are pretty poor. For people that have no background in 3D scanning and try it on the MSP for the first time, I guess it will be quite a disappointment.
Using the MobileStudio Pro with an external (Artec) 3D Scanner
Since it runs the Artec software and it’s a capable tablet, you can of course also attach a professional Artec scanner like the Eva or Space Spider. If you’re considering this, be aware that the 16-inch version is almost impossible to hold with one hand. The 13-inch version is probably more suitable for this. And the Artec software doesn’t need the Nvidia Quadro CPU to run. I’ve tested this by forcing it to run on the Intel Iris 550 CPU and that worked perfectly. I do advice to get the high-end 13-inch model with i7 processor and 16GB of RAM. When reviewing the Artec Eva I discovered that 8GB of RAM quickly becomes a problem with larger scans.
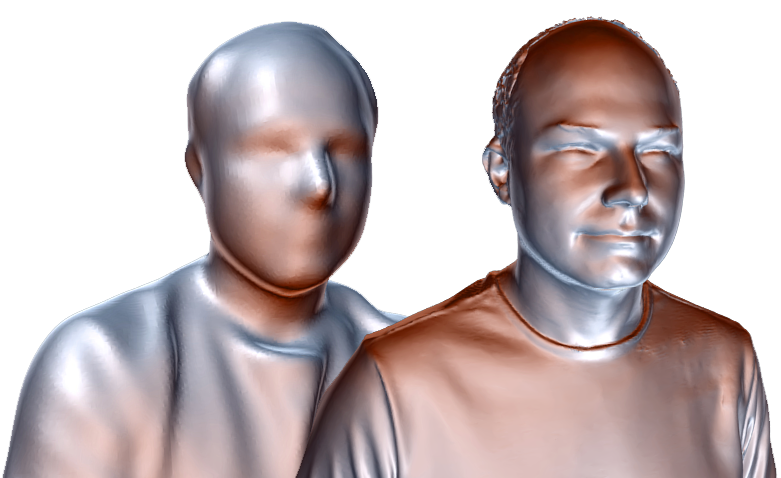
And in case you’re curious about the difference between a scan made with Artec Studio 11 in combination with the RealSense R200 and the Artec Eva, here are two scans of me:
3D Systems Sense for RealSense
I was really surprised by this software when I tested the RealSense SR300. It has a well-designed — and totally tablet friendly — user interface and a suite of easy-to-use editing features that’s complete enough for the average sensor-based 3D scanning project. After starting the application, it recognized the R200 immediately and unlike the SR300 there’s no need to verify the hardware serial number.
Here’s the result with the Geometry Resolution set to the second-t-highest setting (the highest gave too much geometric noise):
If you compare the result to those from Artec Studio 11 Ultimate, you’ll quickly notice that the geometry has a bit more detail (although the polycount is lower) and the textures are sharper — you can read the text on the book cover (great book by the way) now.
itSeez3D
Like I wrote before itSeez3D for iPad can make better scans than other software for the Stucture Sensor. And it’s a well-designed iOS app. It has no editing features, but the cloud-based algorithms do a good job of optimizing and cropping geometry automatically. And they outperform every other app when it comes to texture mapping.
It’s noteworthy that Structure Sensor scans usually have better textures than those made with every other depth sensor, because it has no native RGB color camera. Instead, it uses the iPad’s camera and even the one on my old iPad mini 2 is better than those found on depth sensors like the RealSense family.
Unfortunately, itSeez3D for Windows can only use the R200’s native RGB camera and not the 8 megapixel camera on the back of the MobileStudio Pro (or any other tablet).
The Windows version of itSeez3D, which is specifically designed for the RealSense R200, has the same easy-to-use, tablet-friendly interface. But it only supports scanning people. I’ve been in contact with the developer and they have no short term plans to port the object scanning feature to the Windows version — their focus is currently on the iPad / Structure Sensor version and their new, single-selfie 3D Game Avatar app.
The software knows it’s scanning people because it uses facial recognition to ensure you start with the face. Luckily for this review, I’m using a human analog that looks good enough to pass the facial recognition.
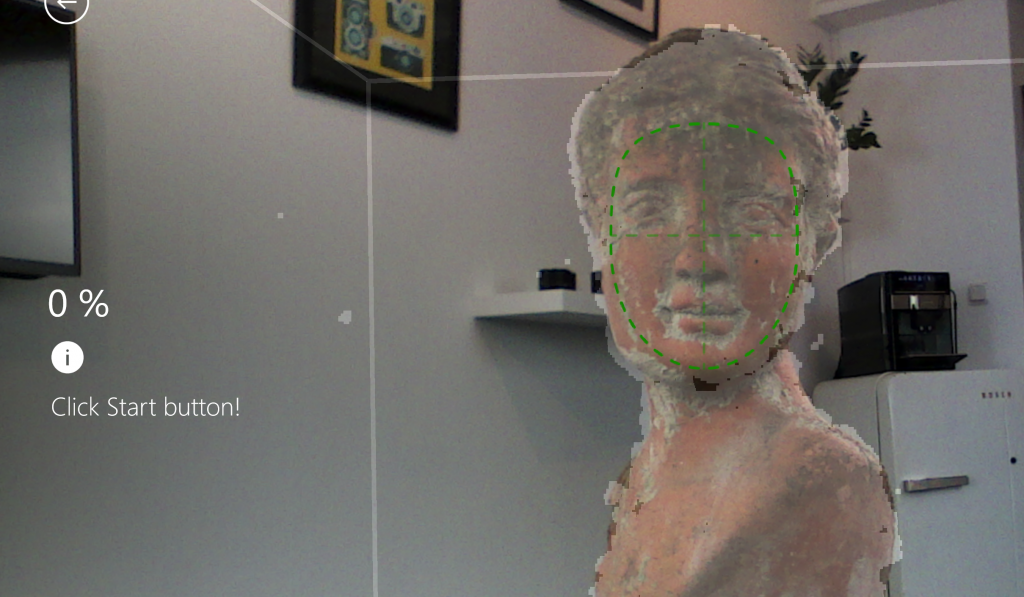
Here’s the result:
Although I probably blocked the softbox light facing the face, making that part a bit dark, the texture quality is the best of the 3 software packages I tested. You can clearly see this when you look at the busts face.
For comparison, here’s a scan of my business partner — and Wacom Cintiq aficionado — Patrick made with itSeez3D for Windows and the RealSense R200 on the MobileStudio Pro:
And a scan with itSeez3D for iOS and the Structure Sensor on an iPad mini 2 (same light setup):
Since the geometric detail of both scans is similar it’s a great example of how much good-quality textures are worth. The R200’s rather noisy RGB camera is the culprit here here.
One more thing…
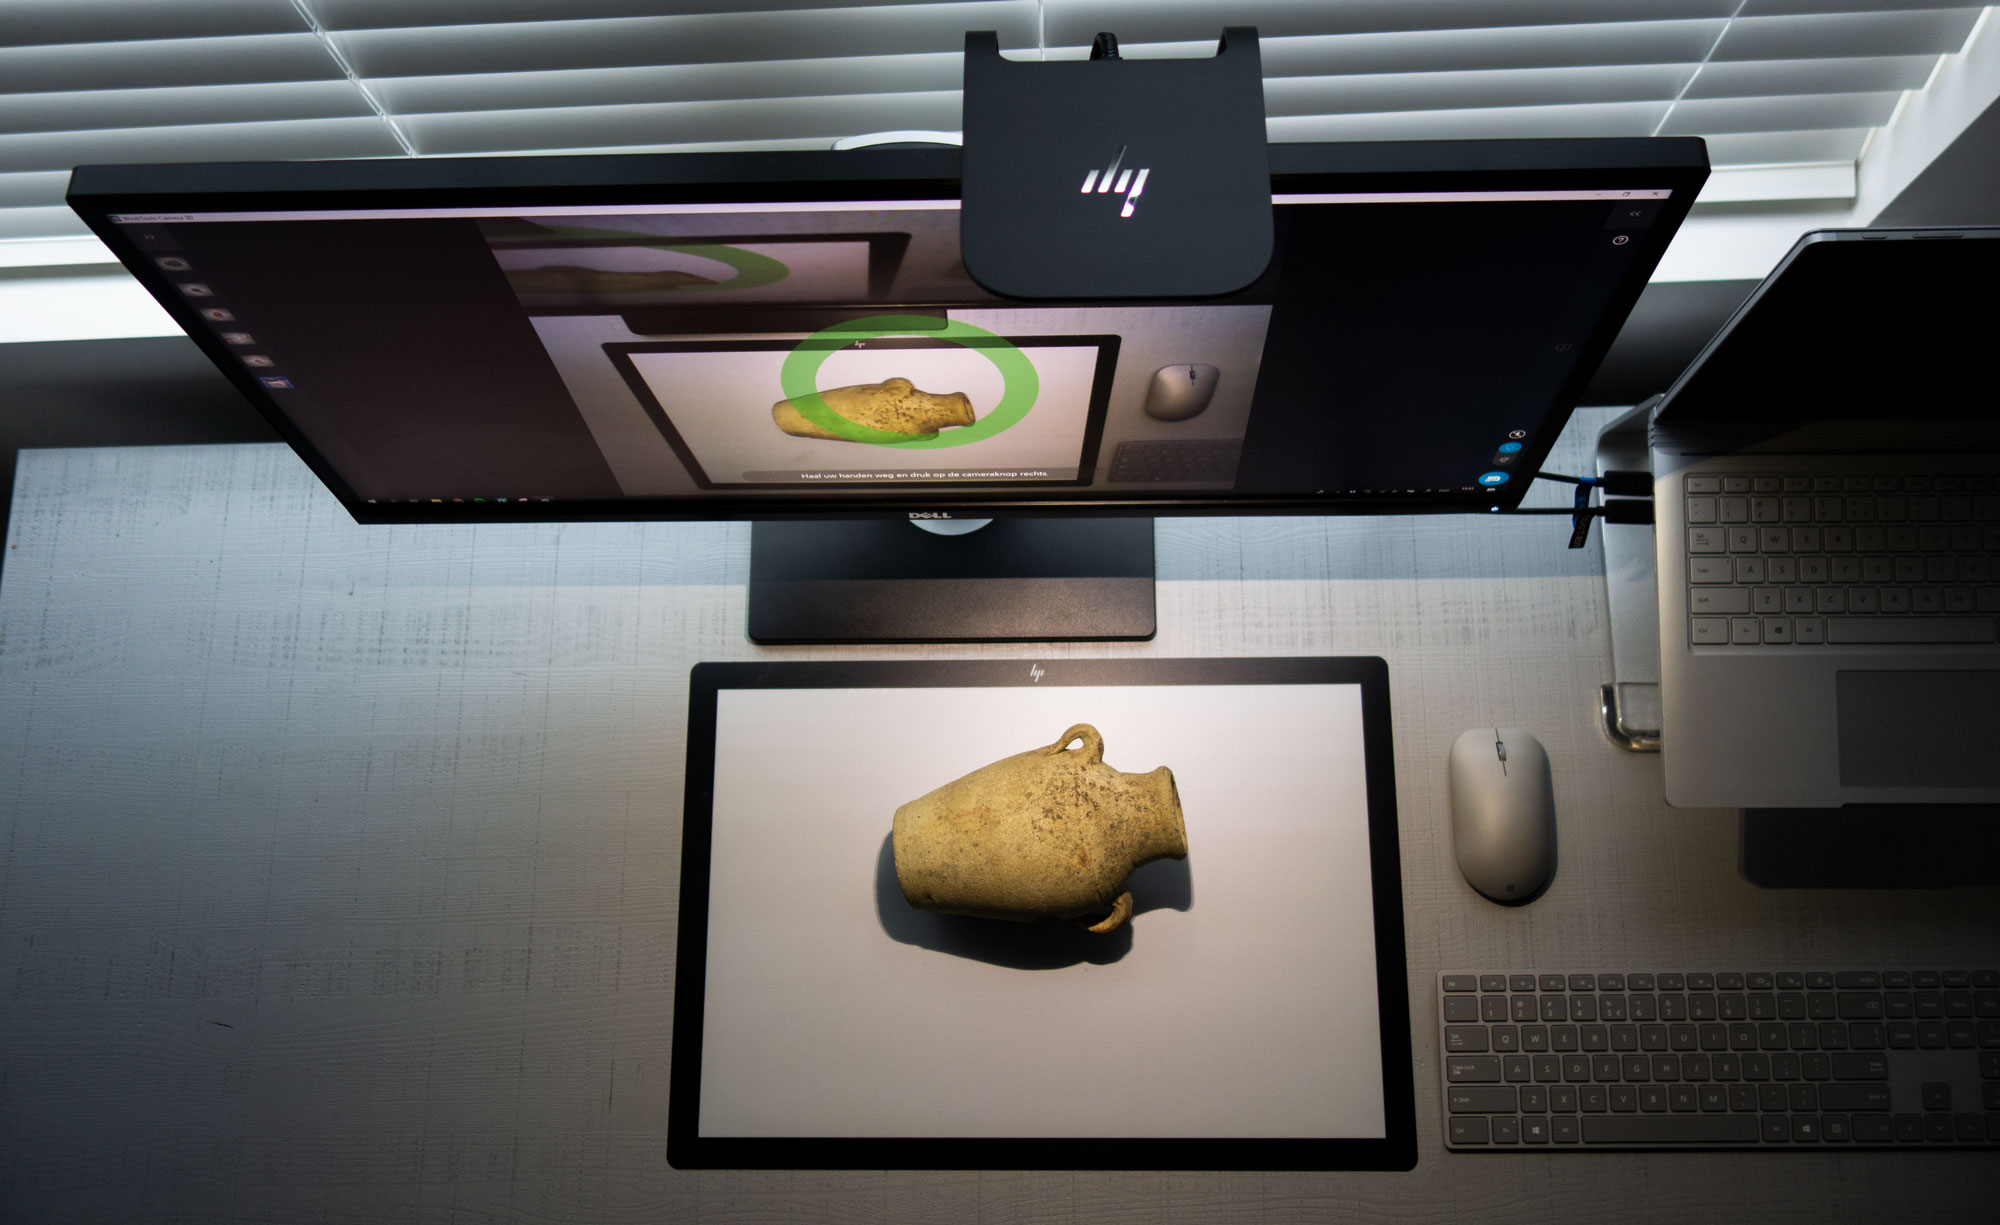
Up until this point, I’ve tested the Wacom MobileStudio Pro’s 3D scanning capabilities by using the RealSense R200 depth sensor included in the high-end versions. But if you’re familiar with my website, you know that this is not the only way to capture reality in 3D. You can also do this through photogrammetry — a technique that uses software algorithms to distill 3D data from regular 2D photo’s.
I recently reviewed Autodesk ReMake, a professional photogrammetry application for Windows that costs (just) $30 monthly or $300 annually in the US and €35 monthly or €350 annually in Europe. It offers a cloud-processing service for an additional per-scan free but also offers local processing on machines with a good Nvidia graphics card.
The Quadro chips in the 16-inch Wacom tablets do an acceptable job on processing small series of photos of medium to small objects, especially because the MSP’s camera is (just) 8MP. So for me this is an ideal test case: capturing an object in 3D using just the tablet’s hardware — completely offline. And to take the photos I simply used the default Camera app in Windows 10 (which unfortunately doesn’t have an auto-exposure lock).
First I did a quick photo shoot (60 photos) of the bust indoors with the exact same setup I used for the depth sensor scans. Here’s the result:
Both in terms of geometric detail and texture quality, the above is already miles ahead of the scans from the RealSense R200. But unlike that infrared-based device, the regular RGB camera also works outdoors, reducing the sensor noise of the not-that-light-sensitive camera. And then you can achieve this with only 45 photos (shot in about a minute):
To make the comparison easier, I’ve made this chart:
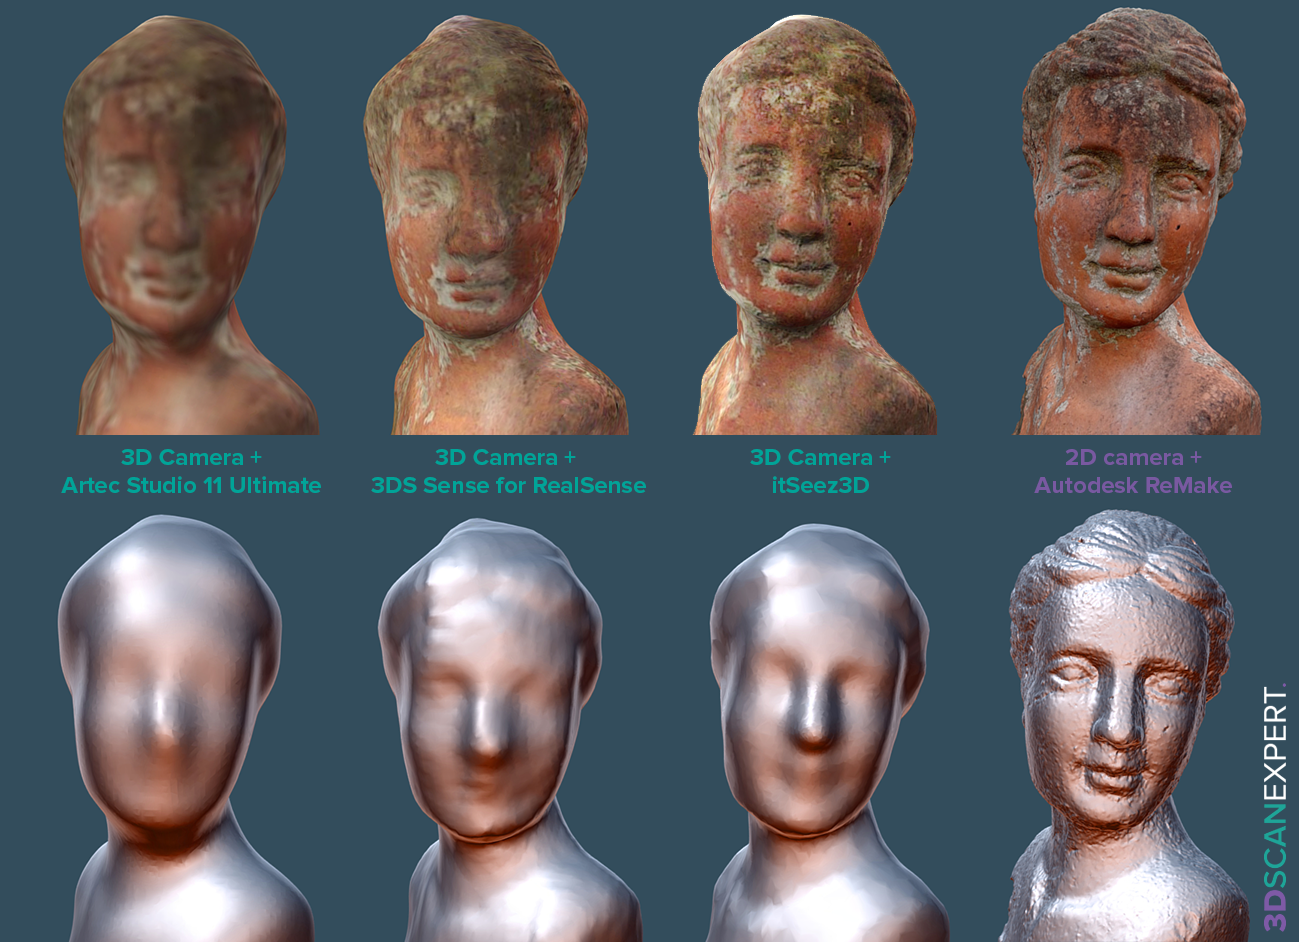
Aside from quality, an annual subscription to ReMake Pro is less than half of Artec Studio Ultimate and features a similar suite of 3D mesh editing features. Again, I’m not saying the latter is bad software — it’s a pleasure to use with a professional 3D scanner. But for depth sensors — or at least the RealSense R200 — I think it’s overkill.
Are Depth Sensors obsolete, then?
The chart above probably makes you think why you would use a depth sensor for 3D scanning anyway?
The complete answer to that is something for another article but really depends on your purpose. Let’s say you simply want a base for digital sculpting — something the Wacom MobileStudio Pro is targeted towards. In that case a low-poly model will do fine. And it’s good to know that depth sensor scans are fairly size-accurate, while photogrammetry captures usually have only have an estimated scale.
On top of that, photogrammetry doesn’t work on any object and (with just one camera) it’s almost impossible for capturing people — there has to be a certain amount of texture variety and no movement for the algorithms to work. And there’s something to say for the interactive manner depth sensors let you make scans, which require less know-how than photogrammetry (or professional 3D scanners).
So it’s not that depth sensors being obsolete in general, it’s more that new ones are coming out every year. The R200 in the MobileStudio Pro is simply 2015 technology. The SR300 was released in 2016 and Intel recently announced the RealSense 400-series. And other manufacturers like Orrbec are constantly developing new sensors as well. And since depth sensors are usually pretty affordable, the question is if they should be embedded into computers and tablets, or that you should simply attach an external one for scanning.
If you’re getting a Wacom MobileStudio Pro, you’re likely investing in creative hardware for at least the next 5 years. Depth sensor development simply goes a lot faster than that.
Verdict
The Wacom MobileStudio Pro is a well-designed tablet that features the best graphic pen and screen currently on the market. It’s truly designed for creative professionals. 3D artists will especially like the fact that the Nvdia Quardo CPU but that’s only available on the 16-inch model which I generally find not so portable. As a mobile device, I’d personally prefer the 13-inch format but the Intel Iris 550 CPU is a bit under-powered for my 3D workflows.
The addition of 3D scanning with the integrated Intel RealSense R200 depth sensor might sound exciting on paper but in reality it’s an older sensor and the scan quality is disappointing — both in terms of depth- and texture resolution. The Structure Sensor / iPad combo compensates for that by using the iPad’s RGB camera for texture capturing but there’s no RealSense compatible software that let’s users use the MobileStudio Pro’s 8MP RGB camera instead of the low-quality RGB camera of the RealSense R200.
Surprisingly, the included one-year subscription to the Artec Studio software gives the lowest scan quality when using it with the depth sensor. There are free alternatives that perform better but the results still aren’t what you’d expect from a $3000 tablet aimed specifically at visual artists.
Ignoring the integrated depth sensor (a.k.a. “3D camera”) altogether and simply using the 2D camera in combination with photogrammetry results in 3D captures that are better and very usable quality. While this can be done with any camera and computer, it’s noteworthy that the whole photogrammetry process can be done on the tablet itself, completely mobile and offline. The 8 megapixel camera has its limits — especially in low-light conditions — but shooting outdoors resolves this. Photos can be processed locally with software like Autodesk ReMake or Agisoft Photoscan, thanks to the Quadro CPU.
Whether you like the integrated depth sensor or not, your basically getting it for free — the increased storage and RAM are worth the price of the high-end model alone. And if you want to make 3D scans, you can simply attach a better depth sensor or other (professional) 3D scanner to the tablet. You’ll have to get a USB-dongle, though, because the tablet only has USB-C ports and no adapter is included.
In the end, out-of-the-box the Wacom MobileStudio Pro is simply a great device for 3D editing — not scanning. At least not with the integrated 3D camera. Digital 3D sculptors and artists using software like Mudbox or Zbrush will definitely like the Pro Pen 2, the great screen and the greatly reduced lag and parallax. And that’s what’s Wacom is good for. It’s probably the most direct digital creation workflow on the market today and the fact that it can double as a Cintiq is a probably USP for many. That last fact makes you wonder how much processing and graphical power you need when working mobile. I guess that totally depends on your workflow — and I see that many creative professionals are still figuring out that workflow.
This post has been edited after publishing to better reflect the possible purposes for scanning with depth sensors


There are many reasons to use a depth sensor, even for object scanning.
Your object scan use case is the same tired old sculpture type object with tons of color and surface random texture which will greatly favor a high pixel count RGB only approach with many images. In fact, rarely does this Remake approach work on anything BUT such chalky texture similar shape and size objects. I have had nice results with Remake on even human sculptures, but some gargantuan error crops up that is far too difficult to post process and fix.
Any object that has much less features, will cause Remake and similar RGB only approaches to fail spectacularly, after sometimes hours of cloud processing. Here is where a depth sensor comes into play.
The problem with Realsense R200 is that it’s depth perception is crap and it’s XY is full of holes. You should try this with the new front facing Intel Realsense F300 or something like that, which uses structured light approach and has somewhat better depth and XY density, compared to the R200.
So the conclusions drawn in this article are far from valid. Just try Remake yourself on a variety of objects. You’ll see why it’s a fun toy you’ll only use once.
Thanks a lot for the feedback, Stan.
You’re totally right about sensor-based scanning. As you can read I already tested the newer SR300 (there’s no F300 as far as I know) earlier and it’s better indeed. So it’s more that Wacom has chosen to include outdated RealSense hardware in the tablet.
I’ve edited the post to reflect this better!
You might find the bust I use “tired” but I deliberately use the same objects for my reviews for better comparison. Unfortunately I can’t scan many different objects for every review, especially not non-dedicated 3D scanners.
my realsense camera never worked straight out the box. dns error
I don’t think the title of your article matches the content lol. Just kidding, mainly because I had some doubts after reading the article.