3D Scanning beyond 3D Printing — Part One
I’m amazed by the developments in 3D scanning since I started researching and writing about it in January. In particular, I like that the technology of 3D capturing has quickly become affordable and will continue to do so with sub-$500 smartphone-based 3D scanners and free photogrammetry apps.
Besides capturing objects in 3D, people seem to really like to have themselves volumetrically digitized, or in less funky words: 3D Selfies are the new Selfies.
One thing I also noticed is that 3D scanning is still very much tied to 3D printing. The scanners themselves are sold by stores that also sell the printers. And manufacturers of affordable 3D scanners—like the XYZ scanner and Sense scanner I reviewed earlier—are still marketing them to consumers as accessories to desktop 3D printers.
By now it’s clear that “consumer 3D printing” will probably never take of. Which is understandable, because who still wants a single-colored, plastic 3D print when you can order one in full color at services like Shapeways?
3D Selfies are the new Selfies
But while I do believe a 3D printed Selfie is a nice gift. But I see three problems for general use:
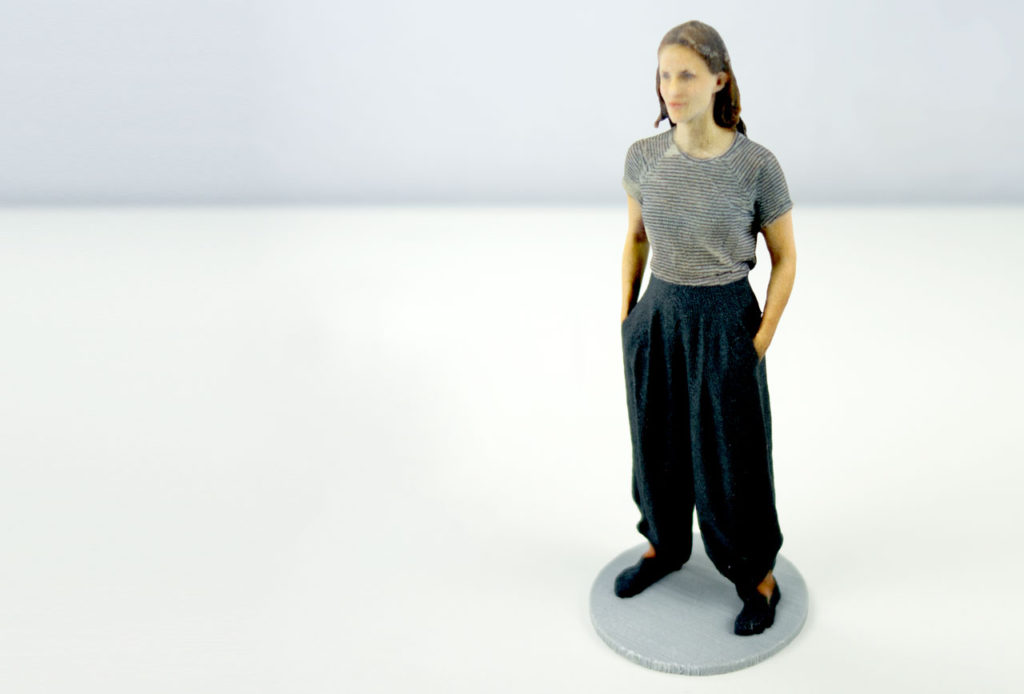
- They’re expensive — The 15cm tall full body scan above or a 10 cm tall bust scan like these is about $30 plus shipping. And that’s when they’re hollowed out to the max (very thin walls) and without protective coating (costs $10 more).
- It takes a lot of time — While the scanning was done within minutes, it took a week or two for the 3D print to arrive at my doorstep. And in my opinion this is too long in a world where we’re getting used to receiving things the day after ordering.
- The quality is quite low — I was surprised how much photographic detail I could capture with a Structure Scanner and a low-end iPad mini 2. But many of the details get lost when 3D printing in full color sandstone. It’s printed with gypsum powder and the color is added in an inkjet-like fashion. The combination of the grainy texture of the print and the slight bleeding of the ink in the gypsum doesn’t make for “HD” results so to say.
But there are great alternatives that let you share your 3D scans (objects or people) in better ways—for free! I’ll guide you through the steps to share your volumetric alter ego online, in Part One of this Tutorial Series I’ll show you how to view and share your 3D scans in Virtual Reality. And in Part Two we’ll dive into presenting your captures in Pokémon GO-like Augmented Reality.
For both tutorials, I assume that you have already made a 3D capture. If not, here are some tutorials to help you make your first capture:
- If you want to to it totally free with just your smartphone, check out my step by step tutorial of 123D Catch. This works great for static objects, but not so much for people.
- If you want to use your digital camera and computer, read my Autodesk ReCap 360 tutorial.
- If you have a Structure Sensor, check out this tutorial for the free itSeez3D app.
- If you have an Intel RealSense, read this section about the Sense for RealSense software.
Web-based 3D & VR through Sketchfab
Sketchfab is quickly becoming the de facto standard of showcasing and sharing 3D files through the internet. The free version is sufficient for this purpose.
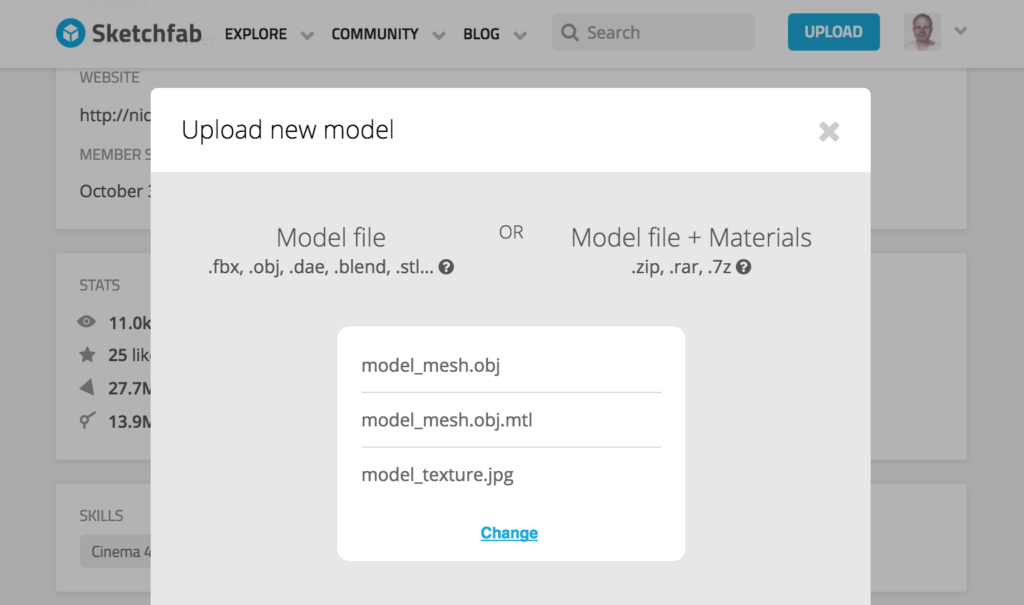
Step 1 — Prepare & upload your 3D model
Sketchfab supports almost every 3D model file format, both with separate texture maps and per-vertex coloring that some 3D scanners output. Most 3D scanning software has a feature to export to Sketchfab directly. If not, export your model as either an OBJ or FBX file.
If you have an FBX file, the texture maps are included in the file and you can upload it directly by clicking the blue button in the top-right corner of the Sketchfab website.
If you have an OBJ file, it will likely come with an MTL and JPG or PNG file containing the texture information. In this case, you should compress all files into a ZIP container. On Windows, select all files, right click and choose Send to > Compressed (zip) folder. On Mac, select all files, right click (or CTRL + click) and choose Compress Files. Then upload the ZIP to Sketchfab.
While uploading, you can give your scan a nice name, description and add some tags to make it discoverable to the Sketchfab community and search engines. But if you like some privacy and rather not have the whole world see your face or body in 3D, you can set your model to Private. This way only people you share the link with can see it and it won’t show up on Sketchfab or Google Search. For this feature you need a Sketchfab Pro account (which costs $10/month but you can get the first year for free by inviting a few friends)
Interesting Fact about 3D Scanning, Women and Privacy
I’ve scanned about 150 people and noticed that 99% of male subjects have no problem with it at all—they actually thinks it’s cool. But more than 80% of females get really nervous of the idea their 3D selfie can be seen by other people—especially people they don’t now. In fact, at events where I scanned people, most women (also ~80%) don’t even want to step in front of my sensor at all.
Ironically, women share more selfies on social media than men. But of course they can take an Instagram photo from that one perfect angle, while a 3D selfie an viewed from any angle—and any distance…
In other words: if you’re going to scan others, get the Pro account and enable the Privacy mode on your scans.
Step 2 — 3D Settings
After uploading, choose to edit the 3D Settings of your model. You can do all kinds of magic here, but for 3D Scans I usually do this:
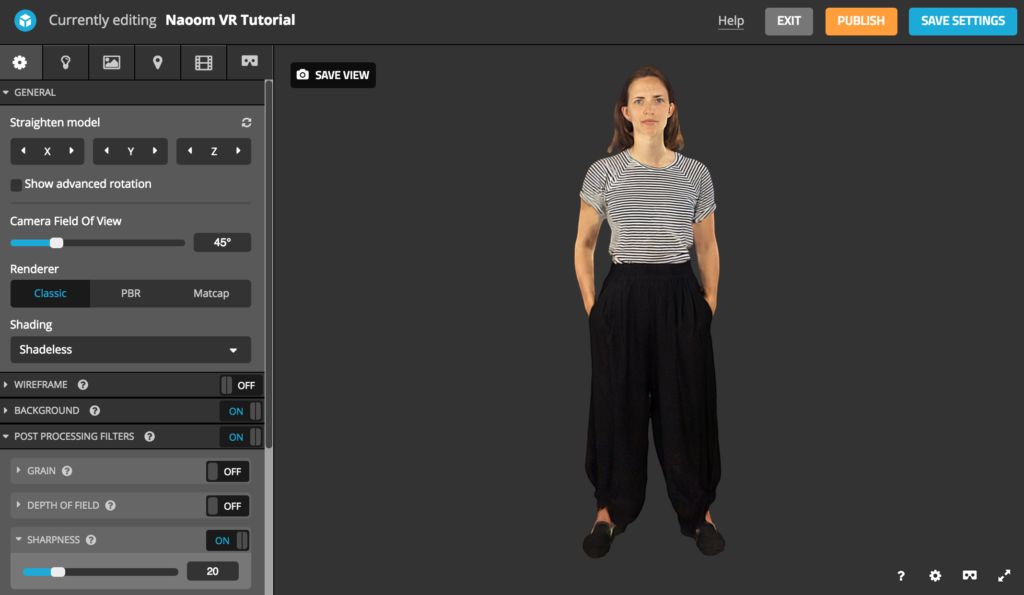
- If necessary, straighten your model it until it’s straight and upright relative to the grid that will show up.
- Set the Render to Classic
- Set the Shading to Shadeless (of course you can also experiment with the lighting if you like, but keep in mind that this can reduce performance on mobile—especially in VR through Cardboard on older phones)
- Set the Background to a nice color (I like boring grey to let the subject shine)
- Set the Post Processing > Sharpness to 20 to boost the texture quality a little
Step 3 – VR Settings
Even if you’re not going to view your 3D model in VR, somebody else might. That’s why it’s good practice to always click the tab with the VR headset icon to enter some basic VR settings.
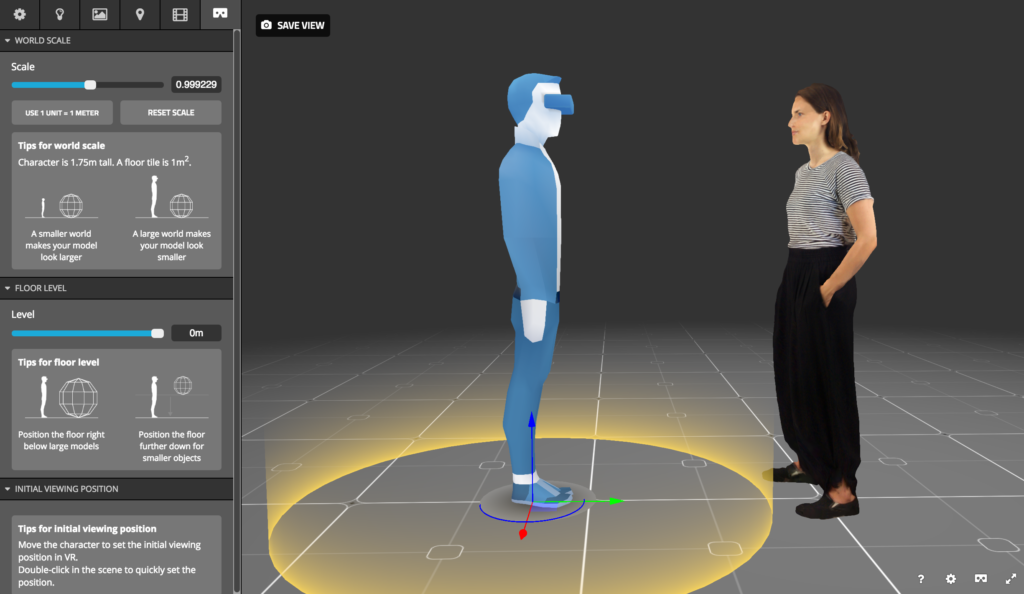
When viewing 3D models on a screen your always looking at it at a different scale. Tiny 3D scans will be bigger than their physical originals and large captures will be scaled down to fit your screen. In VR though, scale matters—especially when you’re showcasing subjects with a known size.
In the VR Settings tab, you can set the scale relative to the virtual human. You can also set the Floor Level. For 3D scans of people the default is perfect, but you might want to move small objects to eye level for comfortable viewing in VR. Finally, you can click the blue guy and move him to set the initial viewing position. In the example above, I’ve moved him slightly away from the 3D scan.
Step 4 – Share
After hitting the Publish button and choosing to save the settings, sharing your 3D scan is as easy as clicking the share button. You can share it directly to most Social Networks or copy & paste the short link. It’s good to know that Facebook supports interactive Sketchfab embeds directly in the Feed. Other services will display a link that takes you to the Sketchfab page.
You can also choose to share your scan through email. I’ve used this feature a lot to share private links of 3D scans of people directly with that person—you can even include a personal message!
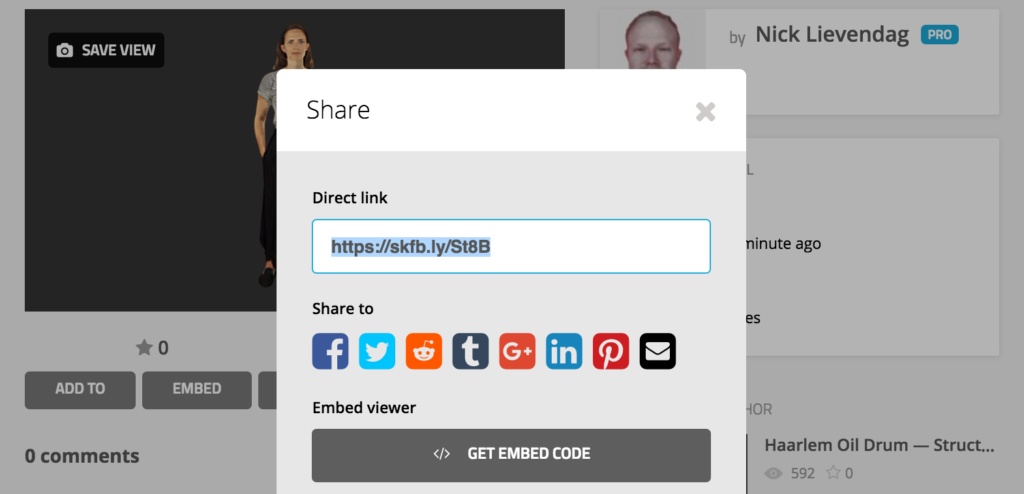
Finally, you can copy an embed code which you can paste into your website’s content management system to share your work online. If you’re using WordPress as a CMS, it’s good to know that (in recent versions) you can simply embed your Sketchfab models using the Embed Shortcode.

Step 5 – View in Mobile VR
While viewing a 3D scan interactively on your computer or smartphone is great, it’s really awesome in Virtual Reality. I think this is a lot more interesting than viewing digitally designed 3D content, because of the fact that your looking at something that was captured in reality through a device that’s designed to mimic that same reality.
I strongly believe this is the killer feature for everything “reality” (virtual, augmented, mixed, merged—things are a bit confusing these days) because of it’s the closest thing to teleportation we’ll (probably) get. The only next step from here is real-time 3D reality capture with motion and audio. And that technology is already being developed.
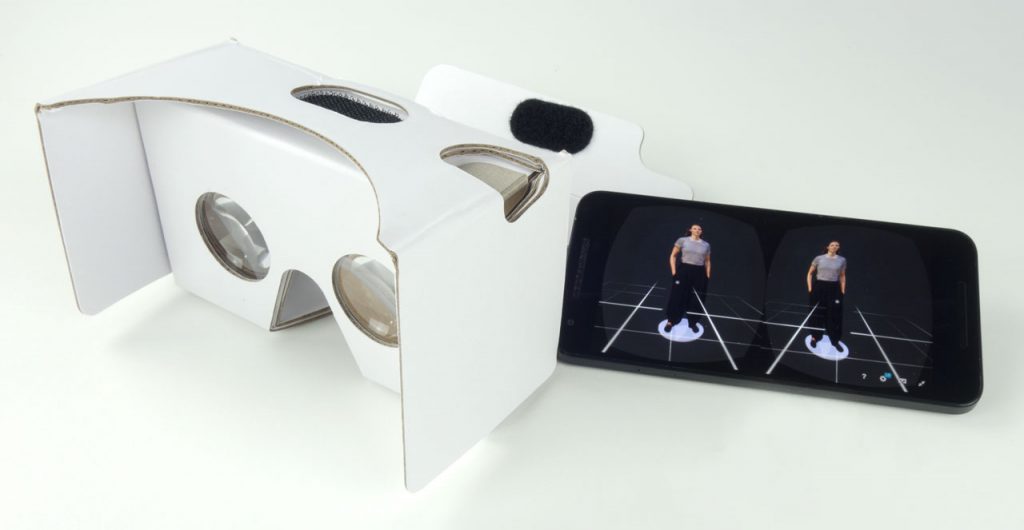
You can buy 15 VR headsets for the price of 1 3D print
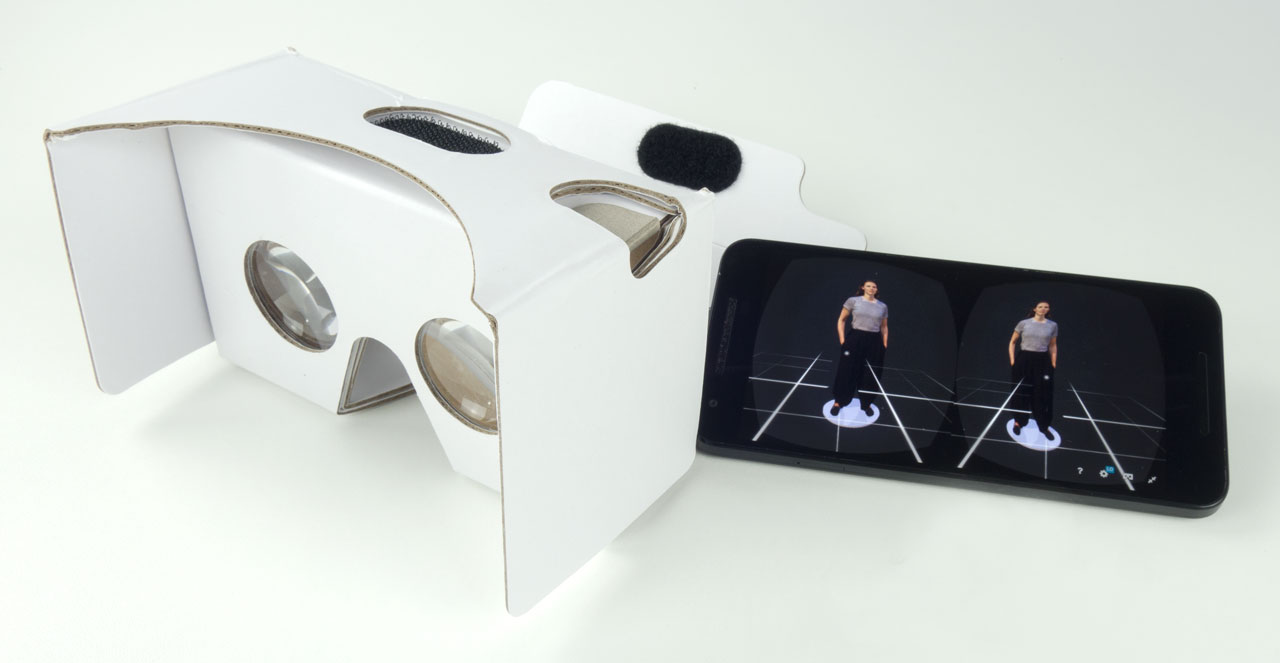
Anyway, if your want view your scan in VR through Sketchfab, the workflow depends on your VR device. Let’s start with the most commonly available one: Google Cardboard, which you can get as cheap as $2 at many stores these days (I just discovered fun ones at Flying Tiger). This effectively means you can buy 15 VR headsets for the price of 1 3D print.
Viewing your Sketchfab model on a mobile VR headset is very simple: just tap the VR icon in the bottom right corner. That’s it! You’re smartphone will go to fullscreen mode and display a different view to your model for each eye. Plus the motion sensors will allow you to look around.
If you have a Samsung Gear VR it works the same as above. But you’ll need to visit your model on Sketchfab with the Samsung Internet for Gear VR browser.
On both Cardboard and Gear VR, you can teleport yourself to another location by staring in the direction you want to go and pressing the action button (Cardboard) or tapping the touch pad (Gear VR).
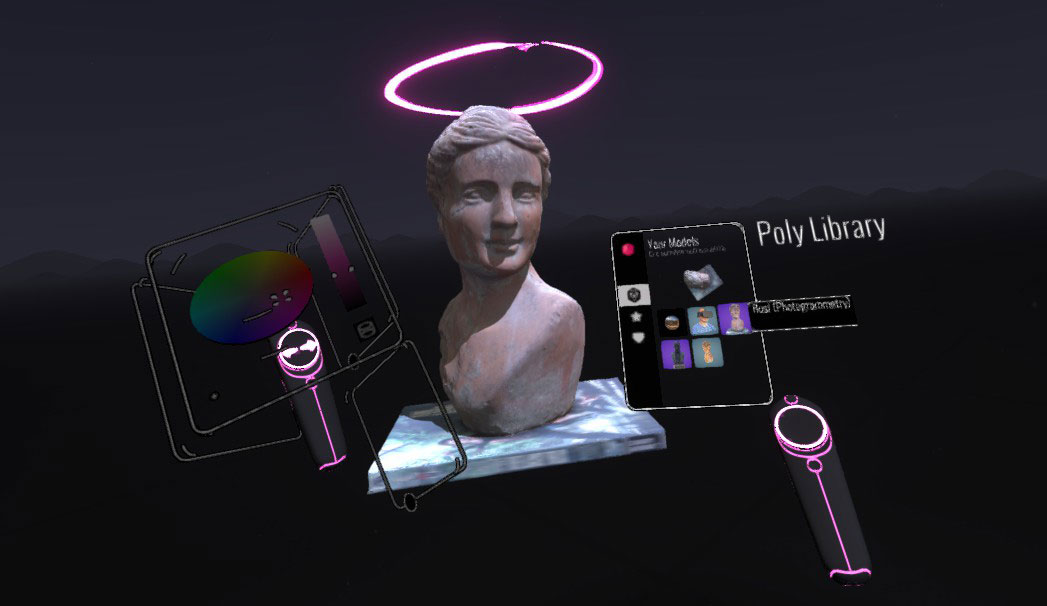
Step 5 – View in VR on Oculus Rift or HTC Vive
If you happen to own a dedicated VR headset, you can also view your Sketchfab models in VR, thanks to the wonderful developments in WebVR. This feature is still in beta, but it works perfectly. The only thing is that WebVR is not yet supported in mainstream browsers, so you’ll have to do two things:
- Download Chromium (a development version of Google Chrome)
- Open Chromium, visit the address chrome://flags and Enable WebVR
Now you can either click the VR headset icon on every Sketchfab page or embed to view that particular model, or click the orange View in VR button when your looking at a Collection to launch a nifty in-VR browser.
It’s the closest thing to teleportation we’ll get
If you have an HTC Vive, like me, you even get see the controller (which is a great 3D design tool, btw) and you can point and click anywhere to teleport to that location.
You can also have endless fun by trying to hit yourself…
https://www.instagram.com/p/BJdJ7iKDn8g/?taken-by=nicklievendag3d
So that’s the Tutorial for Viewing & Sharing your 3D Scans in Virtual Reality. In the next part I’ll show you how to View & Share your captures in Augmented Reality. And by that I don’t mean headset based AR (or Mixed Reality) but the kind that just requires a smartphone or tablet—like Pokémon GO!—using another free service.
Follow me on Twitter, Facebook or Instagram if your want to be the first to know when Part Two is live! And if you think the post you just read is useful for your friends and followers, I’ll appreciate it if your share it on your favorite social network by using the buttons below


That is so cool! This is awesome information! Thank you Nick!
[…] between 3D scanning and VR I began to think I may have hacked my own project. I assumed 3D scanning would involve less labor than painstakingly designing the whole bottle using Unity software. I […]
I have been dabbling in Virtual for a couple of years now, have not yet made the purchase but your article helped clear up a lot of issues that I had. Thanks very much
[…] 여기서 자세히 보기 […]