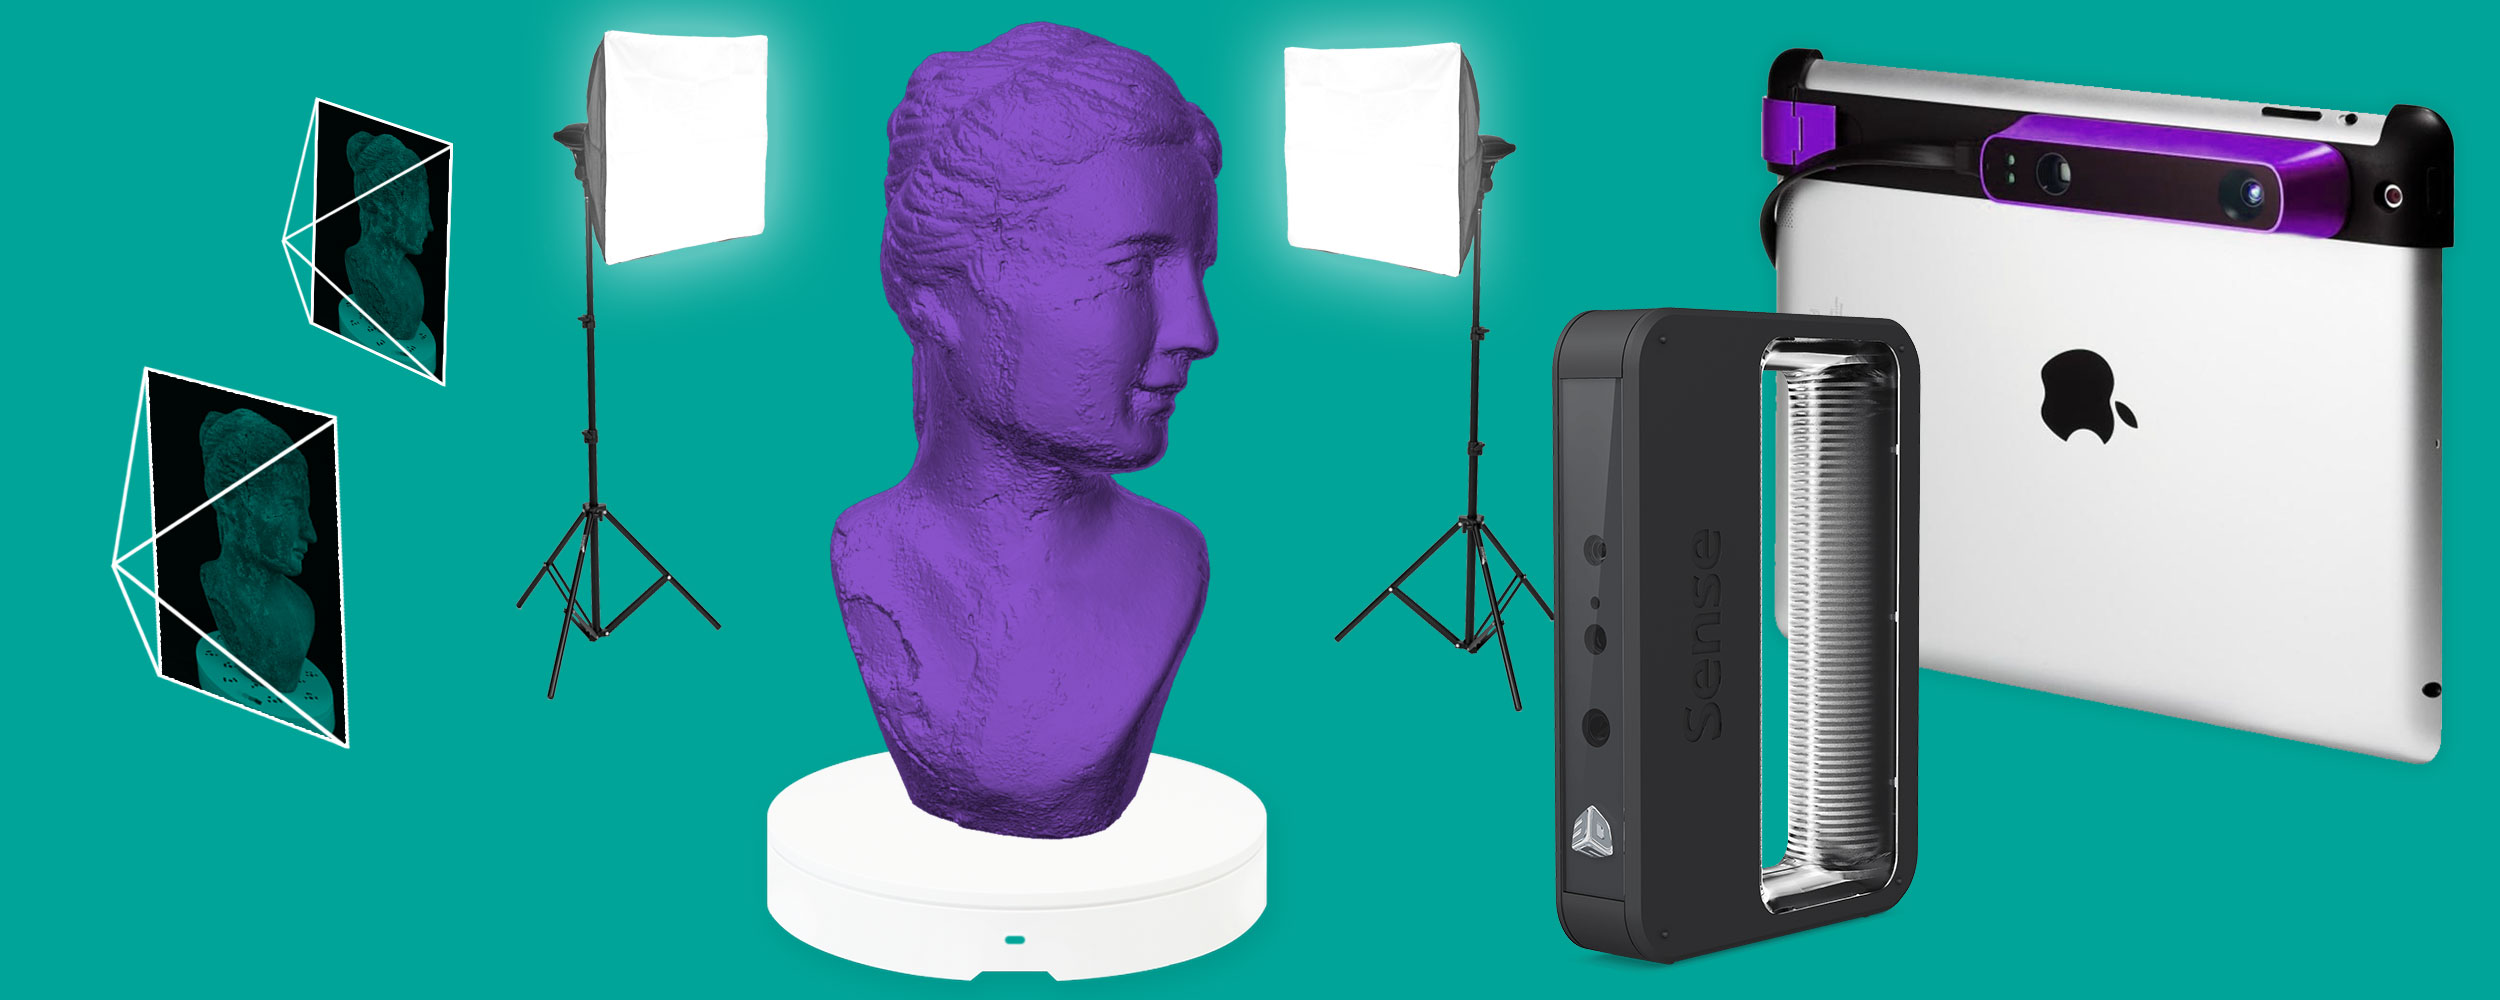
Like photography years ago, 3D Scanning — or, more broadly known as Reality Capture — has become affordable for consumers and small businesses. While higher-end professional grade 3D scanners are still more expensive, two technologies that are commonly used for 3D scanning on a budget are Depth Sensor based 3D Scanning and Photogrammetry, which uses a regular camera and special software.
But like Photography, buying just a scanning device and software might be enough for hobbyists but won’t give the best results. If you want to make 3D scans for professional purposes, you need to invest in some extra equipment to populate your (mobile) 3D scanning studio. Luckily, these can be found for prices that match the affordable scanning hardware and software.
My definition of affordable for this post is using hardware and software that won’t exceed an investment of $1000 (not counting a computer or tablet you probably already have).
Further down this post you’ll find a selection of essential products that I actually use myself to make many of the 3D captures you see on this website. And I’ve taken the time to search for the best deals, so you don’t have to.
But if you haven’t done so already, you should first choose which 3D capture technology you’re going to use.
Depth Sensor Scanning
vs. Photogrammetry
Using a depth sensor or going for photogrammetry is not an easy choice to make. In fact, I advise that you get experience with both approaches, so you get a good feel of which technique is best suited to each project you encounter. To help you, I’ve summarized the differences between the two technologies:
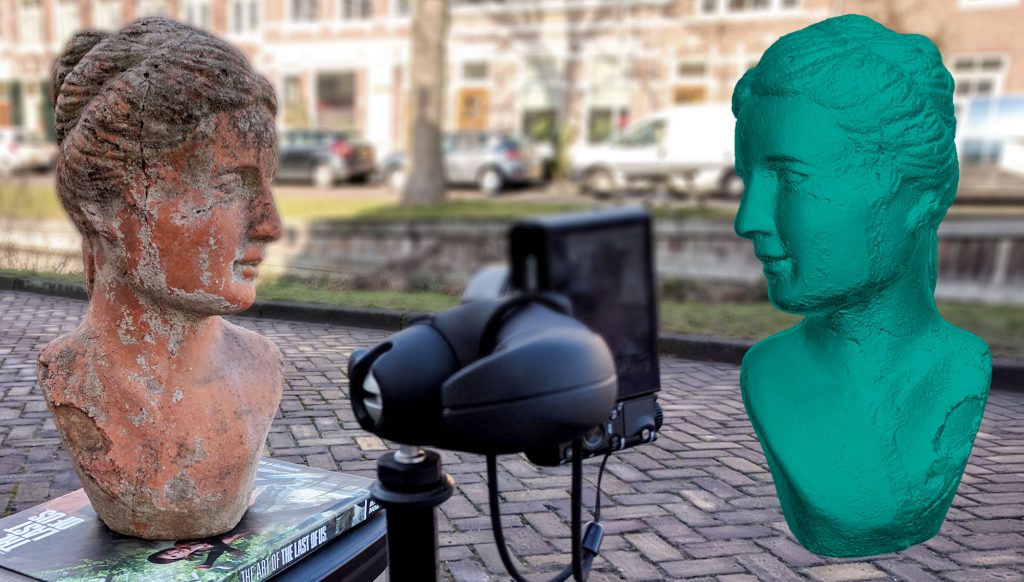
Using a Depth Sensor for 3D Scanning
First of all, let’s take a look at what it looks like in reality and what you’ll see in a typical depth sensor scanning program:
In my opinion, sensor scanning is what you should start with if you’re totally new to 3D scanning and haven’t got a lot of experience with technology in general or photography. You won’t get the very best scan quality but the results are light-weight (small file size and low memory usage). This makes them suitable for many (realtime) 3D purposes. The hardware is fool proof and the software is very user friendly. You don’t have to worry about the background behind your object and it will give an interactive scan progress preview. Scanning is fast (under two minutes for a typical session) which makes it the best way to capture people on a budget. Processing is also fast so you don’t need a very fast computer or tablet.
Typical uses of depth sensor scanning are capturing people and body parts (for both aesthetic and measurement purposes), objects to use as low-poly assets in games and VR/AR experiences (for reference or actual use), and rooms (measurements only).
Below is the result from the Sense 2 from the video above. Click on the gear icon and select Rendering > MatCap to view the geometry without textures.
Single-Camera Photogrammetry
You can start experimenting with Photogrammetry if you have some experience with photography and manual camera settings (even if you plan to use a smartphone) — and don’t mind that your first attempts will fail. There’s a learning curve but once you gain some experience, photogrammetry can generate very impressively textured 3D models. The object size and capture range is merely limited by what’s physically possible to capture. With the right camera and lens you can capture anything from a toy to a large statue. By using a camera drone you can even capture entire buildings.
Photogrammetry is not the holy grail of 3D capture and is limited to objects (or environments) that have a lot of visual detail and it doesn’t like movement — either of the subject or the background. This means that single-camera Photogrammetry is not a great idea for capturing people since they won’t be able to stand totally still long enough. It’s also not suitable for objects with a lot of large, flat surfaces, like furniture.
Typical uses of single-camera Photogrammetry are capturing statues of all sizes (cultural heritage, toys), organic objects (archaeology, nature documentation), high-quality 3D asset creation for games and VFX, and aerial surveying.
Below is the result from the photo shoot above, processed with the Free version of Autodesk ReMake (standard Quality). Again, click on the gear icon and select Rendering > MatCap to view the geometry without textures.
Which Photogrammetry Software should I use?
Since this post is about affordability, let’s start with three FREE solutions, all capped at a maximum of 50 photos which is just enough for most small to medium objects:
- Autodesk ReCap Photo (was ReMake/360) is now marketed as part of the ReCap Pro software package, instead of being sold as a standalone product. Previous versions would restrict your access to key features like post-processing and clean-up tools, but the trial now unlocks access to the platform’s full toolset for 30 days.
- Recap Photo is marketed as an industrial-grade reality capture software, but there are plenty of photo-to-model features here to help users of all skill levels. If you want to process more photos locally on a computer with a fast Nvidia graphics card and better quality, you’ll need to upgrade to the Pro version. In the US, this costs $50 monthly or $380 annually, and in Europe this is priced at €54 monthly or €441 annually.
- 3DF Zephyr was an exclusively paid platform but now there’s a free version of this too. It’s a Windows application that offers only local processing. It can run on a mid-range PC but a fast computer with a modern Nvidia graphics card will speed up processing significantly. If you want to process up to 500 photos you can get the Lite version for a one-time price of €199 or get the full version with advanced GIS, CAD and surveying tools for €250 per month.
If you don’t mind paying for software, you can also get:
- Agisoft Metashape (was PhotoScan) is available for Windows, Mac, and Linux, and supports all kinds of OpenCL graphics cards. The $179 Standard version can process an unlimited number of photos but the amount of these you can actually use greatly depends on the amount of RAM on your computer.
- Capturing Reality RealityCapture is available for Windows and surprises with its incredible speed. Processing that takes hours in other programs can be done in minutes with RealityCapture. It’s not as RAM-hungry as Metashape but strictly requires an Nvidia GPU. You can either top the software up with $10-20 worth of credits at a time or get an unlimited license for $3,750.
More Detailed Pros and Cons for if you’re not in a hurry
Pros and Cons of using a Depth Sensor for 3D Scanning
+ It’s easy
In my opinion, using a depth sensor is the easiest way to start 3D scanning. It requires very little technical knowledge because the process is very interactive. Below you can see an example of what sensor scanning looks like in reality and what you’ll see on the screen of your laptop or tablet.
+ No need to worry about the background
What’s great about a depth sensor is that it actually senses depth. That means that the software can tell it to only capture the object or person — and ignore the background. Because of this, the background doesn’t matter at all. There can even be people moving in the background.
+ Interactive Progress Preview
All depth sensor programs overlay a preview of what is being captured on top of the camera feed. This way you know exactly which parts have been scanned, so you can ensure you cover everything to generate a model without holes (extra important for 3D printing).
+ Fast results
Scanning an object or person can usually be done within two minutes. Processing time depends on the software and computer that’s being used but is usually done within minutes.
+ To Scale by default
Depth Sensors are factory-calibrated and know exactly how far away objects are. Sensor scans are usually great for doing interactive measurements that don’t require industrial (sub-millimeter) accuracy.
– Don’t work well outdoors
Most depth sensors use a small infrared laser projector. This light is invisible to the human eye, which is convenient and safe. But the small projector isn’t as powerful as other infrared light sources like, let’s say… the sun. You might be able to capture on a very overcast day but any direct sunlight messes up their depth sensing capabilities.
– Limited Scan Range & Object Size
There are different kinds of depth sensors but the ones I’m covering here are so called short-range sensors. This means they can sense objects from a distance of 20-40 cm up to 100-300 meters depending on the exact device. This limits them to medium to large objects and people. I’d say anything from 40 – 250 cm tall is the ideal scan size for depth sensor subjects.
– Limited Scan Quality
As such, a low-quality depth sensor scan can yield low-poly 3D models. These depend largely on the resolution of the cameras that are used. Without becoming too technical: these sensors use an infrared black-and-white camera to capture the patterns projected by the infrared projector and and a RGB color camera to capture texture information. These are getting better with each new generation of sensors but will never be as good as a dedicated digital camera that’s used for photogrammetry.
The quality of a depth sensor scan can be considered a low-poly 3D model. It might not be the best scan result but the fact that it’s “light” means it’s perfect for realtime 3D purposes such as online sharing on Sketchfab, VR/AR applications, body measurements and small-scale decorative 3D printing (e.g. miniatures in full color sandstone).
Pros and Cons of Photogrammetry
+ Size doesn’t matter
Depending on the camera you use, you can capture objects as small as a toy and as big as a statue. You can also take photos with a drone to capture really big things. The only thing you should be careful with is the depth of field when capturing really small things. You basically want everything in focus, which is impossible with macro photography. DOF bracketing might be an option here.
+ The geometry quality can be very good
When using a camera with a sharp lens and many megapixels, photogrammetry can achieve incredibly detailed results that come close to professional 3D scanners. But this really depends on the visual details of the object you’re scanning.
+ The texture quality is always incredible
What always sets photogrammetry apart from even the most expensive industrial 3D scanners is texture quality. This can make up for less detailed geometry and can also be used to generate special texture maps like normal maps and displacement maps that enhance the realism of 3D models without adding extra geometry.
– It requires experience
I get a lot of emails from people that loaded a few (I’ve read stories of just 4) photos into photogrammetry software and complained that the results were lackluster. To make photogrammetry work, you’ll first have to understand how it works and how you can take the photos in a way that’s optimal for a computer to understand. That often has little to do with human logic. Even after hundreds of photo shoots and testing almost every software suite available, I’m still improving the quality of my photo sets with each new project. The problem is you have nearly zero feedback while taking pictures and not all problems that arise in processing can easily be fixed.
But experience is not just about shooting photos. To get the best quality out of Photogrammetry software, you’ll also have to learn what impact certain settings have on the quality/processing time balance. That’s significant if you want to offer it as a professional service or have limited computer resources.
– It’s slow
While using a multi-camera Photogrammetry rig is the fastest way to 3D capture objects and people, doing it with a single camera requires time and patience. Shooting from a tripod is a must and to get the best shots you’ll sometimes use longer exposure times. And even for small to medium objects, you will have to shoot a minimum of 40-50 photos from various angles to get good results.
Processing photos can also take a long time. Greatly depending on the amount and size of the photos and the specs of your computer, it’s not unusual to have to wait hours before getting results. Some programs require so many resources that you cannot do anything else on the computer in the meantime. It’s good to know that many modern Photogrammetry programs are optimized for GPU-acceleration. In most cases, one or multiple graphics cards can be used to speed up the algorithms significantly. And in most cases, those from Nvidia are the best (or only) option.
The problem of speed will become less of a problem in the future because algorithms are getting more efficient and computing hardware is becoming faster and more affordable. But as it stands now: patience is a virtue.
– Motion is a killer
While most photogrammetry algorithms can handle moving objects in the far background, they can really go haywire when larger objects or people move even a little bit. Keep in mind that in difficult cases, you can always mask out distracting elements before processing. But again, this takes time.
– It’s not to scale by default
Most photogrammetry programs try to scale the model based on camera and lens information but this is always an estimate. So it’s always a good idea to take some reference measurements of the objects you’re capturing or put something in the scene of known size to scale the model later.
Essential Stuff for your
3D Scanning Studio
Now that you’ve made up your mind about using a sensor or photogrammetry, let me guide you through all the other hardware that will make the difference between a hobbyist’s scan and one that looks great!
1. Light, Light & Light
While industrial-grade 3D Scanners usually have a built-in LED light source, affordable infrared depth sensors haven’t. This means scan quality will greatly depend on the lighting conditions. For photogrammetry the solution is simple: capture your subject outdoors, preferably on an overcast day for nice, diffuse lighting. If you have a 3D scanner that projects a visible line of laser light, scanning outside might also work. But if your scanner uses invisible, infrared light, you’re bound to scan indoors.
In many cases you’ll want to scan indoors anyway to keep control of the lighting. In this case it’s wise to invest in a studio light setup. Not flash lights for photography, but permanent lights used for video production. The kits usually come with 3 lights with softboxes on stands. Depending on your budget, you can buy a kit with LED lights or a more affordable version with fluorescent bulbs. The amount of light you need depends on what you want to capture. Just be sure the light temperature is 5500 Kelvin (daylight).
I illuminate my 3D scan subjects in three main ways:
Small Light Kit
This is a very portable (they usually come with a carrying bag) kit with two or three small, single-bulb, umbrella-style softboxes. It’s good for scanning small objects like the Teddy Bear you see a lot on my blog.
They’re usually just standing in a corner of my office and I use them for most of the photography on this site as well.

Large Light Kit
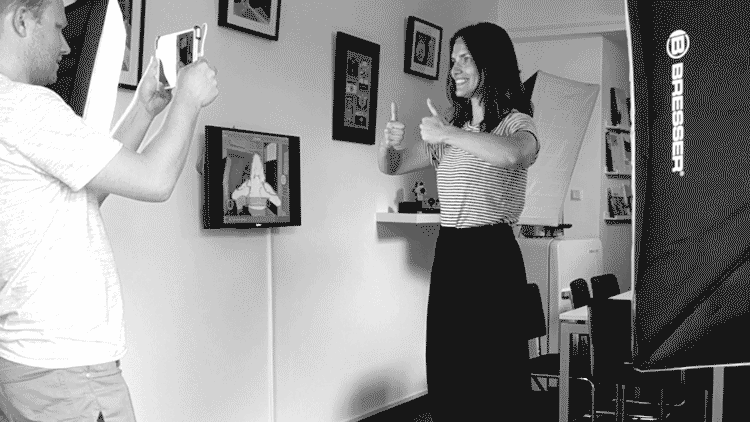
I also have a larger kit that can hold 5 separately switchable bulbs, totaling 2500 Watts of light. It comes with a bag, but I call it the Body Bag for a reason. That’s why I only use this set in my studio and usually for Full Body Scanning.
I might swap that kit for an LED version one day, because that would be a lot lighter and would save a lot of electricity as well. You can see my kit in action in the animated GIF in the Turntable section of this post.
Mobile LED Light
If you want to go totally portable though and use a Structure Sensor, you can also buy a small LED light that you can stick onto the back of an iPad or plug into a headphone port or tripod thread. This does help in some unplanned scenarios where lighting is simply bad. I always have my Structure Sensor and one of these in my bag. It isn’t perfect, because color textures are usually captured at a wider angle than a light like this can cover and you’ll have to keep a fixed distance from your subject to avoid even more lighting inconsistencies. But it’s better than nothing.
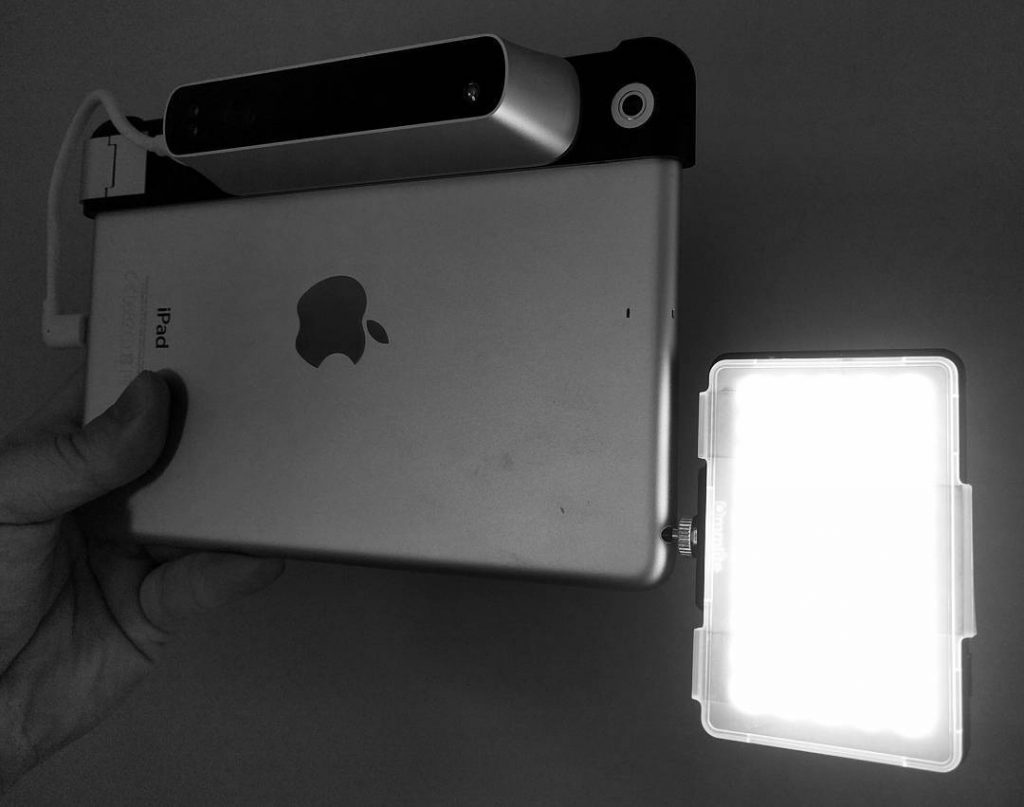
The LED mounted to the headphone jack of an iPad for 3D scanning with Structure Sensor (Review).
The LED mounted to the Tripod Mount of the Sense 2 3D Scanner (Review) with the included adapter.
2. A Turntable
Using a turntable means not having to walk around the subject. This also means you’ll need less space and fewer lights, and in some cases your 3D scanner can even be mounted in a fixed position.
Small Manual Turntable (for Depth Sensor)

For 3D scanning small to medium objects with a depth sensor (like the Structure Sensor or Sense 2) or professional handheld 3D scanner, a manual turntable usually results in better scans — especially when it comes to texture quality. This is because you can move the object in a slower and more controlled way which reduces motion blur in the color capture.
You can use a turntable with a scanner on a tripod or handheld. Just make sure your hands and arms are out of frame as much as possible so they won’t mess up the tracking.
A Smart, Automatic Turntable (for Photogrammetry)
I’m so excited about this one that I wrote a complete review about it. The $139 Foldio360 is actually meant for 360-degree product photography but it is also great for automating Photogrammetry for small and medium objects. It can be controlled with an iOS and Android app over Bluetooth and has an infrared transmitter that can trigger a DSLR camera of almost any brand. I’ve made it part of my permanent small-scale Photogrammetry setup.
A Large, Automatic Turntable (for Depth Sensors)
If you want to scan bigger objects or humans, you’ll have to buy something more serious. I own an electric turntable manufactured by Dutch company Pre-Motion, that can hold up to 100 kilograms. They have two versions with different fixed speeds and I tested both to discover that the slowest 0.8 RPM version works great for 3D Scanning. I modded mine by adding a simple foot-operated light switch in the power cord, so I can take my time to scan the front and head of people first and then turn on the turntable with my foot to capture the rest at a comfortable pace (the GIF below is played at 4x the original speed). A turntable like this isn’t very cheap and also isn’t very light (15.5 kilograms), but if you’re going to put people on something that rotates it better be good, right?
3. Markers
To stitch geometry from different angles together into one seamless model, all 3D capturing programs use feature detection and tracking to understand which parts need to go where. Some 3D scan solutions use just the geometric features (from the black-and-white Depth Map) for this, while others also use the color information for this (referred to as RGB+Depth tracking). This means that the former method would not be able to capture a perfectly smooth globe, because of the uniform geometry of a sphere, but the latter could, because it’s capable of detecting the unique features of the print.
For RGB+Depth scanning, you can solve most tracking problems by adding distinct visual features to your object. Some scanners come with dedicated marker stickers for this, but most of them usually detect any high-contrast stickers. I always have a few packs of small fluorescent stickers from Avery that you can buy in any office store. If you want to capture color as well as shape, just place the markers strategically so you can easily remove them from the texture map in photo editing software. Photoshop’s Healing Brush does this pretty quickly for this in most cases.
4. Matting Spray
Both 3D scanning hardware and Photogrammetry-based software solutions rely on computer vision of some kind. They either project visible or invisible light onto an object and capture the result with a camera, or they use software algorithms to estimate depth from images. In all cases, the computer tries to understand what it’s seeing. And computers aren’t smart enough yet to understand a few surface types that humans take for granted: transparency and specularity.
This basically means that see-through and shiny objects cannot be 3D captured in their original state. But if you only care about the geometric shape and not aesthetics, there is a solution for this: making the object opaque and matte. This can be done using a matte, light-colored spray. And in most cases probably temporarily. There are special 3D Scanning Sprays on the market, but there are many cheap sprays that will do. From chalk spray to water-soluble glue spray or even hairspray. Just make sure you don’t use any of them on sensitive materials.
If you want to scan people, you will run into problems with people wearing shiny things like glasses. If you need a 3D model of a person that always wears glasses, you can scan them without their spectacles on and add these in post production. For this you will naturally need a 3D model of the glasses, and 3D scanning them separately is very hard. Luckily, you can find many brands and models on 3D Stock websites like Turbosquid for a reasonable price. Just be sure the file format is compatible with the 3D modeling software you intend to use.
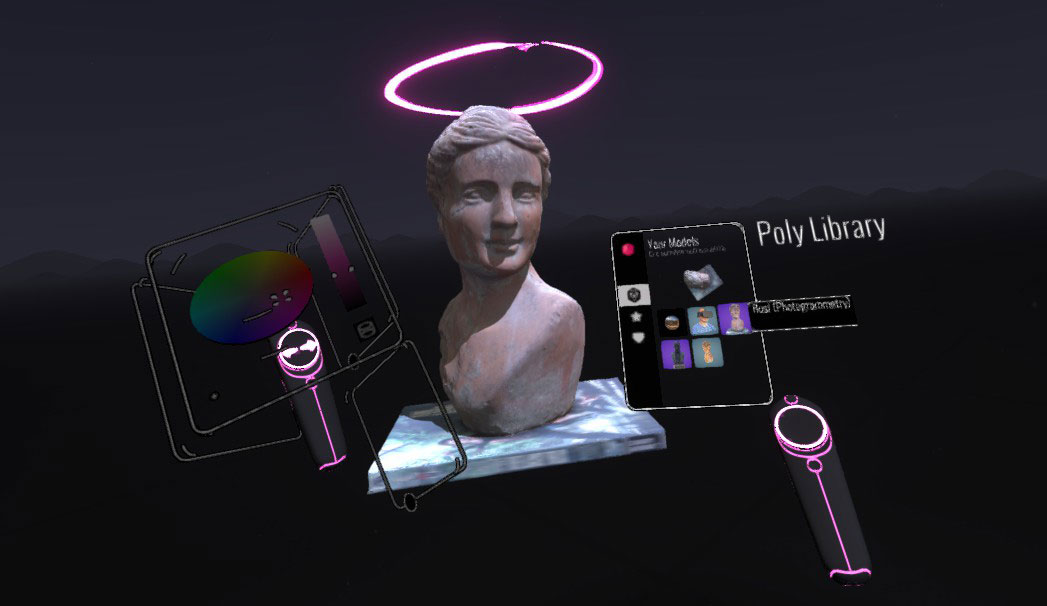
5. A Sketchfab Account
If you want to share your 3D Scans with the world (and don’t have the cash to 3D print all your scans and mail them to your friends and family), there’s only one way to do it in style: Sketchfab. The website has quickly become the YouTube of 3D Models and offers an easy-to-use way to publish and share your 3D scans through the web, social media and even in Virtual Reality (I wrote a tutorial about this). Manually uploading scans isn’t necessary in most cases, because almost every 3D scanning and photogrammetry software can directly publish the result to your Sketchfab account.
It’s free, but I can totally recommend the Pro account if you’re taking yourself and your work seriously (and want to support the development of this great service). The Pro features I use the most (Yes! You can also follow me on Sketchfab) are the ability to publish models privately and change the background to something more branded. Also, some of my scans go beyond the 50MB file size limit of the Free version.
Thanks for reading. I hope this post is useful for you if you’re getting into 3D Scanning (which you should). If you think it would be helpful for your friends and followers, please use one of the buttons to share it on your favorite social network. For this you can use the buttons on the left (desktop) or under (mobile) this post.


Thank you So Much for this fabulous wealth of information! I am a wood carver that does small carvings (@aseriesofbarbaricyawps on instagram)… i give some of them away and stick them on that feed so i remember them – but would love to be able reproduce my carvings as a keepsake for my kids, etc.
From reading your guide – I am thinking that if I Really want an accurate representation of a carving (that I can 3d print) – that the photo method is the way to go? or would depth scanning work too (I like easy)? capturing knife marks would be lovely though…
Hi! I am trying to find a good solution to scan speed humps placed on common roads. Could you give me some advice on which method (depth sensor or photogrammetry) would me better for that purpose and maybe which device/software would be the best buy. Thank you!
This is very serious, You’re associate passing qualified author. I actually have signed up along with your feed and in addition can relish finding your personal marvellous write-ups. Incidentally, we’ve shared your net journal in our social networks.
Server 2016 Consultants
Turntables are not suitable for 3d scanning, as they make the shadows change.
Autodesk products are no more free, but there is the opensource/multiplatform Regard3d.
By far essentially the most succinct and also up-to-date information I found about this topic matter. Certain pleased that I stumbled upon your write-up by opportunity. I will likely be signing up on your rss feed so as I’ll receive the newest posts. Enjoy everything right here.
Server 2016 Migration
Hello Nick.
I’m Gerzon Cochea from Ecuador
I try to sign in Sketchfab with the 3d System Sense software, but it does not open, I can not share the scan I made, only the first one was able to later, I do not want to start the session anymore.
I have a Sense RS Class 1
What I can do?
Heya, was looking for lights with 5500 kelvin at hardware stores (aka – Home Depot), but I couldn’t find any. The closest I can find are 5000 kelvin & 6500 kelvin lights. Would those work or would they throw off the color accuracy of the texture maps?
Anything between 5000 and 6500 will pass for “day light”, especially for this purpose. And textures can always be color-balanced in post processing.
Hi Nick
Can you share some info on your mobile LED light for the headphone jack?
I’d like one for my Asus Zenfone AR, but I can’t seem to find one as large as yours.
The ones I can find are generally most small selfie-lights.
This Portable LED Light seems to be the same one I have and comes with a headphone port adapter (show on the last image, third row, second part): https://amzn.to/2q64toP
Hi Nick
Could you share how you mounted your light into the headphone jack of your iPad? I can’t find any suitable adaptors to do similar.
Many thanks
This Portable LED Light seems to be the same one I have and comes with a headphone port adapter (show on the last image, third row, second part): https://amzn.to/2q64toP
Im impressed, I should say. Pretty rarely do I come across a blog thats each informative and entertaining, and let me let you know, youve hit the nail on the head. Your blog is significant; the problem is some thing that not sufficient men and women are talking intelligently about. Im seriously happy that I stumbled across this in my search for one thing relating to this issue.
Office 365 Migrations
Speed humps could be tricky if you are going to scan them you will need to get a section of the road to, i would recommend a drone with a detachable camera so you can shoot from the ground first and then elevate
It is an incredible weblog in the senses and very participating too. Great job! Probably not much comes from an early blogger like me, but I can guess after having fun with your posts. Nice grammar and vocabulary is not like many blogs. You actually know very well that you are talking too much. That’s what you want me to learn more. Your blog has turned into a stepping stone for me, my fellow blogger. Thank you for the detailed journey.
Office 365 Migration Support
Please tell me that youre heading to keep this up! Its so great and so important. I cant wait to read a lot more from you. I just feel like you know so substantially and know how to make people listen to what you might have to say. This blog is just too cool to become missed. Terrific stuff, genuinely. Please, PLEASE keep it up!
Office 365 Migration Support
Nice blog. I would like to share it with my friends. I hope you will continue your works like this. Keep up the excellent work. You have a magical talent of holding readers mind. It is something special which cant be given to everyone.
Office 365 Migrations
Hello Nick,
thanks for all the good info in this blog.
I have a tiny question, for a very perculiar use case, that is not covered here:
I am looking for a cheap 3d scan solution of some kind, that can instantaneously cover a whole person in low/medium detail (facial details like wrinkles etc. are not needed) and mesh only (no textures needed). Also the mesh would only need to be valid from one view angle, as the resulting mesh would only be needed to be overlayed over a master photograph of the person, so that the mesh could be used to apply CGI to the master photograph.
Would it be possibly to use (instantaneously) multiple camera photogrammetry with only 3 or 4 cameras, since the mesh would only have to be valid for one camera/viewing angle?
Thank you! Have a nice day!
If you are looking for 3d scanning depth sensor based 3d scanning is best and professional way to scan though it is costly than photogrammetry but gives you professional look and better experience than photogrammetry. There are number of deep sensors present in market which you can buy according to your budget and functions.
Great article. What camera would you recommend for entry level photogrammetry? I am a sculptor getting up in age and need to find a better way to reproduce and my work. 24″ and smaller sculptures of people and animals. $1,000 budget, thank you
Interesting article. However, I was disappointed to see that Regard3D was not included in the list of photogrammetry software. Regard3D is a polished, easy-to-use program with many features and options, developed by Roman Hiestand. It’s completely free and open source, and comes packaged for Windows, Linux, and Mac. (It’s the only OSX software that doesn’t require CUDA!) It can produce really beautiful results. I really think it should be included on the list of software.
thanks for the information
Hi i would like to know what setting are you use in SENSE 2 3d scanner.
Medium or high, small or large scan area. I’m now struggling to scan full body using SENSE 2… Thx in advance.
[…] 여기서 자세히 보기 […]