The most frequently asked question I get is:
How can I easily make 3D captures on a smartphone — for free?
For a while many people enjoyed photogrammetry through Autodesk 123D Catch for this. Since that has been discontinued, alternatives have surfaced like my ReCap 360 Android workflow but that still requires taking separate photos. Many people find that process too time-consuming. TRNIO for iOS fixes that problem with a tracking-based continuous photo-taking feature but its results can be hit-and-miss and it’s not available for Android.
Microsoft seems to be working on a crossplatform app, but but nobody knows when that 3D Capture app will be released. And then there’s Google Tango, which can also be used for 3D scanning with dedicated apps. But that requires a special Tango-phone that I guess very few consumers will ever own.
Looking at my personal preferences for mobile on-the-go 3D capture, I came too the conclusion that I don’t actually need the results directly — I just want to make the capture as soon as possible. I don’t mind processing them later, just as I do with with my photos after a vacation.
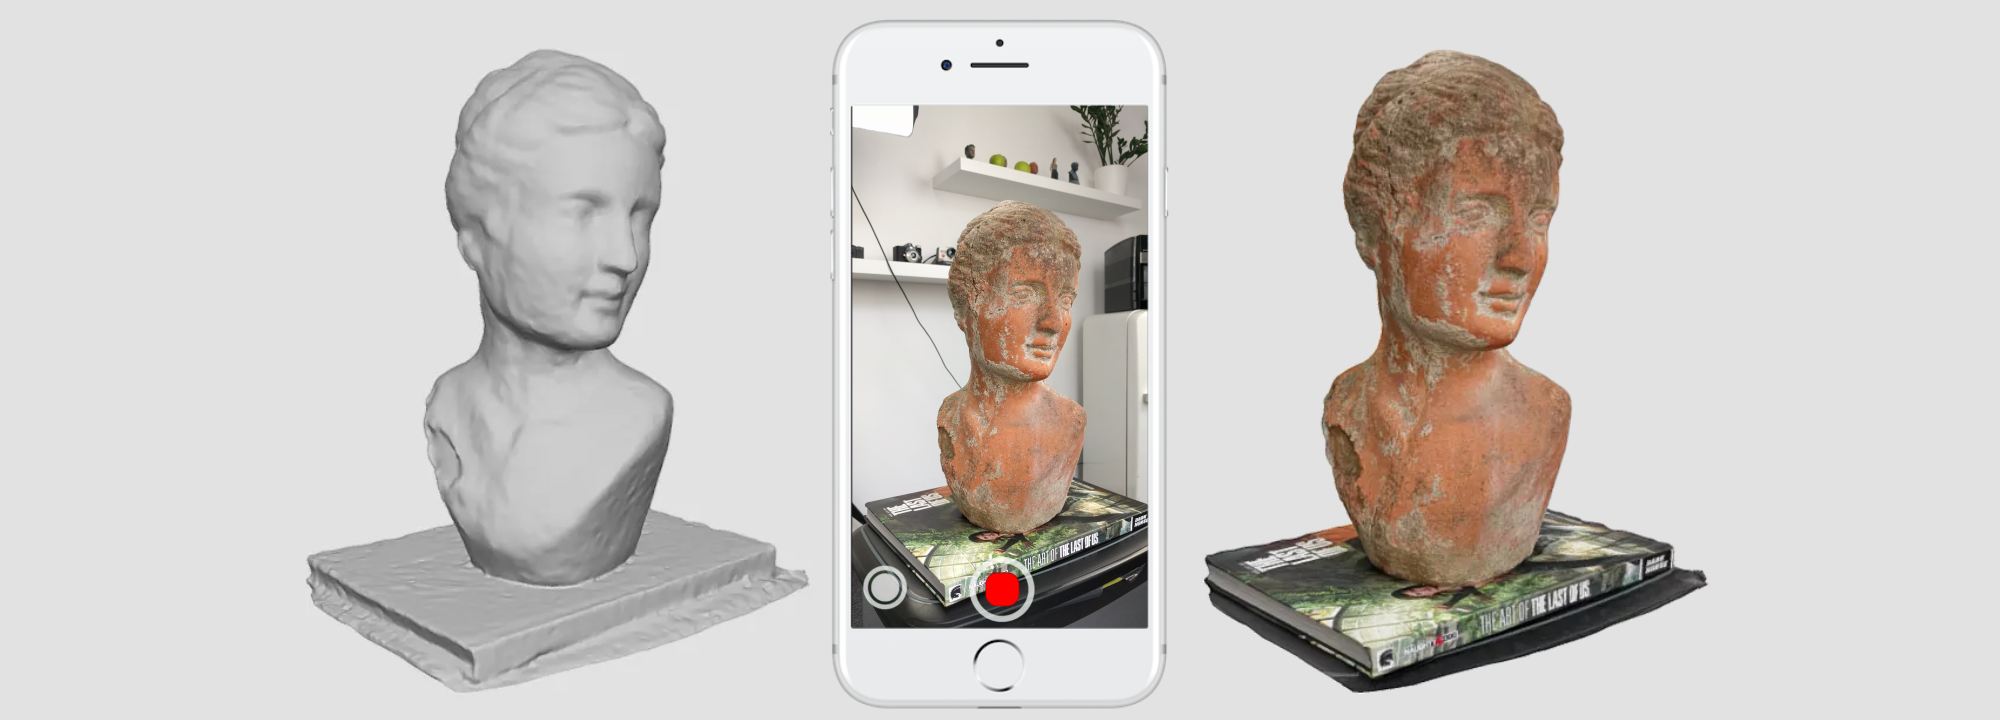
After reviewing the photogrammetry software 3DF Zephyr, I discovered that its video-to-3D feature started to change the way I approach “casual 3D capture”. Let me define that! Like photography, I sometimes want to capture things at the highest quality but other times just want to capture something in 3D in a way that’s as fast as possible and delivers an acceptable result that I can share on Sketchfab. Acceptable for me is a 3D model with depth sensor-like geometric detail and a good texture.
I think the workflow I’m going to describe here delivers that. And the good news is that it’s totally FREE!
But what if you need more than 40 seconds of Video?
After posting this article a while back I got a lot of emails from people that where hitting the 50 photo limit of 3DF Zephyr Free, which in my experience roughly translates to about 30-40 seconds of video. I ran into that myself when I wanted to make this years 3D Chistmas Card:
I had to put some extra effort in moving around the glasses and hat areas which resulted in a 4K video of about two minutes. Too long for Zephyr Free but a perfect match for Zephyr Lite which has a limit of 500 photos. That version is not free but below is a special discounted offer from 3D Flow:
Get Holiday Discount on 3DF Zephyr Lite
If you use the button below you can order the Lite version with $10/€10 discount!
What you need
- A Camera or Smartphone that can shoot video, preferably in 4K quality but 1080p HD also works if you’re less keen on quality.
- A Windows computer with a somewhat recent graphics processor. More specifically a DirectX 9c compatible one, which is true for many integrated graphics solutions from the past years. A faster processor, more RAM and a faster (dedicated) graphics processor (especially an Nvidia one) will speed up processing.
- A copy of 3DF Zephyr Free that you can also use for personal purposes with regular photos (max 50).
Tutorial
- Shooting the Video
- This is the hardest part and you’ll need to practice with the technique to get better at it. It’s good to do this in an environment with plenty of light. This can be outdoors or indoors. For the latter you can think about using a budget studio light kit like me but maybe your room or office light is sufficient. Either way, low-light conditions will introduce too much noise and motion blur for this technique to work. This also greatly depends on your phone or camera capabilities.
- Pick an object or person and tell the later to stay totally still while you’re busy. Putting a person on a solid chair can do wonders for this. Make sure there’s nothing in the background that moves. Passing cars or cyclists can ruin everything! Objects or clothing with very little detail, or things that are either very dark, shiny or transparent won’t capture well. If possible, use a floor surface with a lot of detail, like a newspaper or a book like I do
- You can shoot in either portrait or landscape orientation. For taller objects and people, portrait is the best choice since it will better fill the frame. Check the settings of your Camera (app) and set it to the highest video capture quality. 4K UHD is great if it’s available.
- Finally, it’s absolutely necessary to lock auto-exposure and auto-focus. On iPhones and most Android phones this can be done by framing your subject followed by tapping and holding the screen for a few seconds. A message like “AE/AF Lock” will appear on screen.


- Start capturing. Especially with people, it’s good practice to start slightly off-center and move (slowly!) from ear to ear first, followed by a top-to-bottom movement (don’t forget to peek under the chin). Then walk around the subject slowly, moving up and down if needed. Don’t forget to also take a few seconds of video from the very top down. Done!
- To make this work in the Free version of 3DF Zephyr, keep you video under 50 seconds. This is enough for most objects and people. Larger objects and environments require more angles, meaning more capture time. If that’s your thing you might consider buying Zephyr Lite for $149. It has a Free 14-day Trial and results from that can be uses commercially as well.
- Copy the Video to your PC
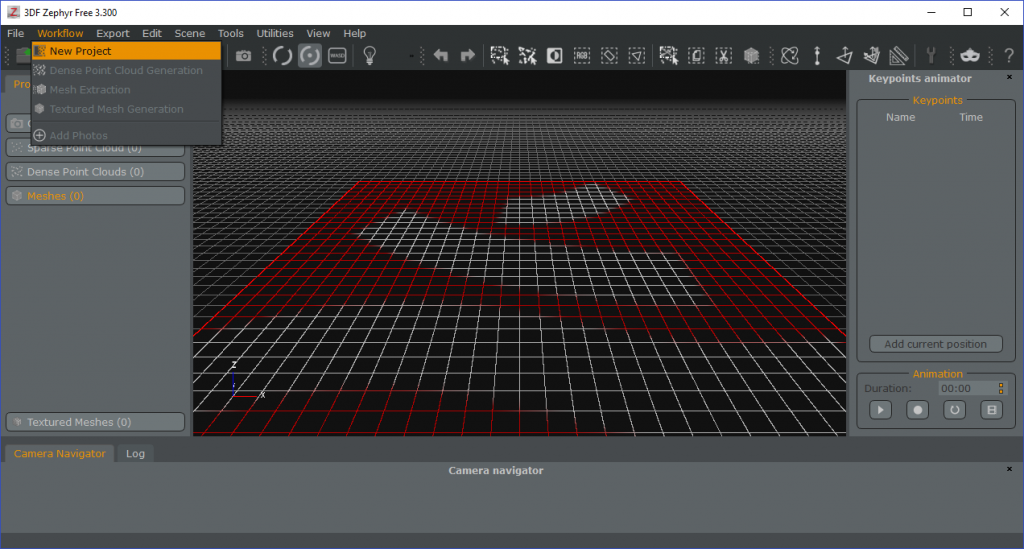
You can do this through a cloud service like Dropbox, Google Drive or iCloud but simply using a USB cable works a lot faster since even one minute of 4K video can be a few hundred megabytes. - Launch 3DF Zephyr Free and start a New Project

- Deselect the Camera Calibration check box and hit Next

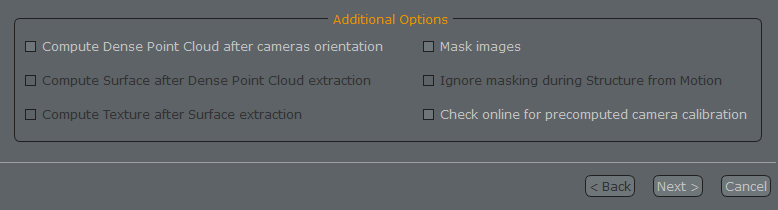
If you feel confident about your video skills, you can take a shortcut by selecting the first two Additional Options in the left column. If you do you can skip Steps 10 – 18. But I strongly advice to walk through the whole process manually the first time so you know whats happening.

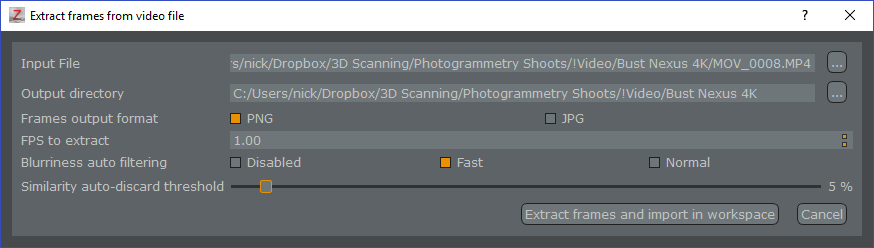
The default settings are fine in most cases. If you have time, you can set the Blurriness filtering to Normal. For a 50 second video, the default Frames Per Second (FPS) setting on 1.00 is fine. For shorter video you can set it higher — 2.00 for a 25-second video, etc.
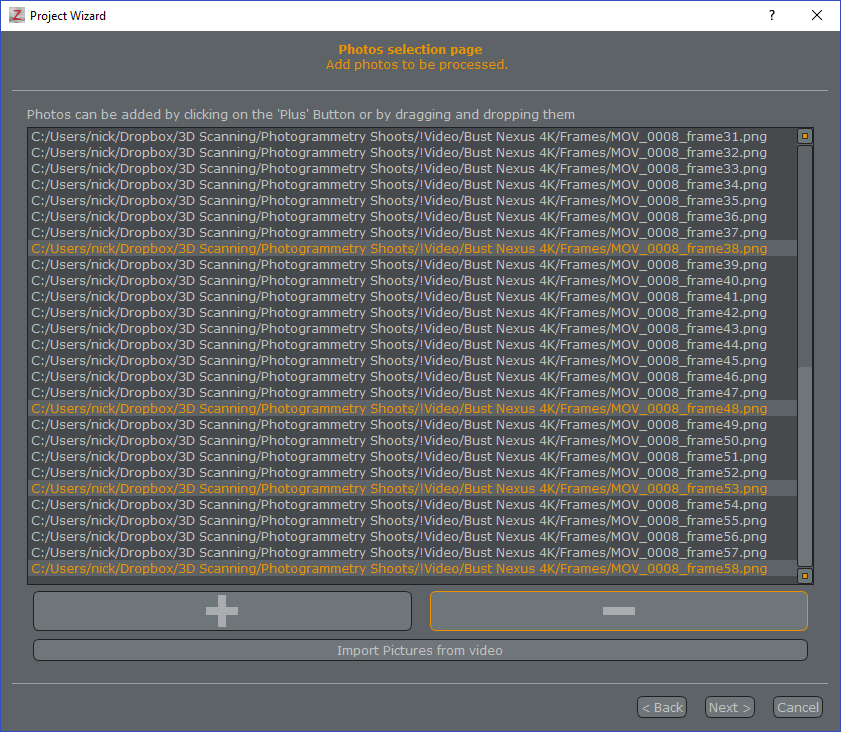
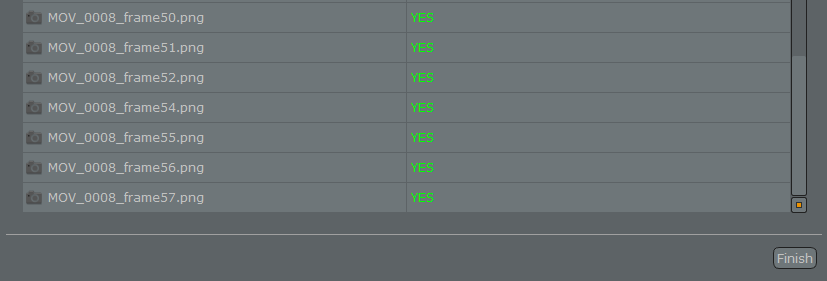
If Zephyr extracted more than 50 and you want to use the Free version, tactically select a few photos across the sequence like below and delete them with the minus button until you have exactly 50.
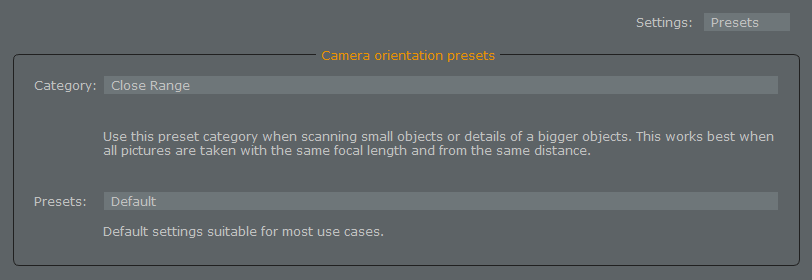
Use your common sense to choose the right category. Leave the second preset at Default. If camera orientation seems to fail after this step, you can always retry this step with another, more time-consuming, Preset.
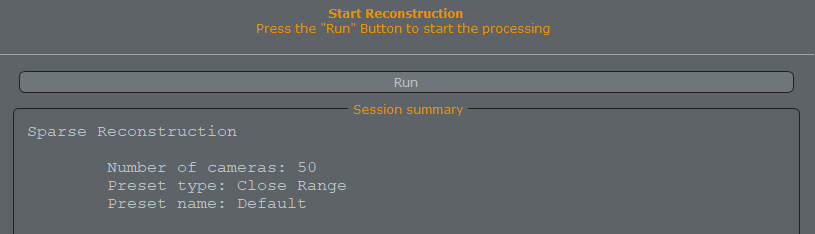
This phase can take anywhere from a few to many minutes depending on your system. Depending on the amount of RAM in your PC, you can also work while having this process run in the background. In Windows 10, the Zephyr icon in the task bar also serves as a progress indicator.
Ideally all frames should have been successfully included. If more than a few produce errors, repeat step 8 with the Deep Preset and drink more coffee. Both can do wonders.
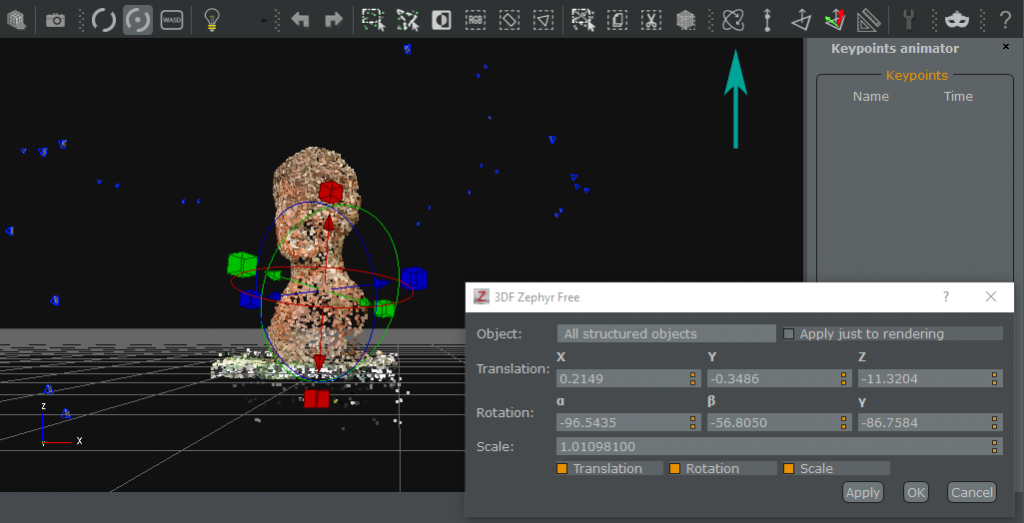
First check if the result looks fine and the blue camera indicators are at the right places. If not, repeat step 8 with a more aggressive Preset. If everything look fine, it’s good practice to rotate and move your object so it sits nice and flat on the grid. Videos shot in portrait orientation will usually need a 90 degree rotation. You can do this by clicking the icon indicated below and using the interactive gizmos or by changing the numbers. Hit OK afterwards.
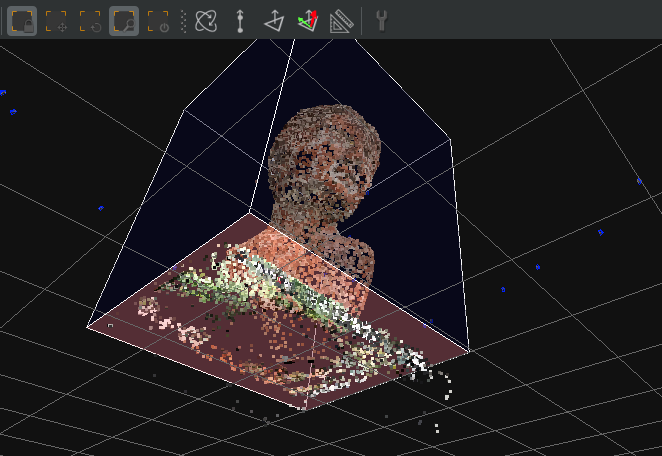
Make the Bounding Box visible by clicking the first icon you see in the screenshot below. Reset it by clicking the fifth icon.

If the bounding box was set incorrectly or you want to crop elements of the 3D model, use the Translate, Rotate and Scale tools to do so. Below is an example of cropping of the book (which I ended up not doing because I like the book).
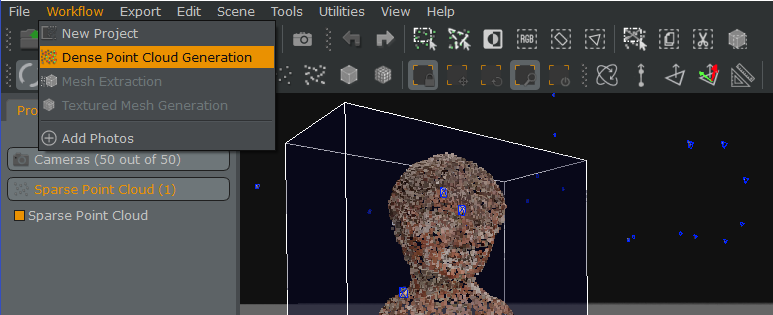 The Default quality preset is probably enough in most cases since we’re not using extremely big images. You can try High if you have more time. This step is often beyond a coffee break, but depending on your system and the time you can go for lunch. Or just keep working if your system allows it. Light word-processing and emails usually work but this is not the time to edit photos or videos.
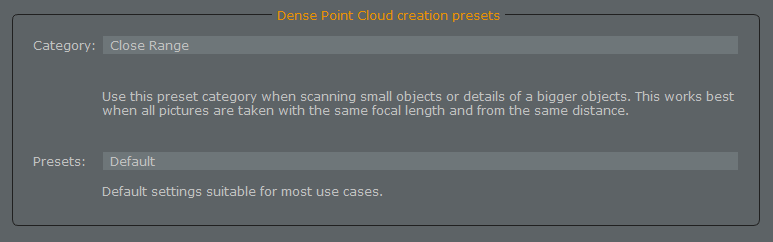
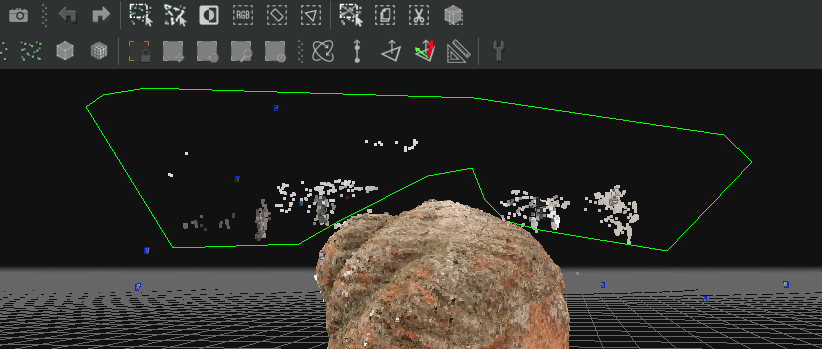
After the Dense Cloud is finished, check for orphan, flying points that are not part of the model. You can remove them by clicking the fourth or fifth icon in the menu bar below and following the on-screen instructions.
 Default is fine, High is Better, Coffee is great.
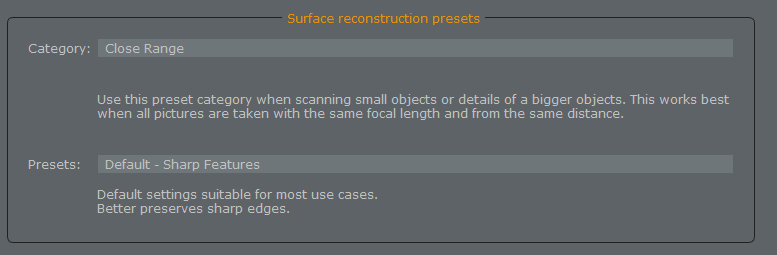
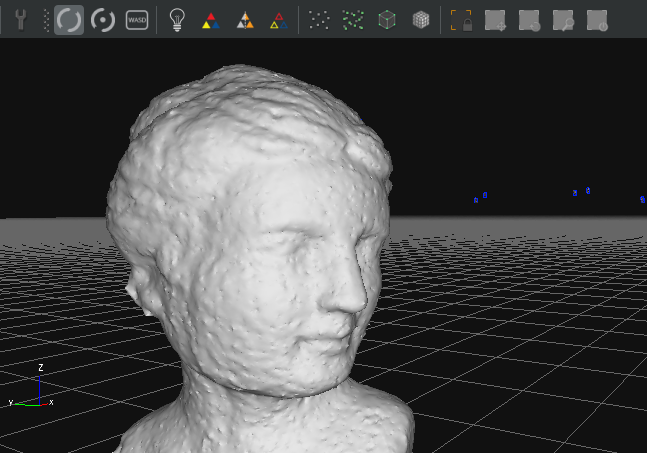
Depending on your camera quality and the light conditions, video will always contain some noise. The result will be visible on the model. To judge this, click the Lamp icon and then the first icon with Triangles to turn off the color.
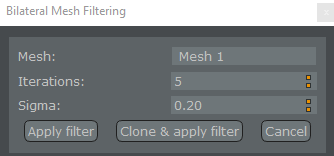
Go to Tools > Mesh filters > Bilateral Smoothing. You can experiment with the Iterations setting. I ended up setting it to 10 (more would result in too much loss in detail for my taste). You can choose to make a copy with the result so you still have the original.
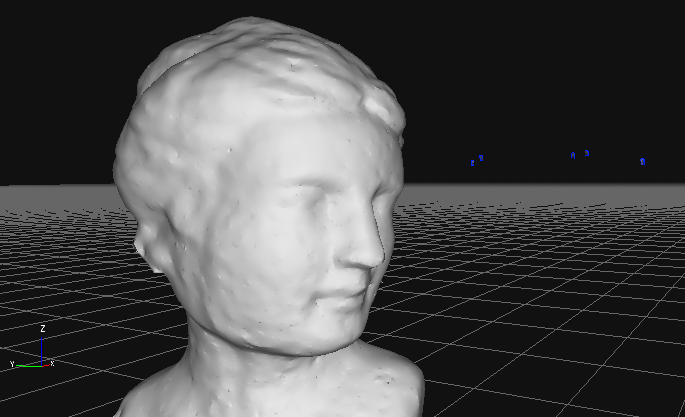
As you can see in the image above, the surface is now smoother but has a few funky polygons here and there. If needed you can reorganize the polygons (a.k.a. the topology) of the 3D model within Zephyr by launching Tools > Mesh filters > Retopology.
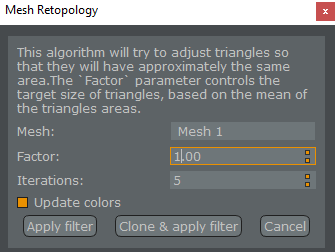
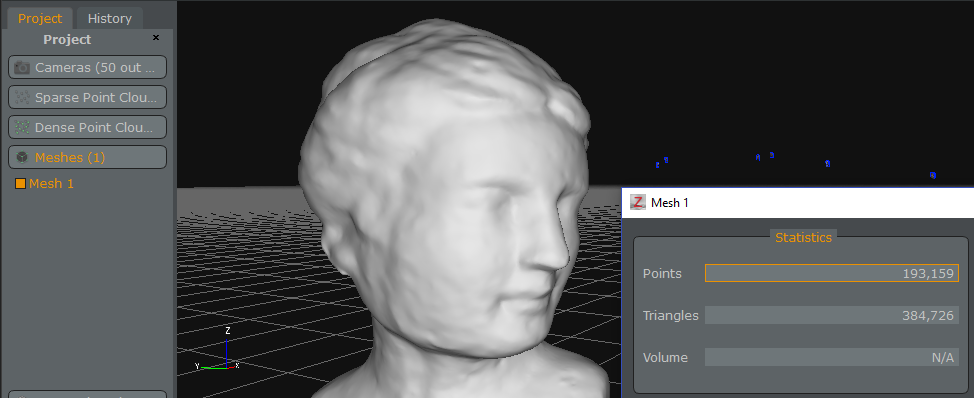
The text in the panel explains with the Factor setting does. If you’re going for a really low-poly object for a game, yo might want to go for something bigger. Again, you can make clones with various settings. You can make the polygons visible by selecting the third icon with the triangles in the menu bar. I went for 1.00 and the result is a much cleaner mesh. You can always check the polycount (Triangles) by double-clicking the mesh in the menu on the left. 384k is okay for me and very similar with what a depth sensor would produce with an object this size. Retopology can take a while.
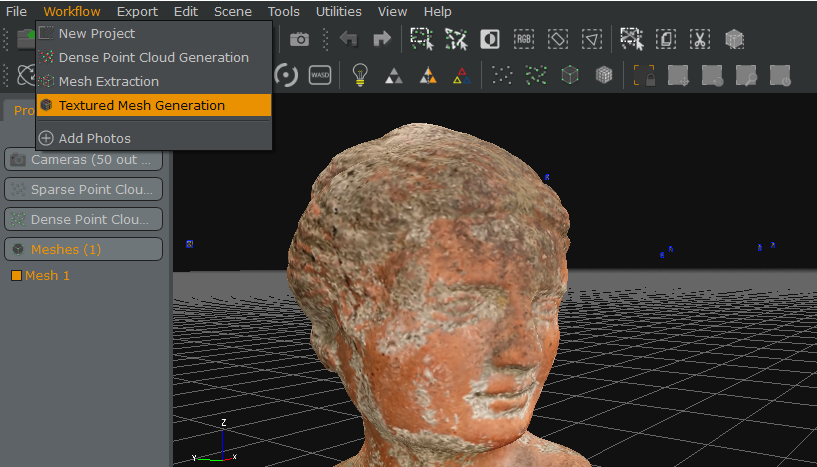
First, switch on the color with the first Triangle icon in the menu bar. Switch of the lighting too because it gives a false representation of the colors. The colors are now rendered per-vertex. If you want better quality color that’s independent of the polycount, create a texture in this final step.
 In my opinion, a 4K texture (meaning 4096 x 4096 pixels) is enough for most purposes, especially real time applications like Sketchfab or game engines. Max out the Resolution and max number of vertices for the best texture quality.
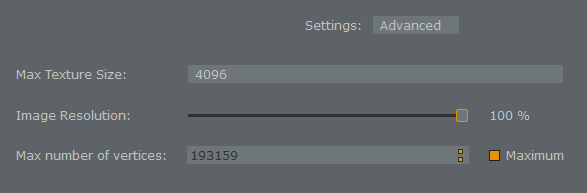
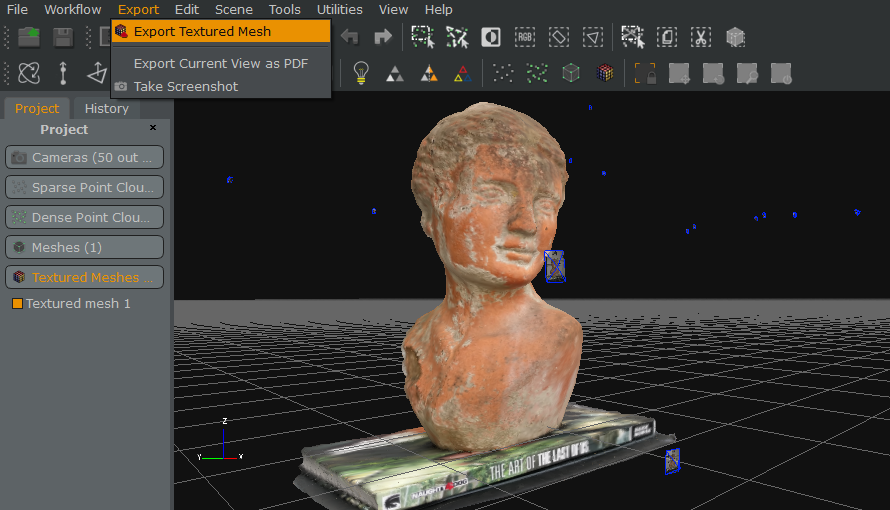
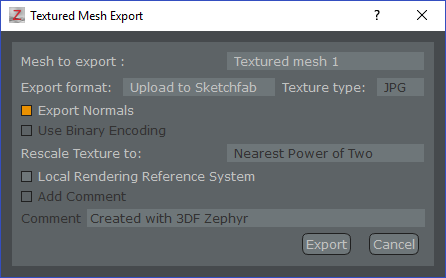
It’s always a good idea to save the entire project (File > Save) so you can easily export models with different settings later. From the Export menu you can save the textured mesh as a file (the free version only offers OBJ and PLY formats) or export it directly to Sketchfab.
 (You can find your Sketchfab API Key when you log into the Sketchfab website under Settings)
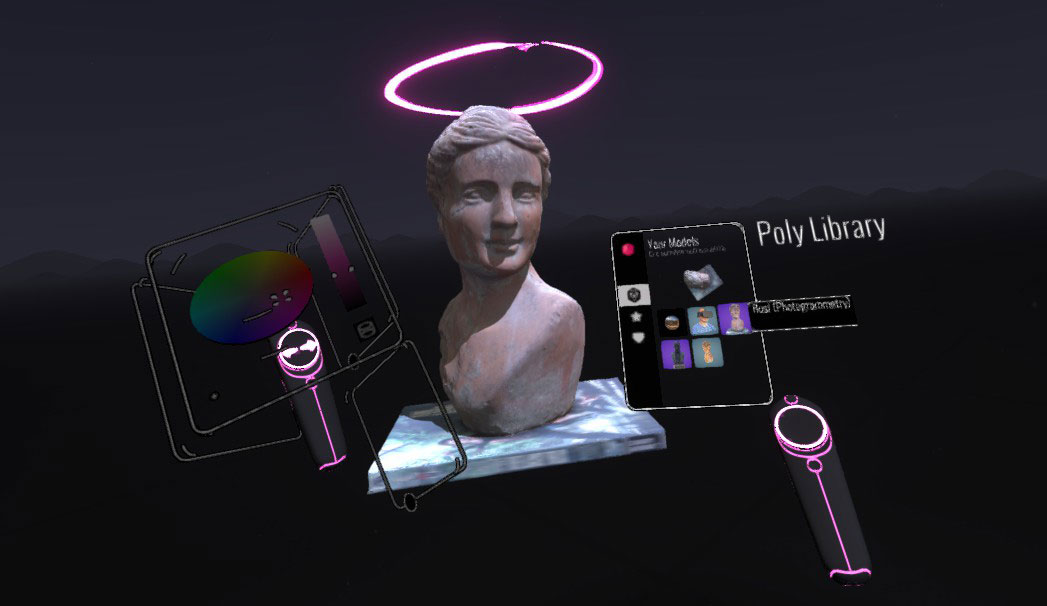
If you choose to upload it to Sketchfab, you can share it through email and social media from there. Or embed in in a website like I did below. You can also view it in VR if you have a compatible headset or Cardboard VR viewer.
And to prove that — with practice and patience — you can really also capture people this way:
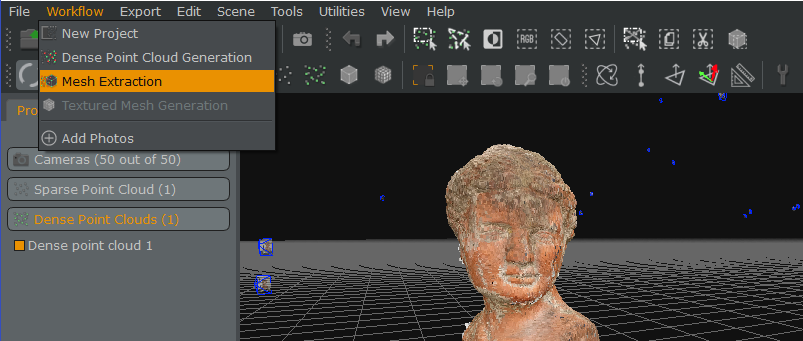
So that’s it! It might seem like a lot, but that’s because I’ve written down every step in detail here. And if don’t want to go through all the separate steps one by one, it’s good to know that from the very first New Project window you can tick Additional Options so Zephyr will run all the steps (Camera Orientation, Dense Cloud, Meshing and Texturing) in one go.
I hope you liked this tutorial! If you have any questions or remarks, please leave them in the comments. If you need tailored help by email, by phone or in person, please consider my Consulting Service.
If you think it’s useful for your friends and followers, I’d appreciate it if you share it on your favorite social network! There are buttons for this on the top left (desktop) or under this post (mobile).


If you get the chance could you please upload the raw video from the person scan? It’d really help to see how you shot the video. Thanks!
[…] Free 3D Scanning from Video by using just a Smartphone […]
Can this be used to figure out a person’s measurements to make custom clothing?
I think you’ll need to place a reference object in the picture to figure out actual dimensions of the object.
I’m trying to do something similar: design a seat cover for my car, from a 3d model of it…
Hello! Great Article. Alternative for OSX Users? Regards from Spain. Julia
Hi Nick, we are doing a pilot app in this space- if we use a smart phone and associated software to create a 3D image of say the head of a person how accurate in measurements will be ? our objective is to get accurate measurements in 2D ultimately for custom manufacturing of accessories.
rgds
Vinod
Can these images be imported into 123D? And are they modifiable to create exact sizing for 3D prints?
can u please suggest a software where we can convert 2d images to 3d model and measure linear and angular measuremts of facial features on that 3d phtographs
The Pro version of 3DF Zephyr has measurement features.
[…] 3D. Free 3D Scanning from Video by using just a Smartphone – 3D Scan Expert. The most frequently asked question I get is: How can I easily make 3D captures on a smartphone — […]
[…] Free 3D Scanning from Video by using just a Smartphone 3D […]
I have a large ceramic sculptute that exploded in the kiln. Before it went in took 100 tripod photos of it. I would like to use these photos to make a 3D model that can be edited and eventually 3D printed. Is this possible with this software? Thank you.
Yes, but the free version is limited to 50 photos. You can get the Lite version, which allows up to 500 photos with a discount.
Thats brilliant – 10000000% better than anything i got with a Kinect V1 and V2. Tutorial is brilliant. Cheers Nick!
Hello. Thank you very much for this article.
I would like to know if would you recommend this workflow for a full body scan of a person, or would you rather use another method?
This because I would like to obtain measures to be used in dressmaking. I was thinking that your method could be actually upgraded (using, for example, a semi professional camera, a rack and setting correctly the background and lighting), to get a well defined 3d model.
I hope I can get a quick opinion from you on this matter. Thanks!
Eddie,
Thanks a lot!
Great tutorial, it’s so simple to grasp this first bits of this amazing technology.
Your point of view caught my eye and was very interesting. Thanks. I have a question for you.