I’m getting a lot of questions lately from people that want to view their 3D scans in VR on their HTC Vive or Oculus Rift. If usually point them to my earlier tutorial about viewing 3D scans in VR through Sketchfab but that is limited to viewing a single scan at a time while some people want to view multiple scans in one virtual environment.
There’s now an easy way to do this and for this you need:
- A PC and a VR headset like Oculus Rift or HTC Vive (or the newer versions of those headsets)
- Google Tilt Brush — a VR painting app, available on Steam for $19.99.
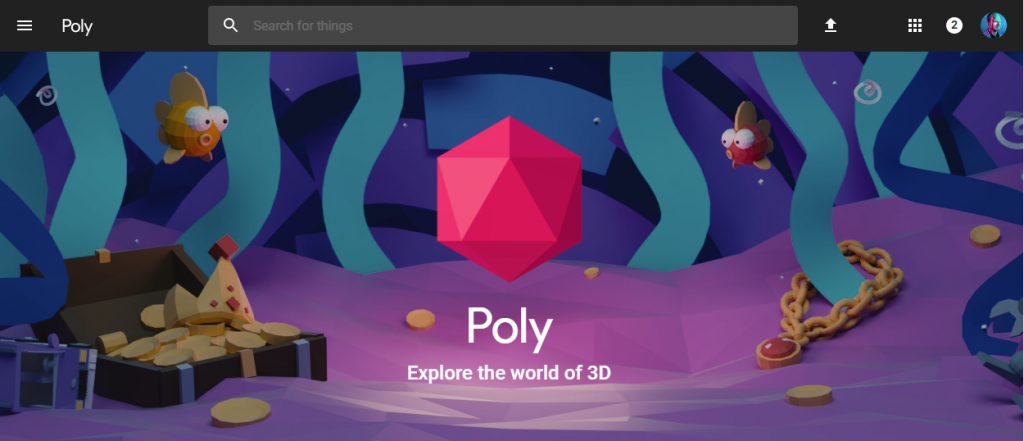
- Google Poly — a free online 3D file sharing service.
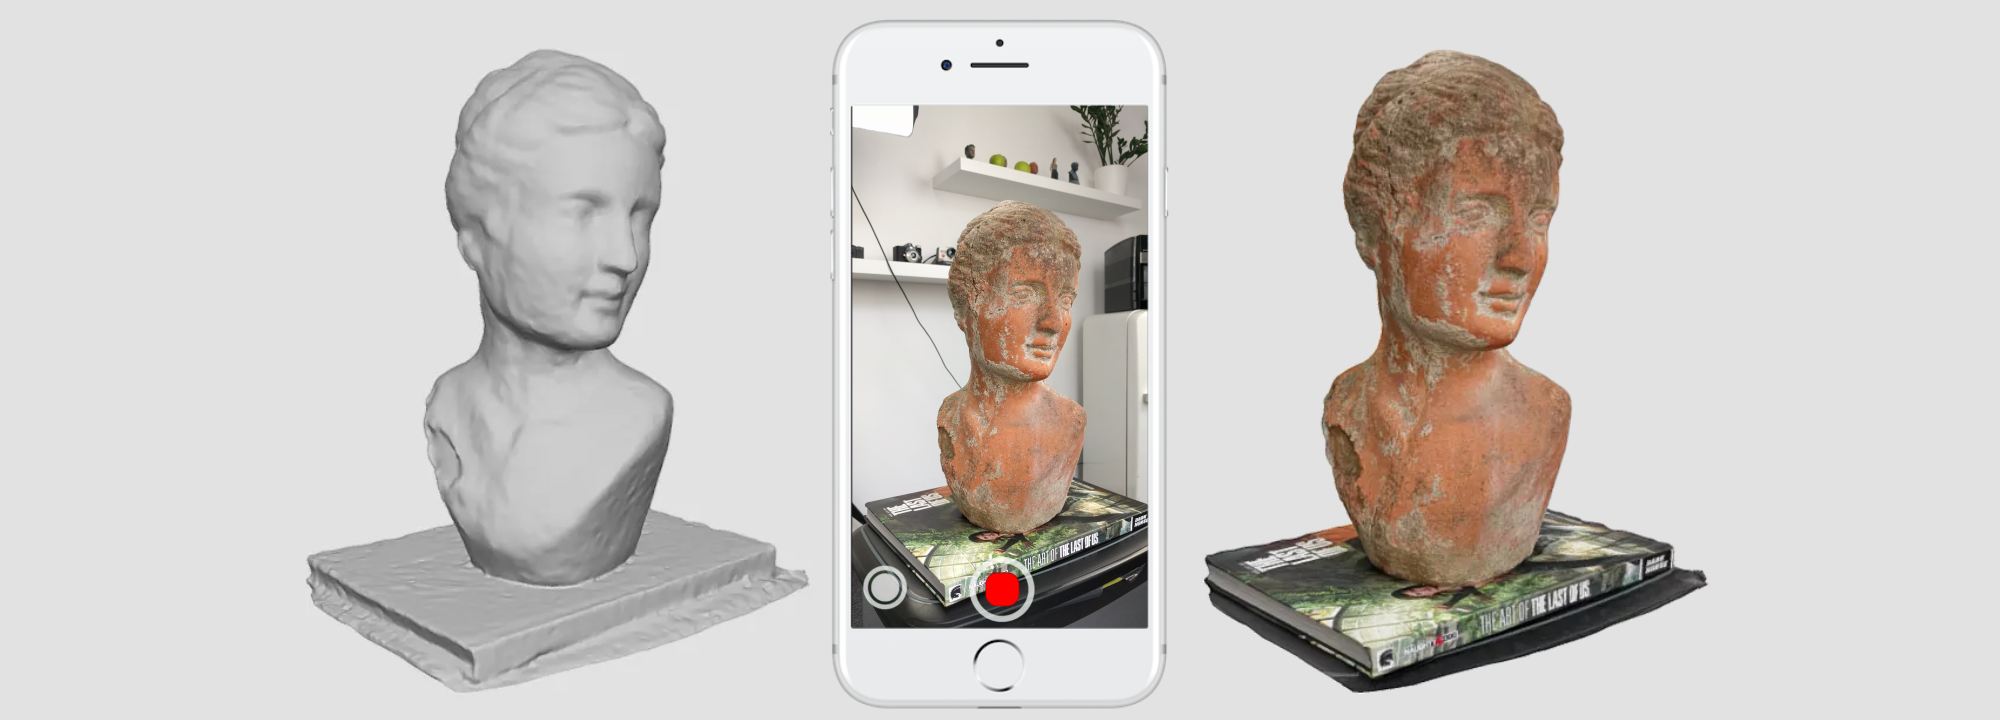
- 3D Scans in .OBJ file format that are relatively light. The maximum depends on your system but my advice is max 100k polygons and a 2K texture map.
Let’s go through the process:
- Sign into Poly with your Google Account in the top-right corner

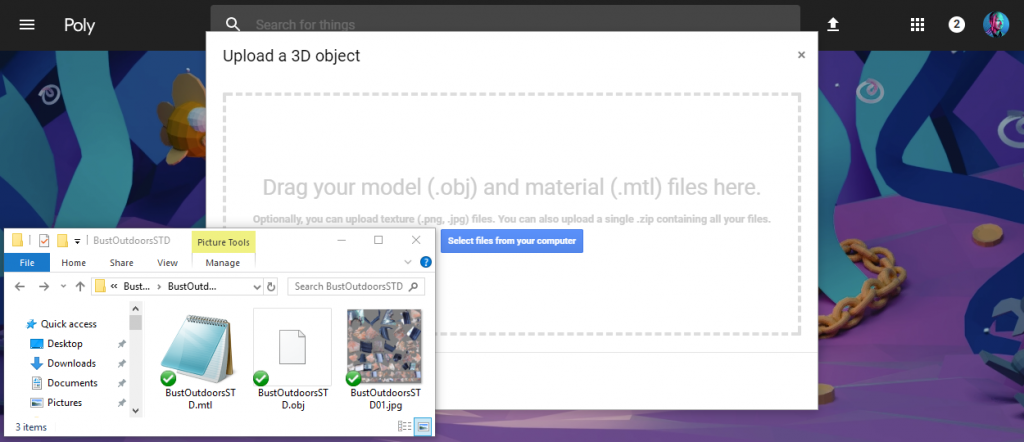
- Click the upload button (right of the search bar) and drag and drop your .OBJ, .MTL and .JPG or .PNG texture files into the window. Technical requirements can be found here.

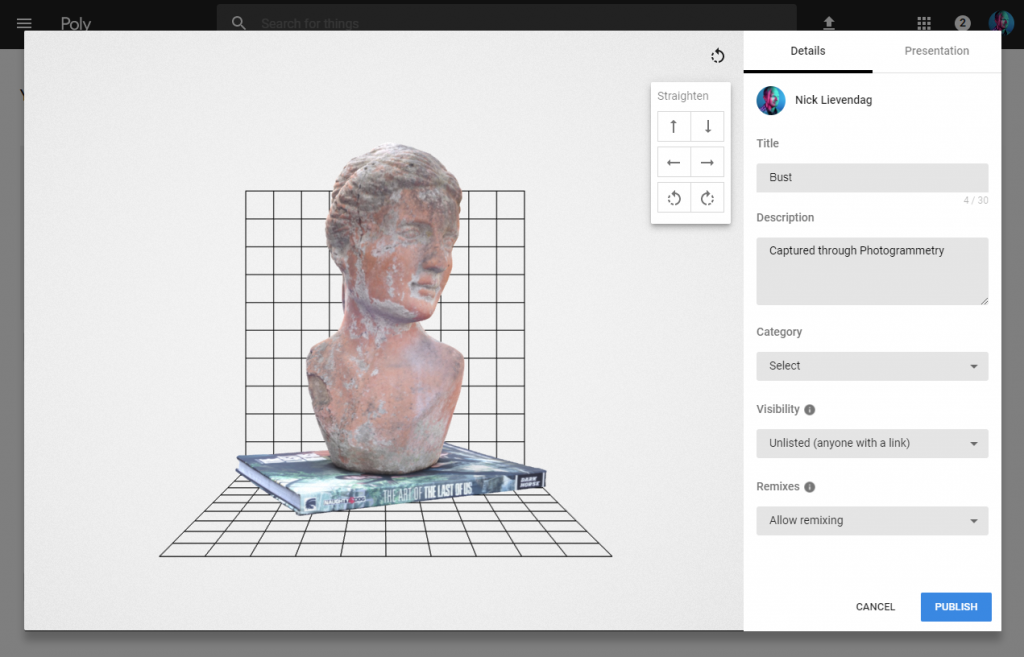
- Straighten your model using the arrow icons and give it a nice name and description. You can set the visibility to either public or unlisted (if you want to keep it private) but it’s important that Remixes is set to Allow remixing. Optionally, you can choose a background color in the Presentation tab but that wont affect viewing in VR.

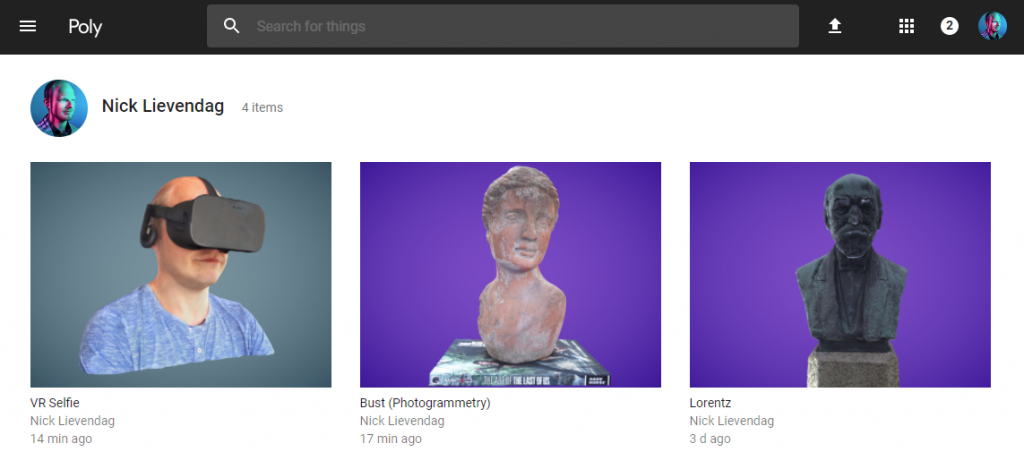
- Your 3D scans will be on your profile page.

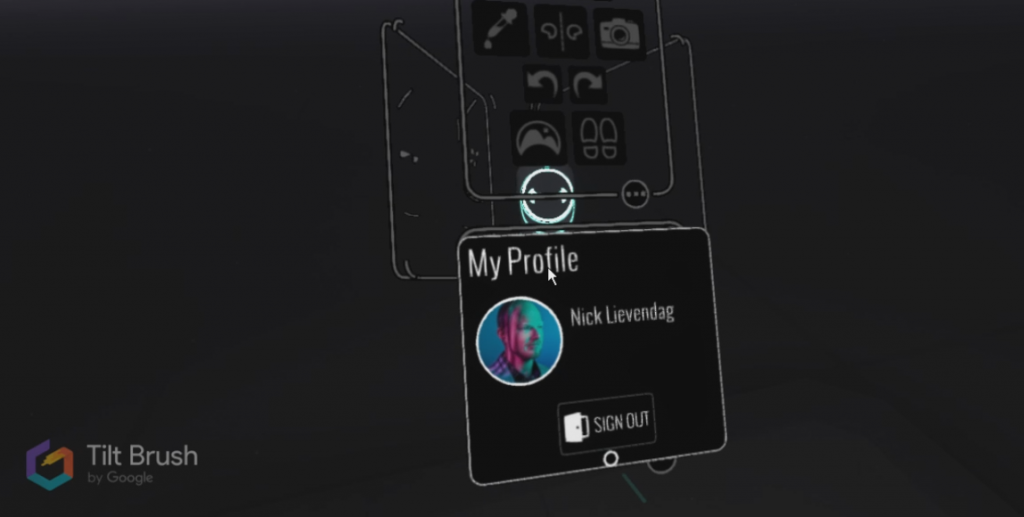
- Now start Steam VR and Tilt Brush on your PC and put on your headset and login to your Google Account (this requires you to put off your headset and login in your web browser when prompted).

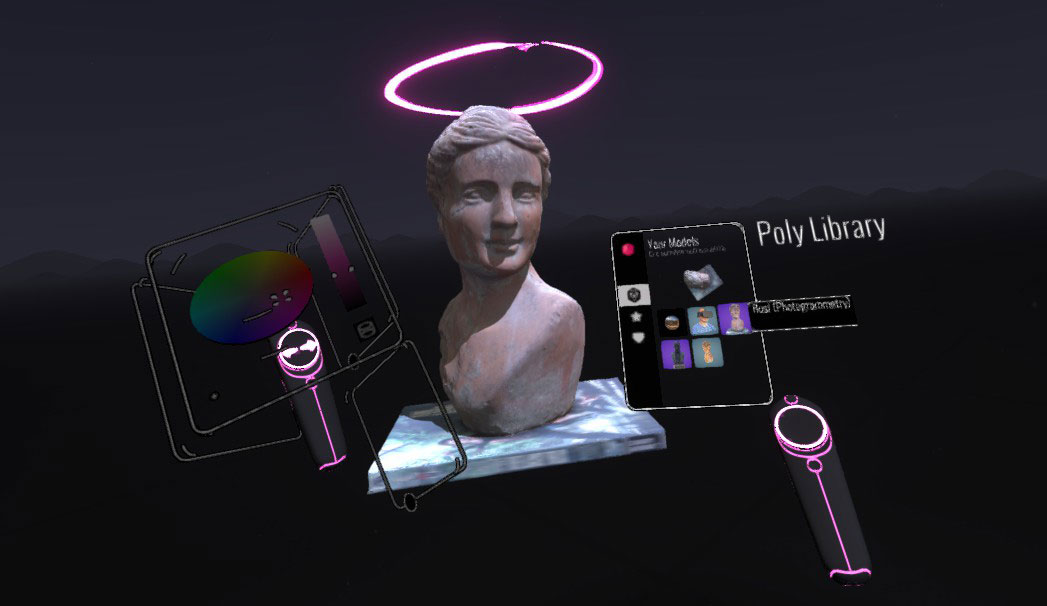
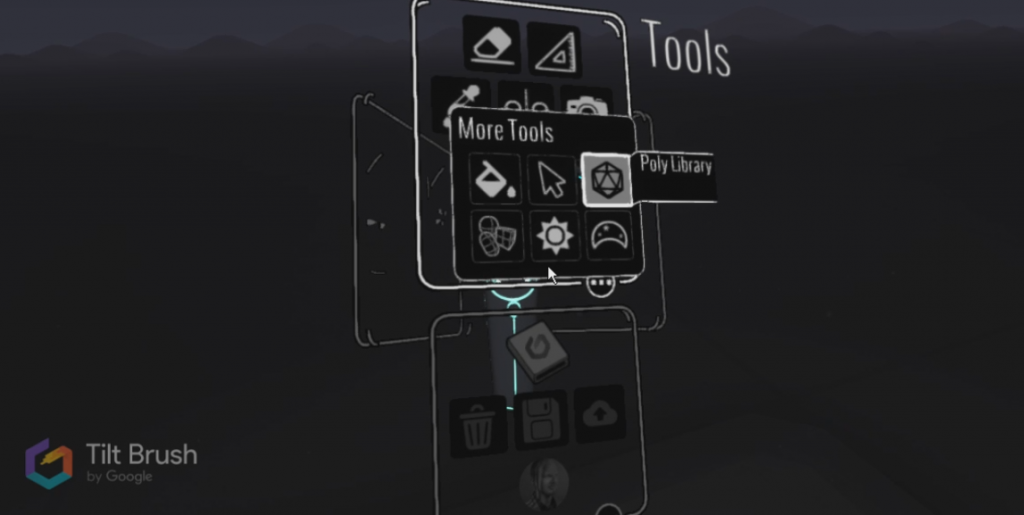
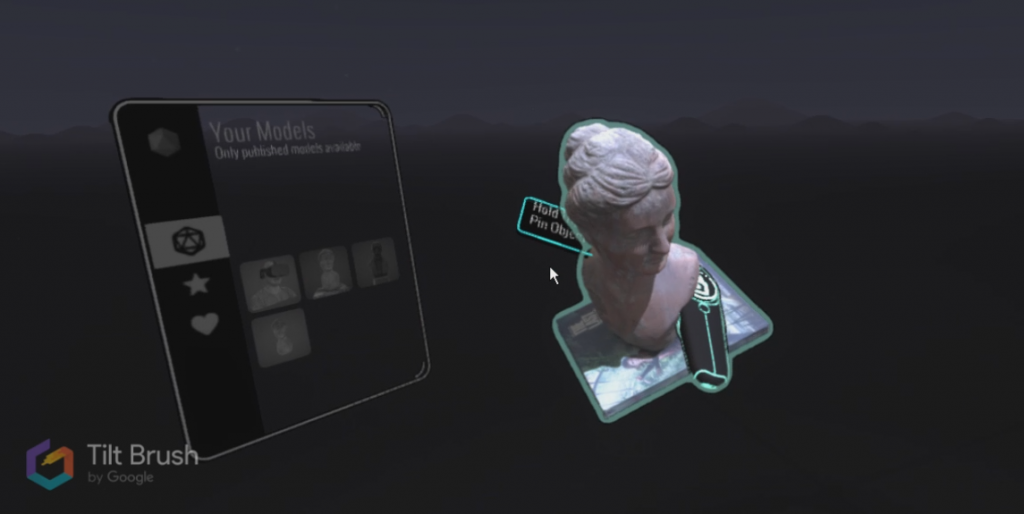
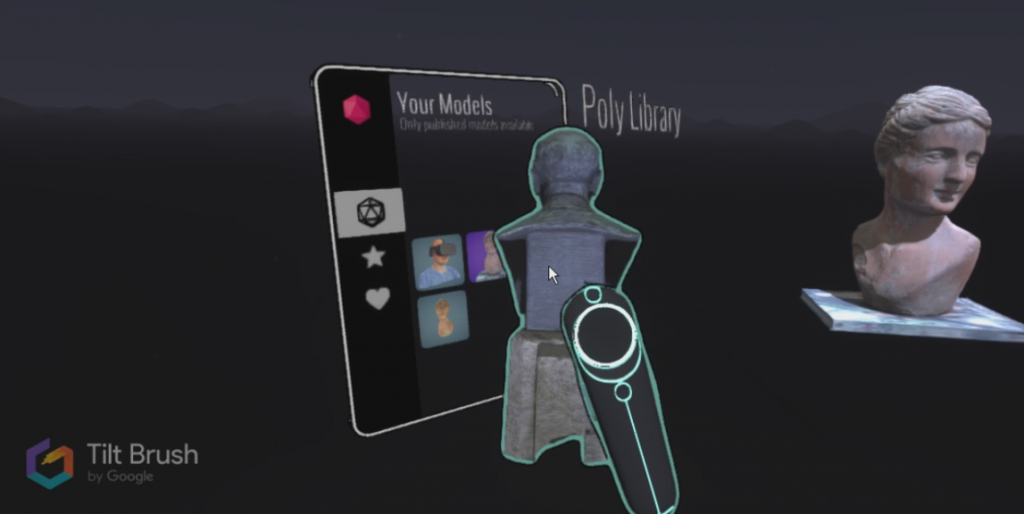
- Select the circle with the three dots and choose More Tools. And then Select Poly Library.

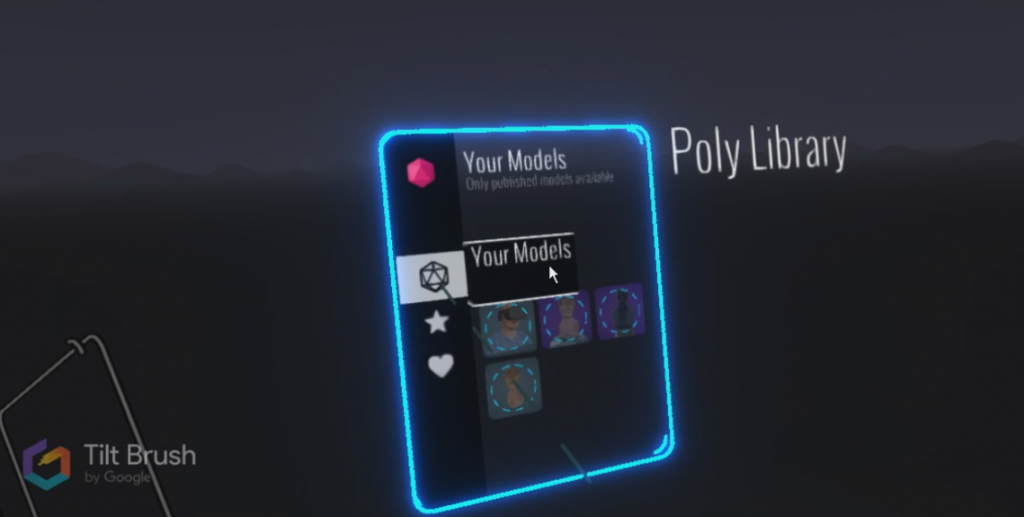
- Your Remixable models will appear in Your Models. They can take a moment to load.
- Point at the 3D scan of your choice and hold the trigger to drag the 3D scan into the environment.

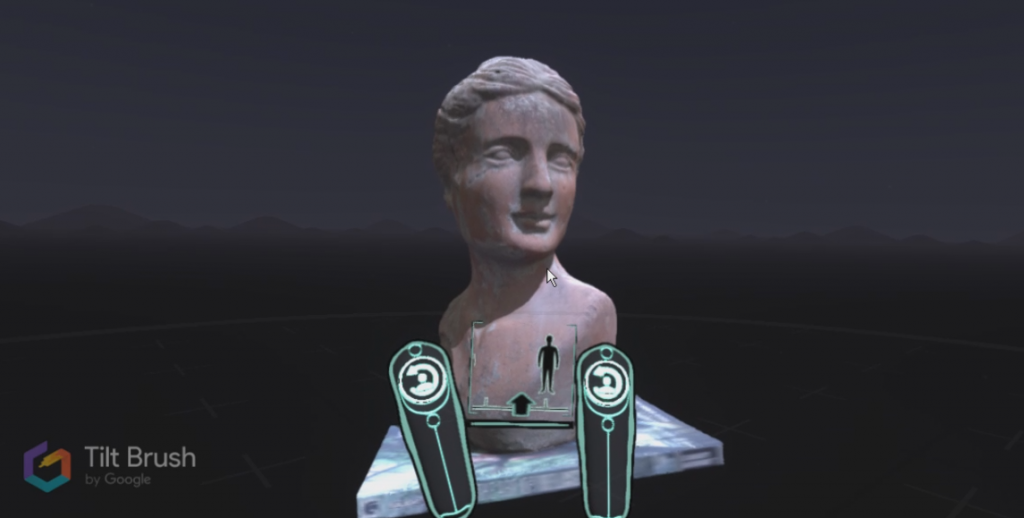
- You can scale the model by using the grip buttons on both controllers and moving your hands further apart.

- Add as many models as you want and scale and arrange them to your liking.
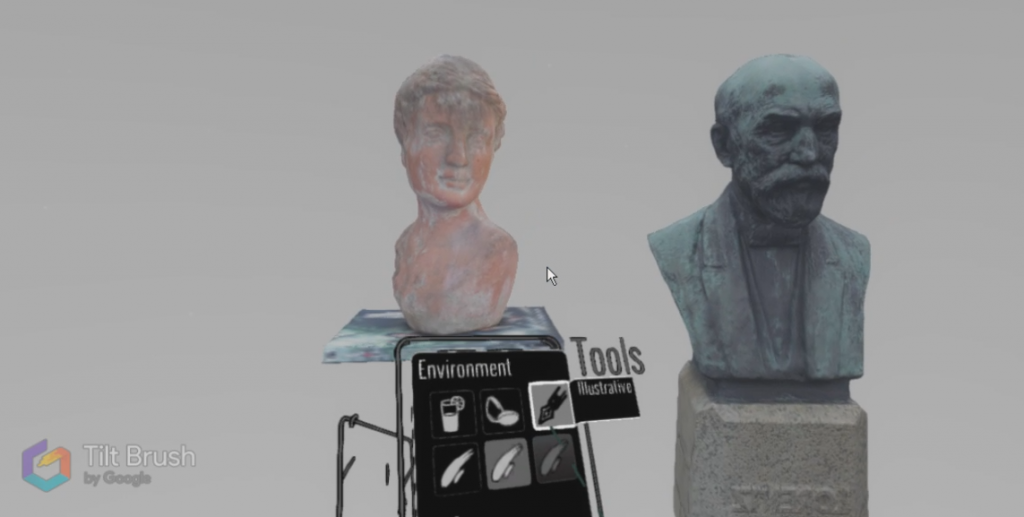
- If you don’t like the lighting and shadows you can choose a different environment. The Illustrative preset has shadow-less diffuse lighting.
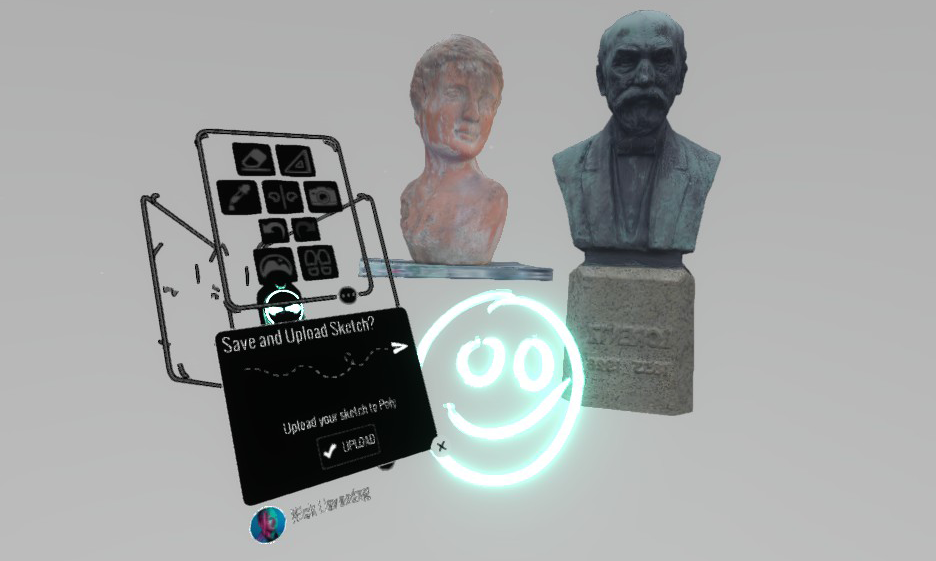
- Now be creative! Go totally wild with all the painting tools in Tilt Brush. Or just draw a smiley. Or don’t draw anything at all if you just want to arrange 3D scans. When you’re done, you can upload your Sketch back to Poly. This will include the 3D scans you put into the scene and the environment’s lighting.

- Publish the new Sketch on Poly with your web browser and share it with anyone you like. Or embed it into your website, like this!
That’s it! It doesn’t get any simpler than that. This way you can build a nice virtual exhibition of your 3D scanned objects and share it online in real-time 3D. Just be aware that all the polygons of the 3D scans you import and the Tilt Brush sketches can add up.
I’m planning to add more tutorials like this in the near future. Follow me on your favorite social network and be the first to know when new ones are up!


Or you can just save the model as .obj or .fbx and then open that from the tiltbrush directly (needs to be copied into the tiltbrush models folder).
Awesome tutorial. This makes me want grab a 3d scan of a studio with a canvas and easel and set up a TiltBrush guide matching the placement of the canvas to be able to virtually paint on the canvas. Now if we could import an obj as a guide, well that would REALLY be something. Then we can import any object both as a scene and as a guide and paint directly on it.